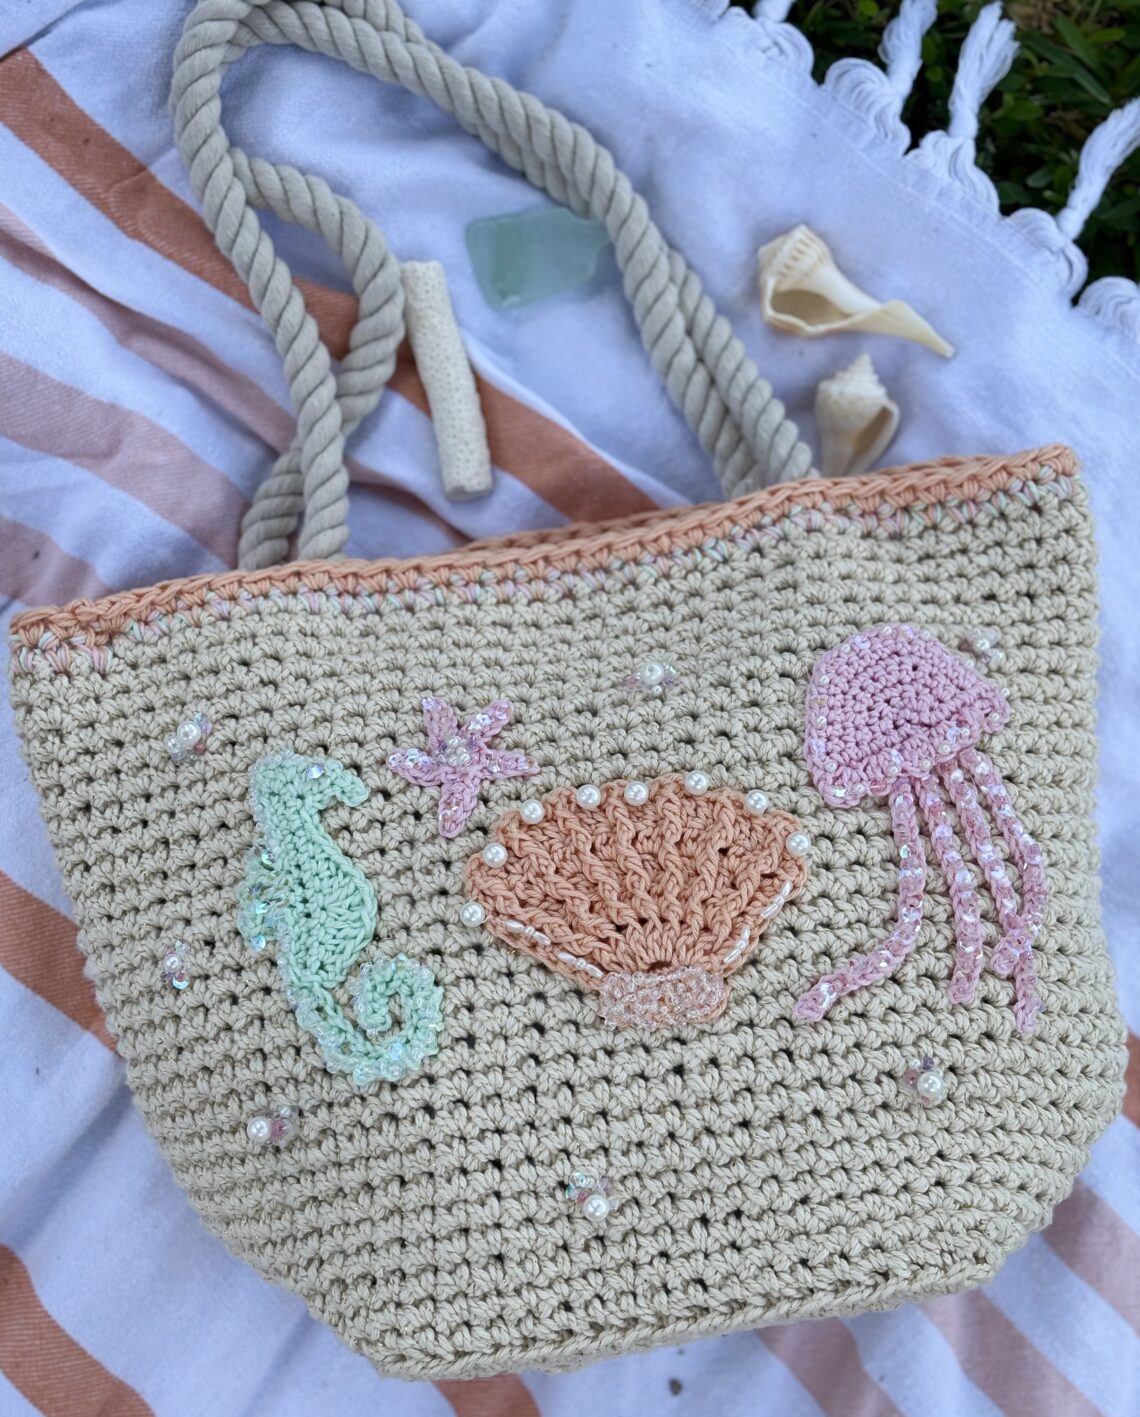
The Seaside Tote
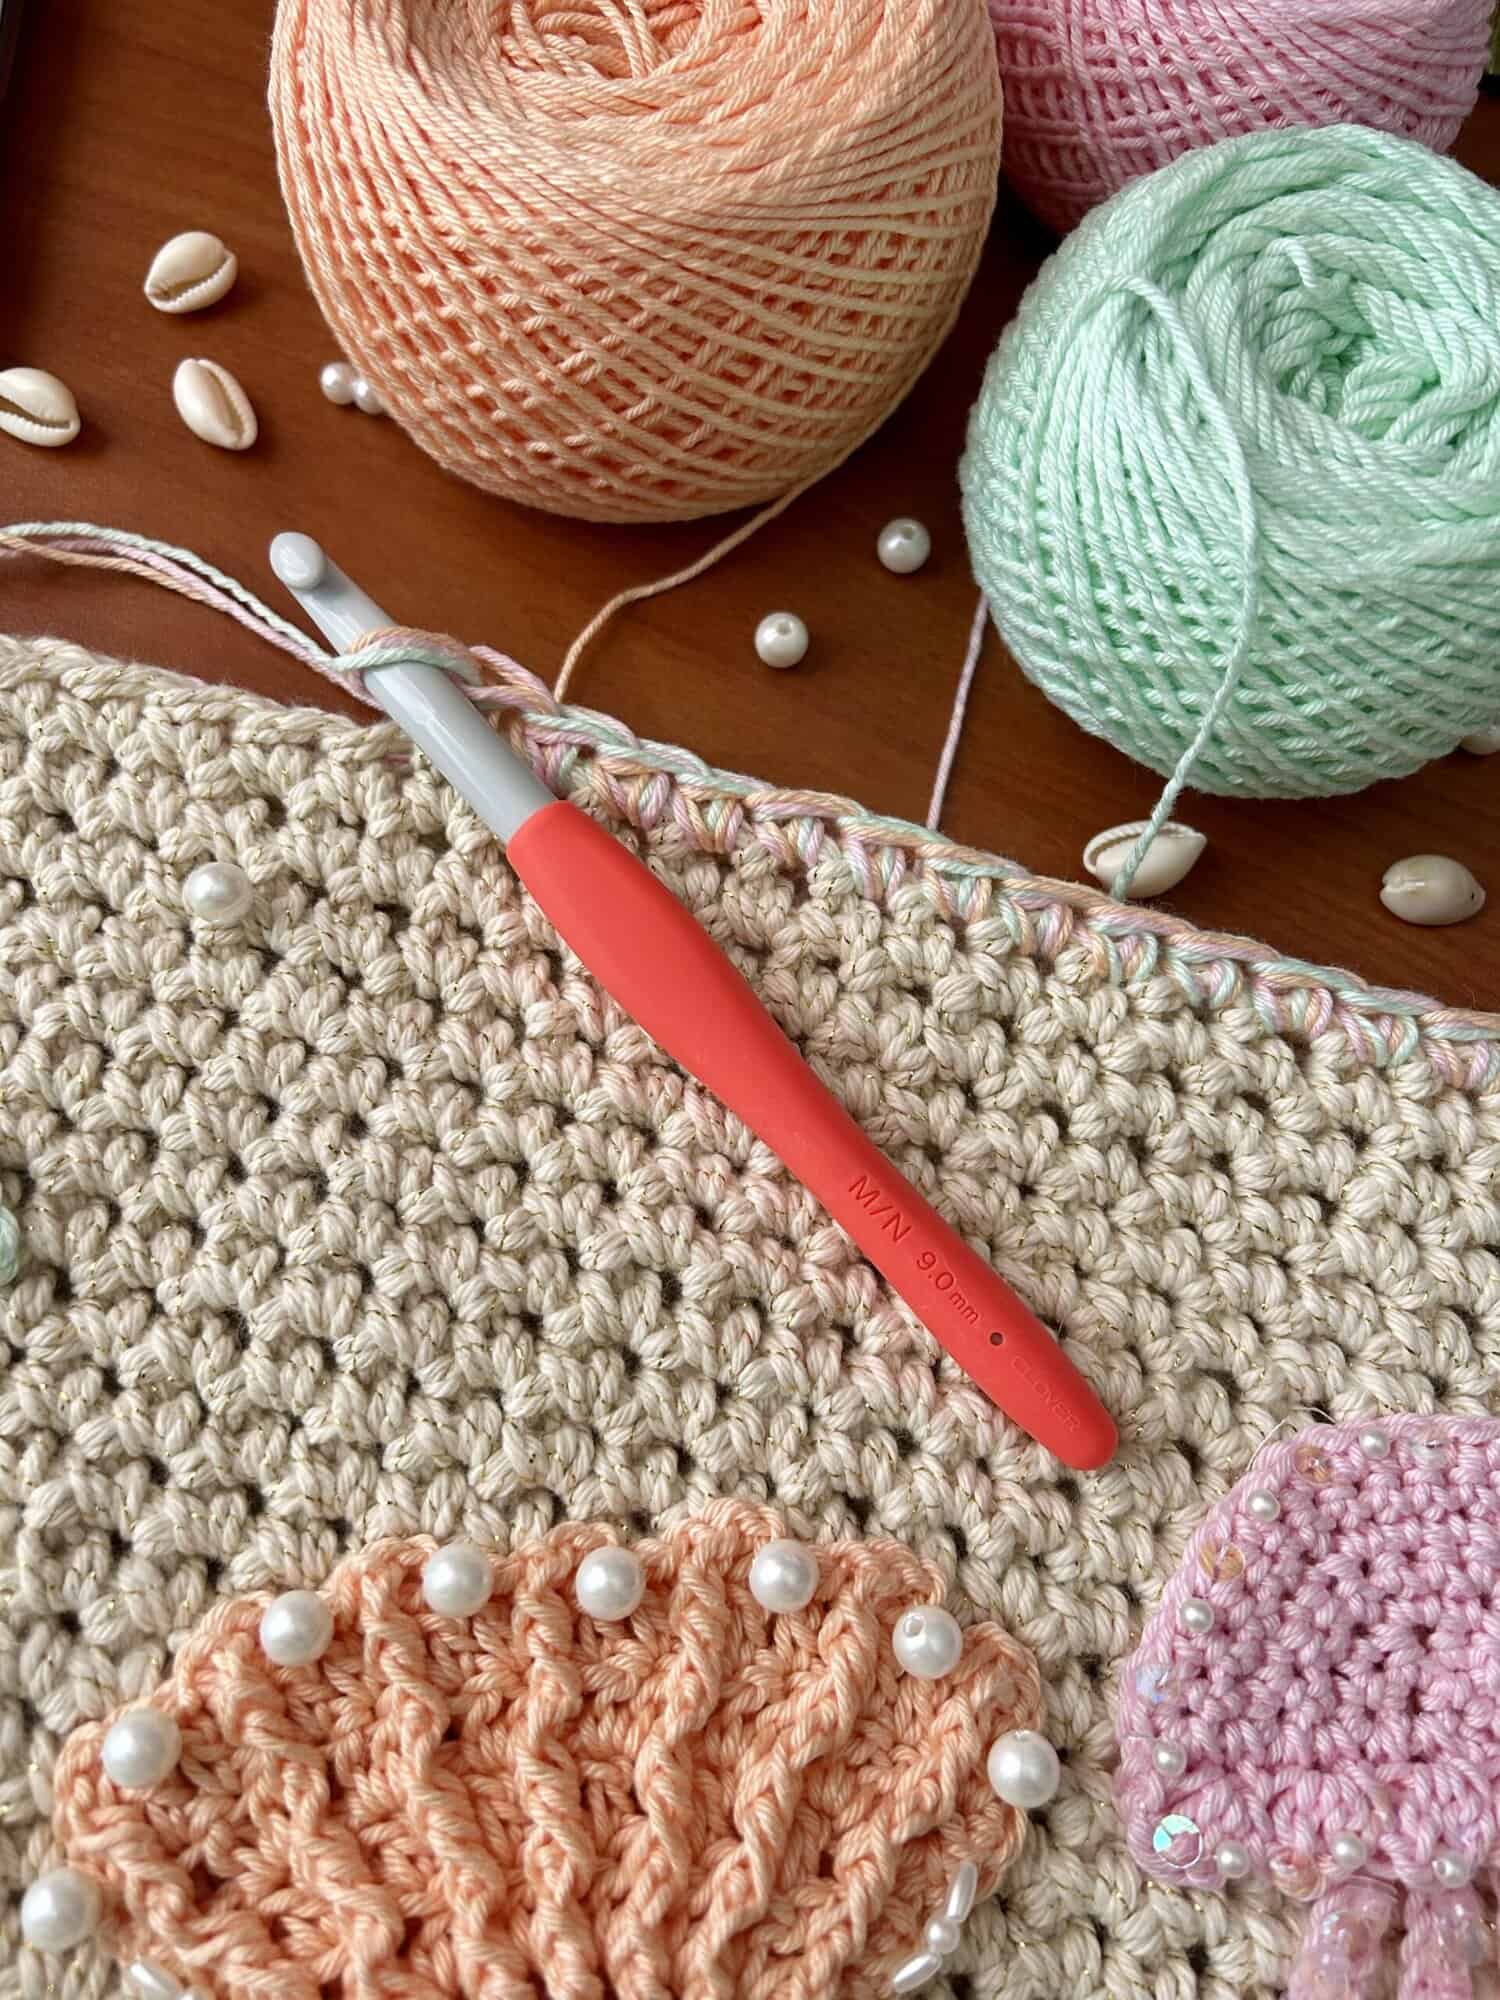
This tote’s got ocean vibes stitched right into it! Made with sturdy cotton yarn and topped with handmade details, it’s the perfect sidekick for beach days, pool hangs, or cruise adventures. A little sparkle from the beading gives it that just-dipped-in-the-ocean magic. Pack your sunnies, toss in a good book, and let this tote tag along for the fun!
MATERIALS:
- Clover Amour Hooks
- Clover Stitch Markers
- Clover Patchwork Scissors
- 5 oz bulky weight yarn or worsted weight doubled up (for the main part of the bag)
- small amount of worsted weight yarn in colors of choice for appliques and for the border
- beads & pearls
- needle & thread
- rope for bag handles (I got some rope at the dollar store!)
ABBREVIATIONS:
- PM: place stitch marker
- BLO: back loop only
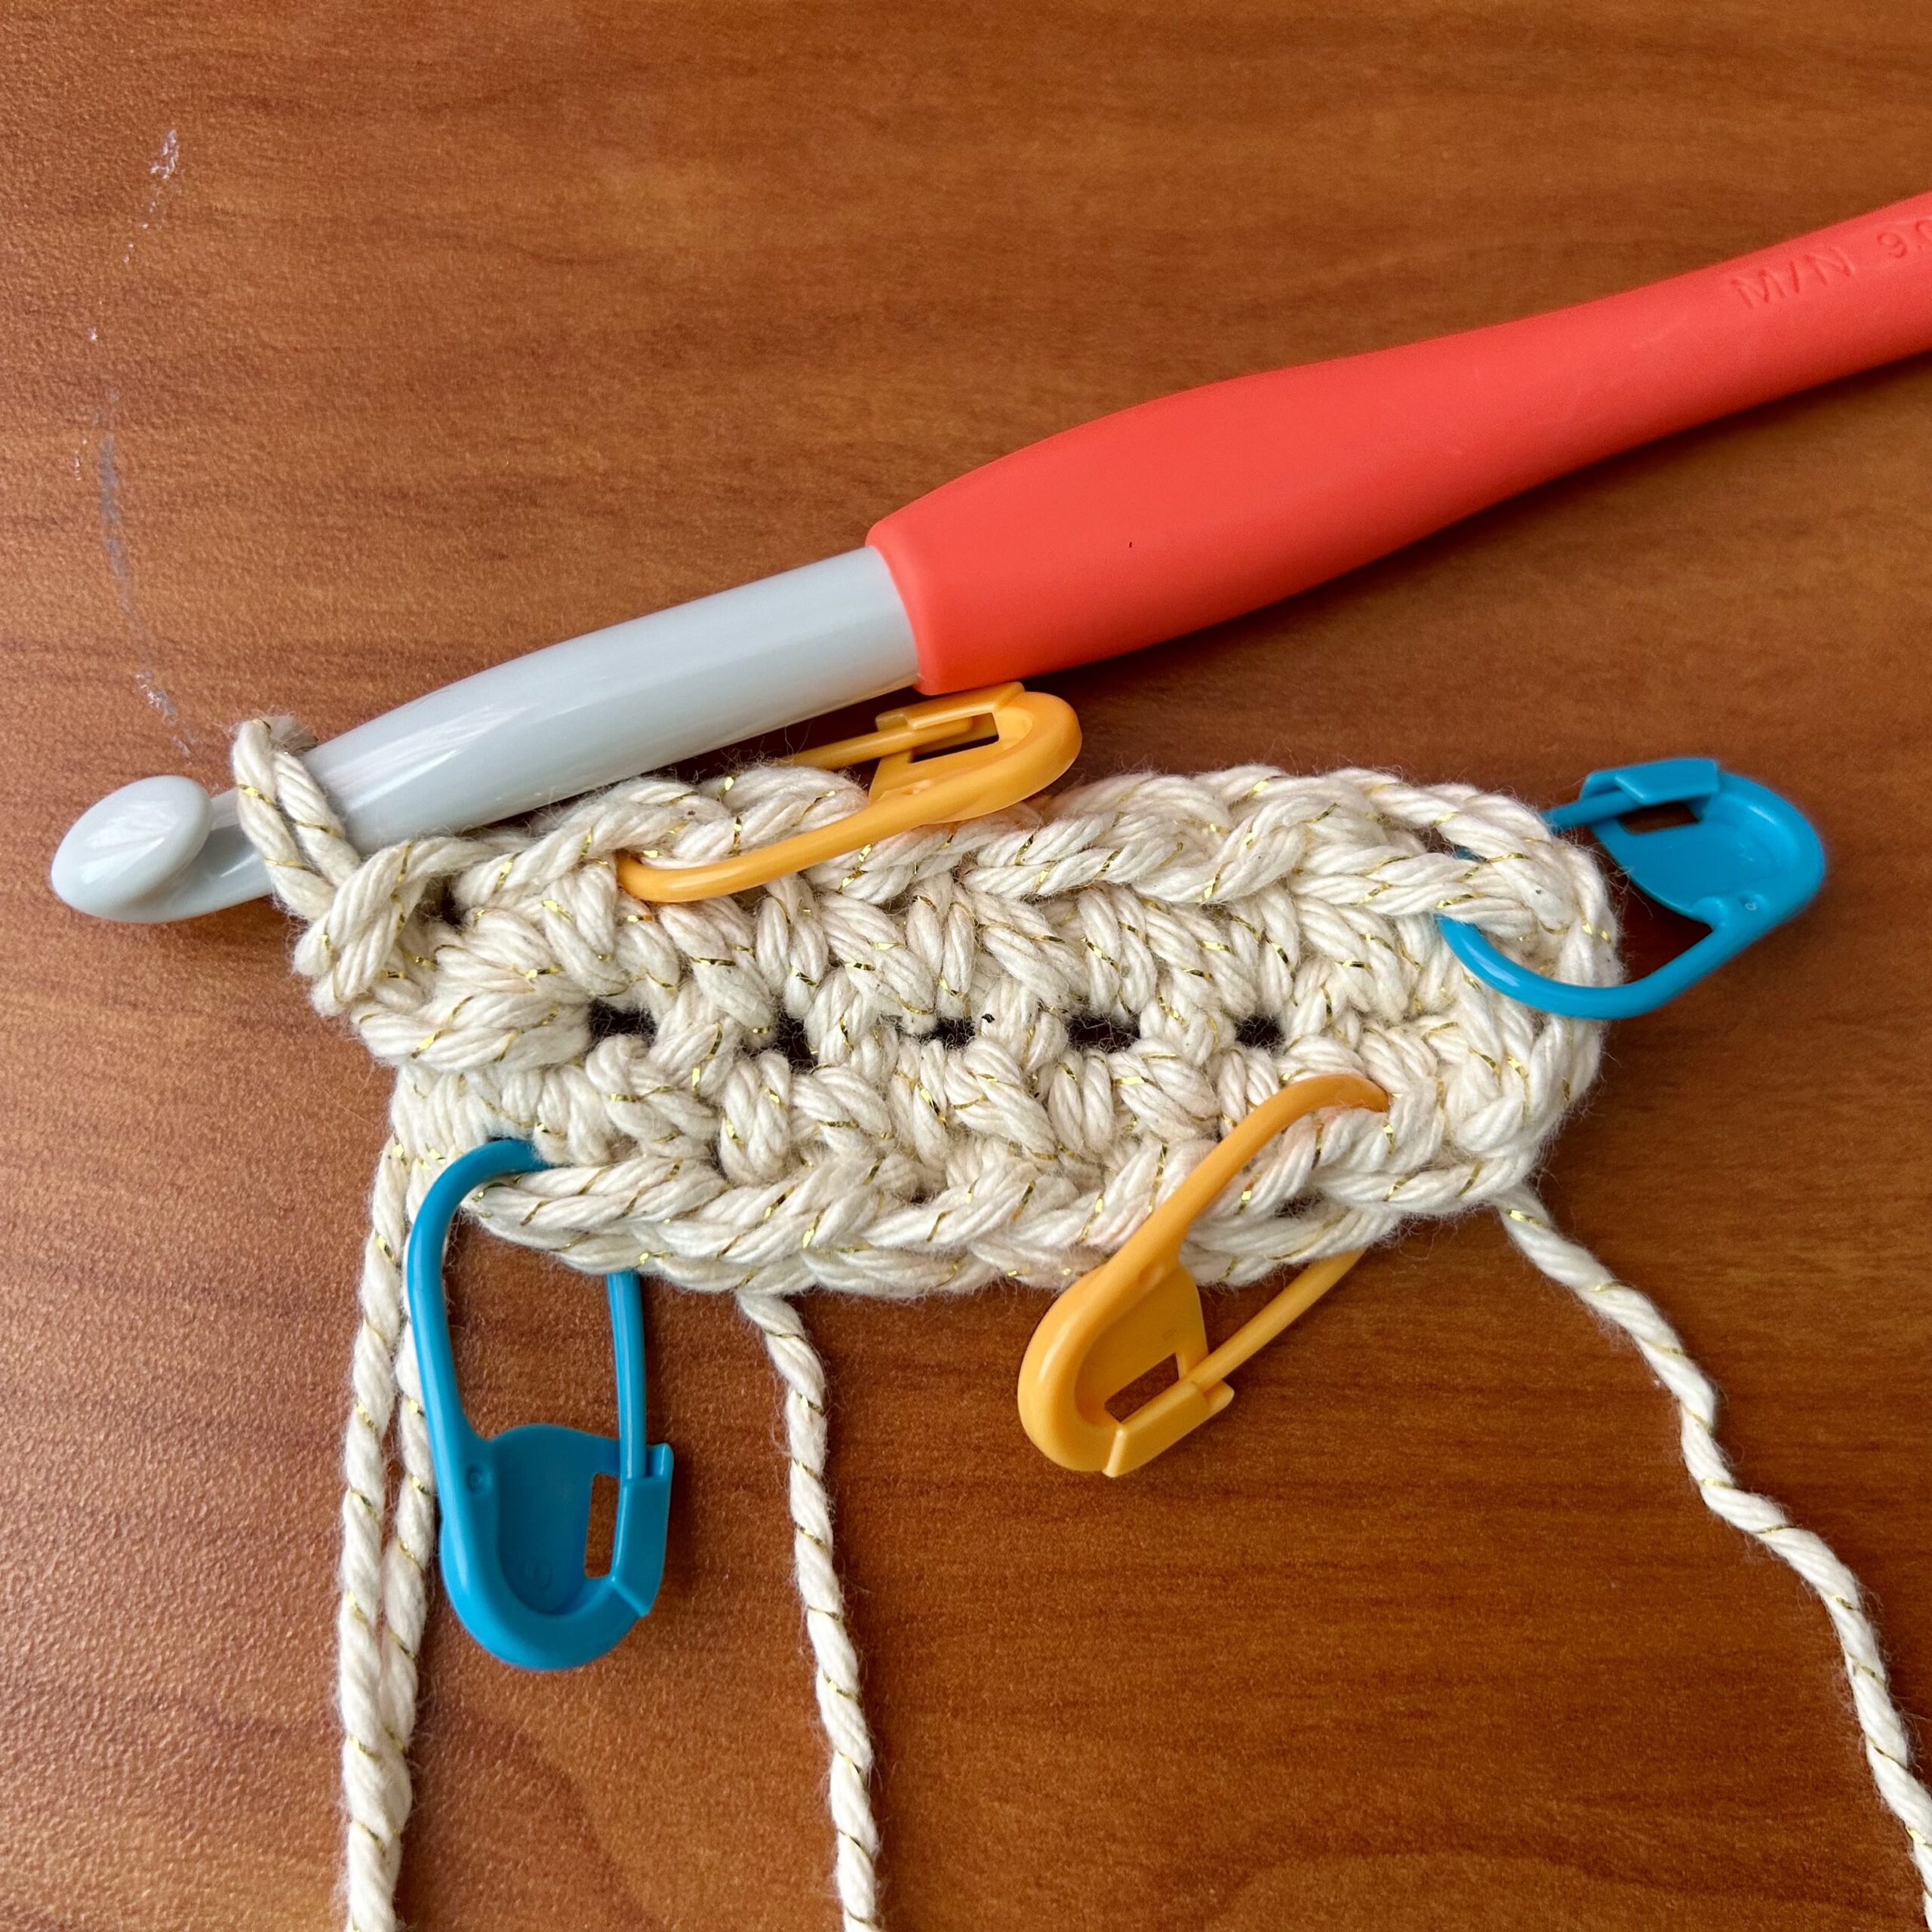
TOTE BAG TUTORIAL:
The bottom of the bag is a rectangle. You will work in continuous rounds.
Ch 7.
- Round 1: 1 sc in the 2nd ch from the hook – PM in the sc you just made, 1 sc in the next 4 ch, [1 sc – PM, 1 sc, 1sc – PM] in the last ch. Now you will be working on the opposite side of the foundation ch: 1 sc in the next 4 chs, 1 sc – PM in the last ch, 1 sc in the same ch. (14 sc)
- Round 2: Ch 1 (counts as 1 sc here and throughout), [1 sc, 1hdc – PM, 1sc] in the next sc (where the marker is), 1 sc in next 4 sc, [1 sc, 1hdc – PM, 1sc] in the next sc (marker), 1 sc in the next sc, [1 sc, 1hdc – PM, 1 sc] in next sc (marker), 1sc in the next 4 sc, [1sc, 1hdc – PM, 1 sc] in the next sc (marker), ss to the beginning ch-1. (18 sc, 4 hdc)
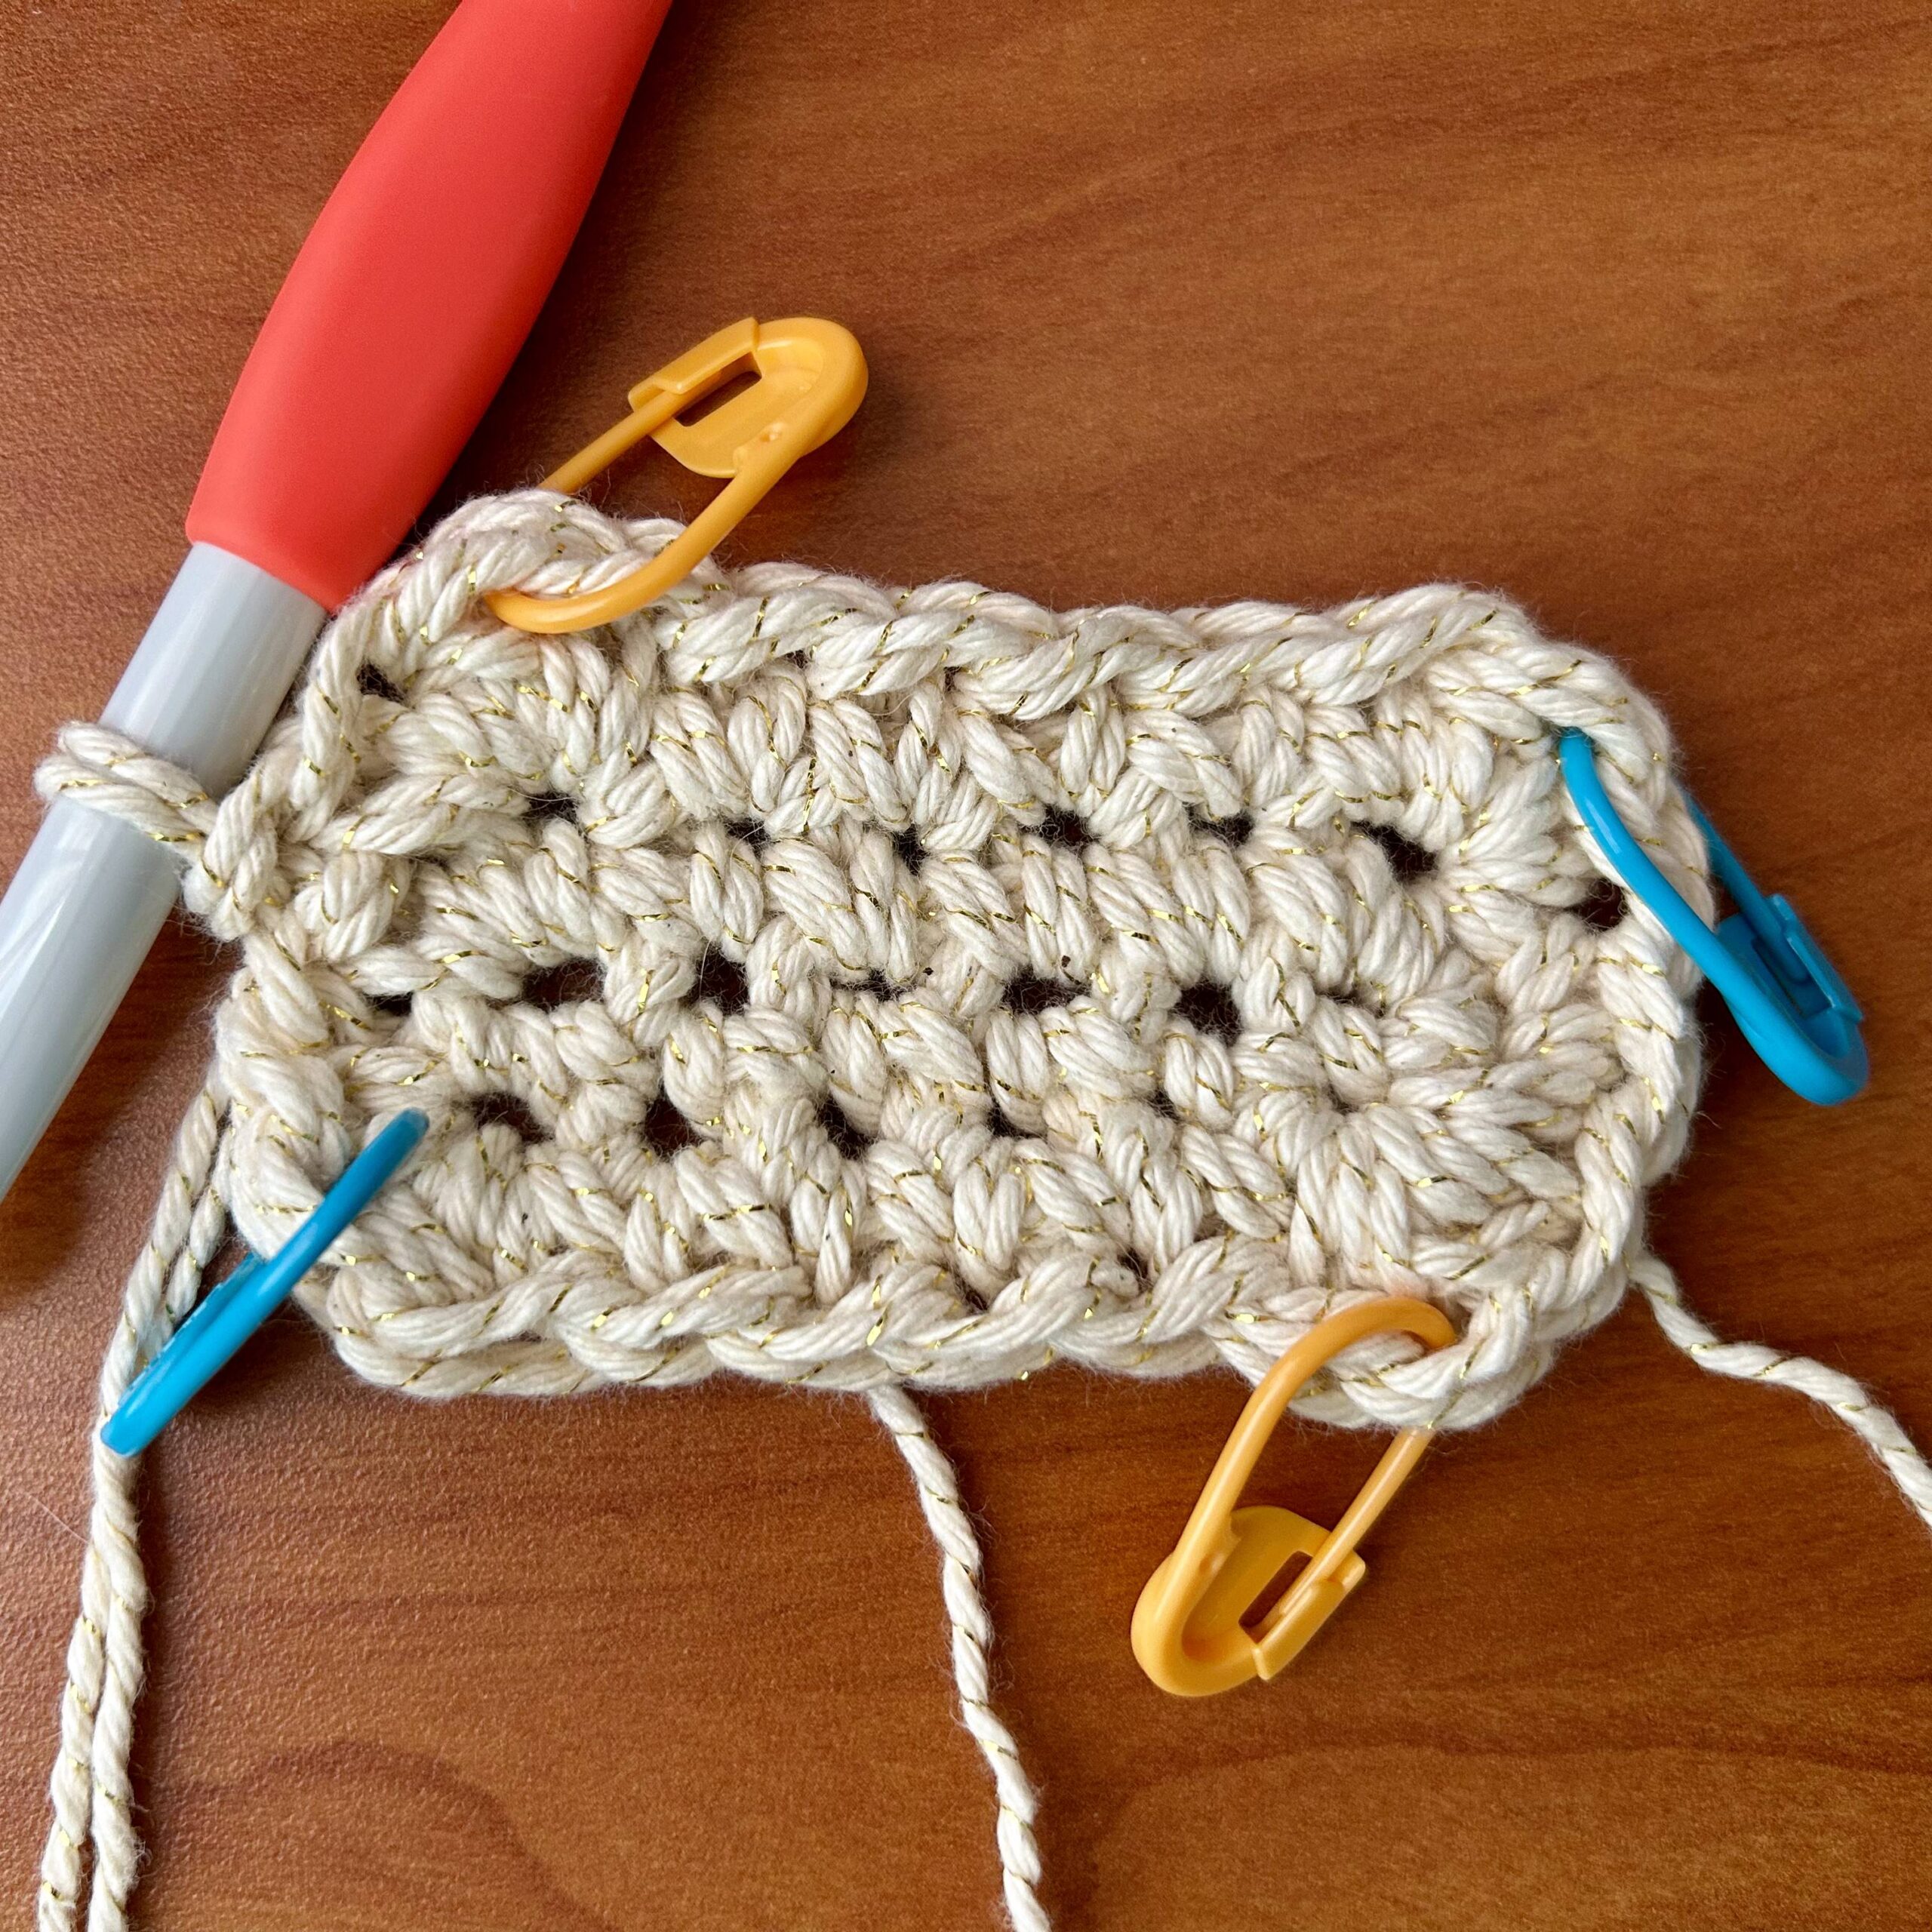
- Round 3: Ch1, * 1 sc in each sc until marker, [1 sc, 1 hdc – PM, 1 sc] in the next hdc (marker); Repeat from * 3 more times, 1 sc in each sc to the end of the round, ss to the beginning ch 1.
Repeat round 3 until you have a total of 7 rounds.
- Round 8: Ch 1, 1 sc in the BLO of the same st (place st marker), 1 sc in the BLO of each st around. You can remove all other st markers.
- Round 9: Sc in each st around, moving the st marker at the beginning of the new round.
- Round 10: Right where you have your st marker, you are going to place (1 sc, ch 1, 1 sc) and place st marker in the ch 1 sp, 1 sc in the next 29 sts, (1 sc, ch 1, 1 sc) in the next st (place st marker in the ch 1 sp. 1 sc in each st to the end.
- Round 11-14: Remove st marker, (1 sc, ch 1, 1 sc) in the ch 1 sp. Place st marker in the ch 1 sp. Continue around placing 1 sc in each st until you reach your next st marker. (1 sc, ch 1, 1 sc) in the ch 1 sp. Place st marker in ch 1 sp. Sc in each st to the end.
- Round 15 – 37: Remove your beginning st marker, place 1 sc in the ch 1 sp your st marker was in, put your st marker in the sc you just made, 1 sc in each st around (you can remove your other st marker).
You will now just be working rounds of sc with no increase.
- Round 16-37: 1 sc in each st around. Move st marker each new round. For the last two Rows you can change colors if you would like.
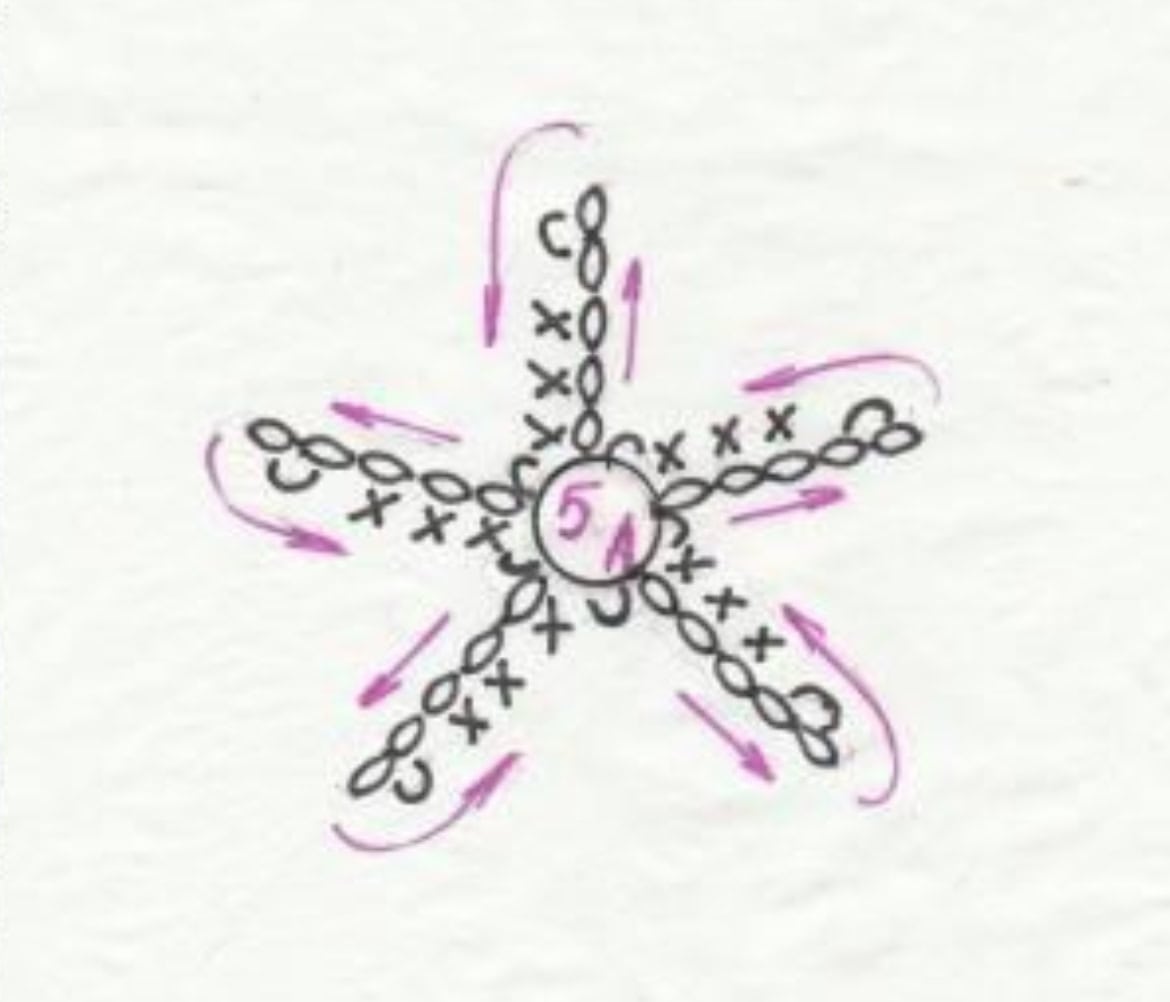
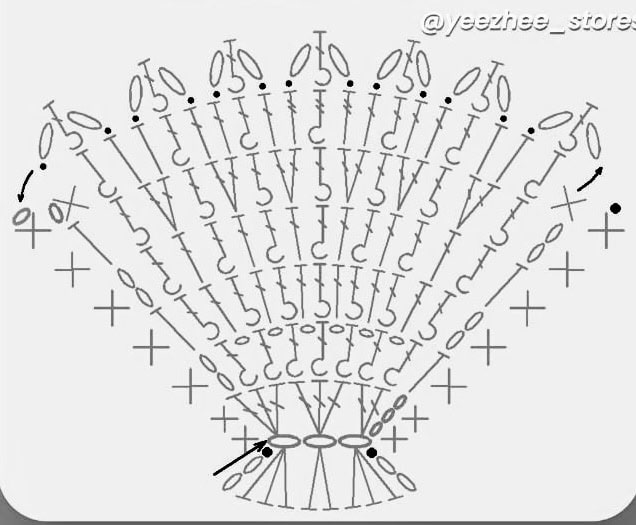
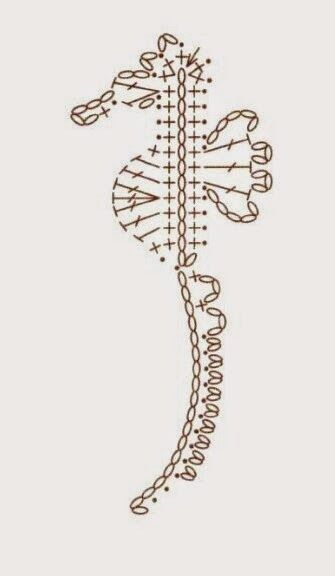
APPLIQUE CHARTS:
- There are so many fun appliqué patterns available on Pinterest and YouTube—you can truly make your tote your own! Feel free to swap in a sandollar, a crab, some flowing seagrass, or whatever fits your beachy vibe. Let your creativity lead the way. Below, I’ve linked the jellyfish pattern I used, along with the charts for the starfish, seashell, and seahorse.
- jellyfish chart: https://bananamoonstudio.com/blue-jellyfish-crochet-pattern/
- starfish, seashell, and seahorse charts:
Thank you for reading through this pattern! We hope you’re able to make this Seaside Tote for yourself 🙂
Tag Clover on Instagram, TikTok, Facebook, X, YouTube, or Pinterest to have us see your final result and get featured on our social media!
If you want to keep up with me, Julie, on social media for other fun projects, follow me on: Instagram
If you want to keep up with all things Clover, follow us on: Facebook | Twitter | Instagram | Pinterest | YouTube | Ravelry