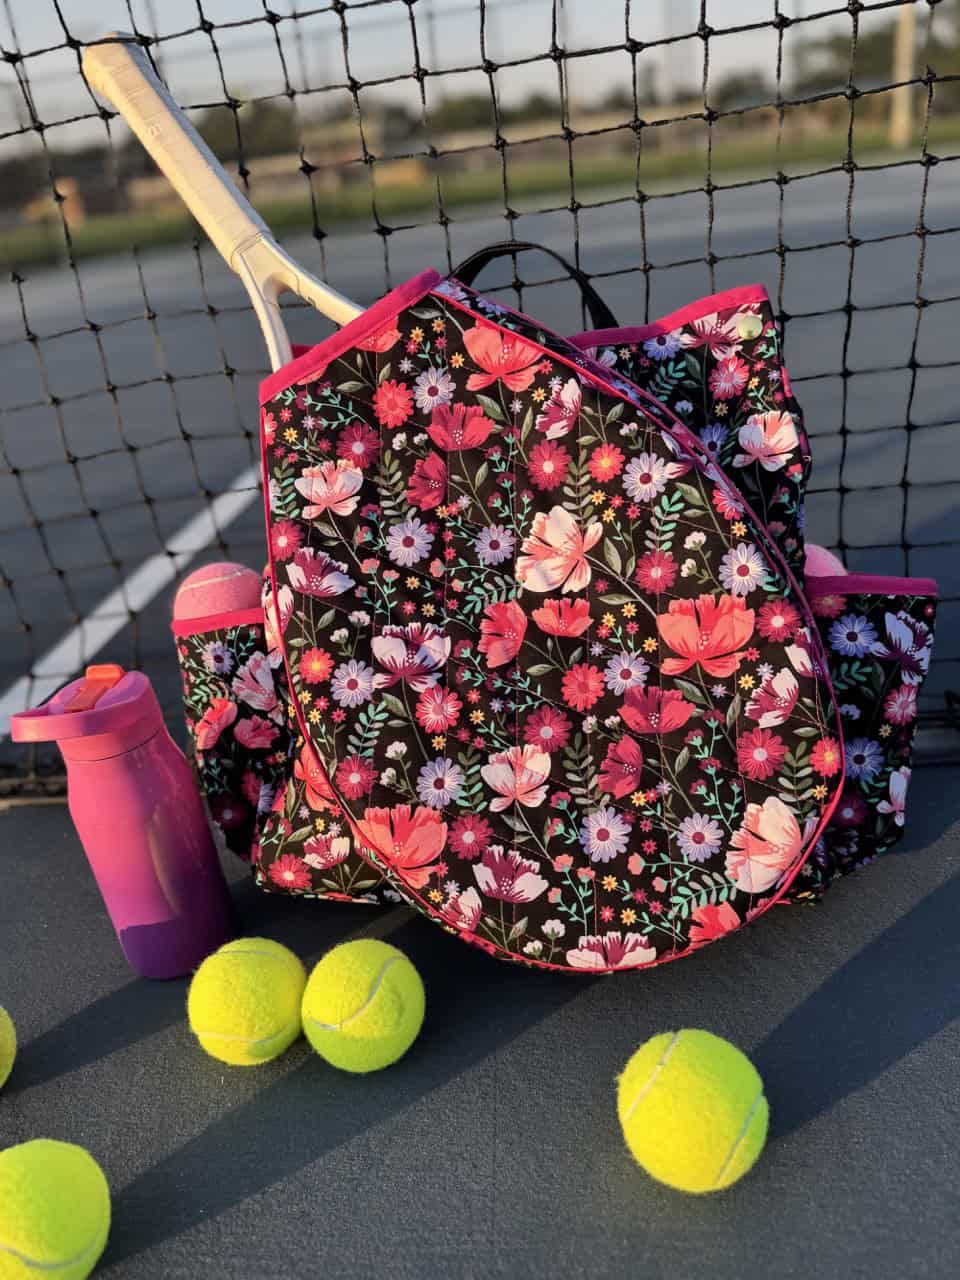
DIY Convertible Tennis Bag
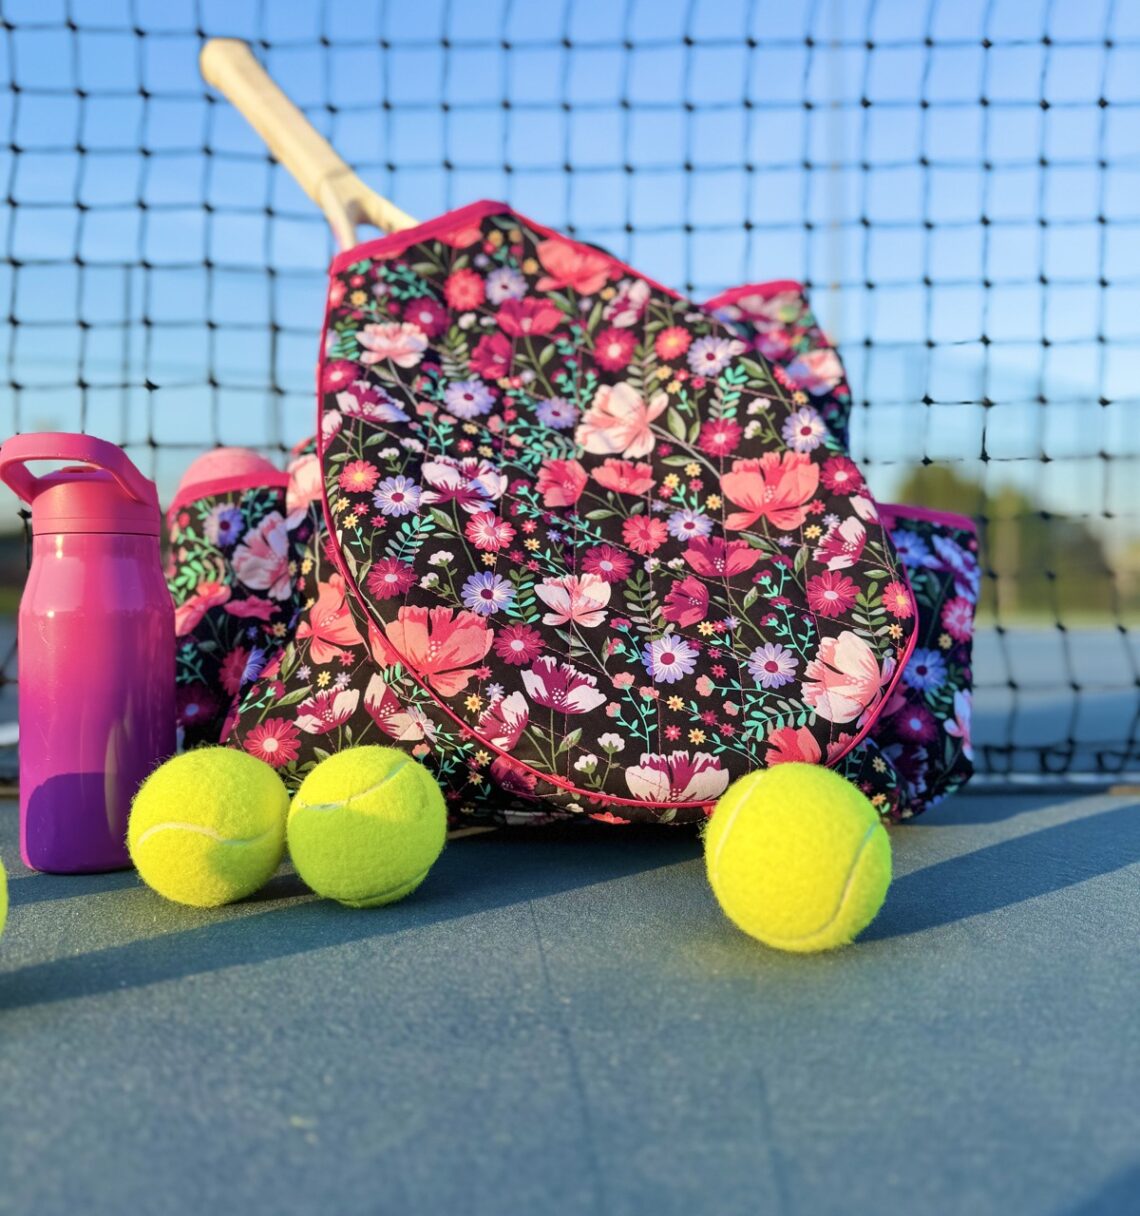
Summer is here and so is your new favorite tennis bag! I just started learning tennis, and naturally, I had to find a way to bring a little of my own style into the game! I found a bunch of tennis bags that were cool, but none really fit my personality and style, so enter this handmade tennis bag, which is super fun to take out with me to the court. It holds your tennis balls in the bag and the tennis rack in a front attachment, so everything’s easy to grab when you’re heading to the court. You can even use it as a pickleball bag. Here’s the fun part. When you’re not playing tennis or pickleball, simply unsnap the racket holder and use the bag as your everyday bag! We are excited to share this tutorial on how to make this bag, so let’s get started!
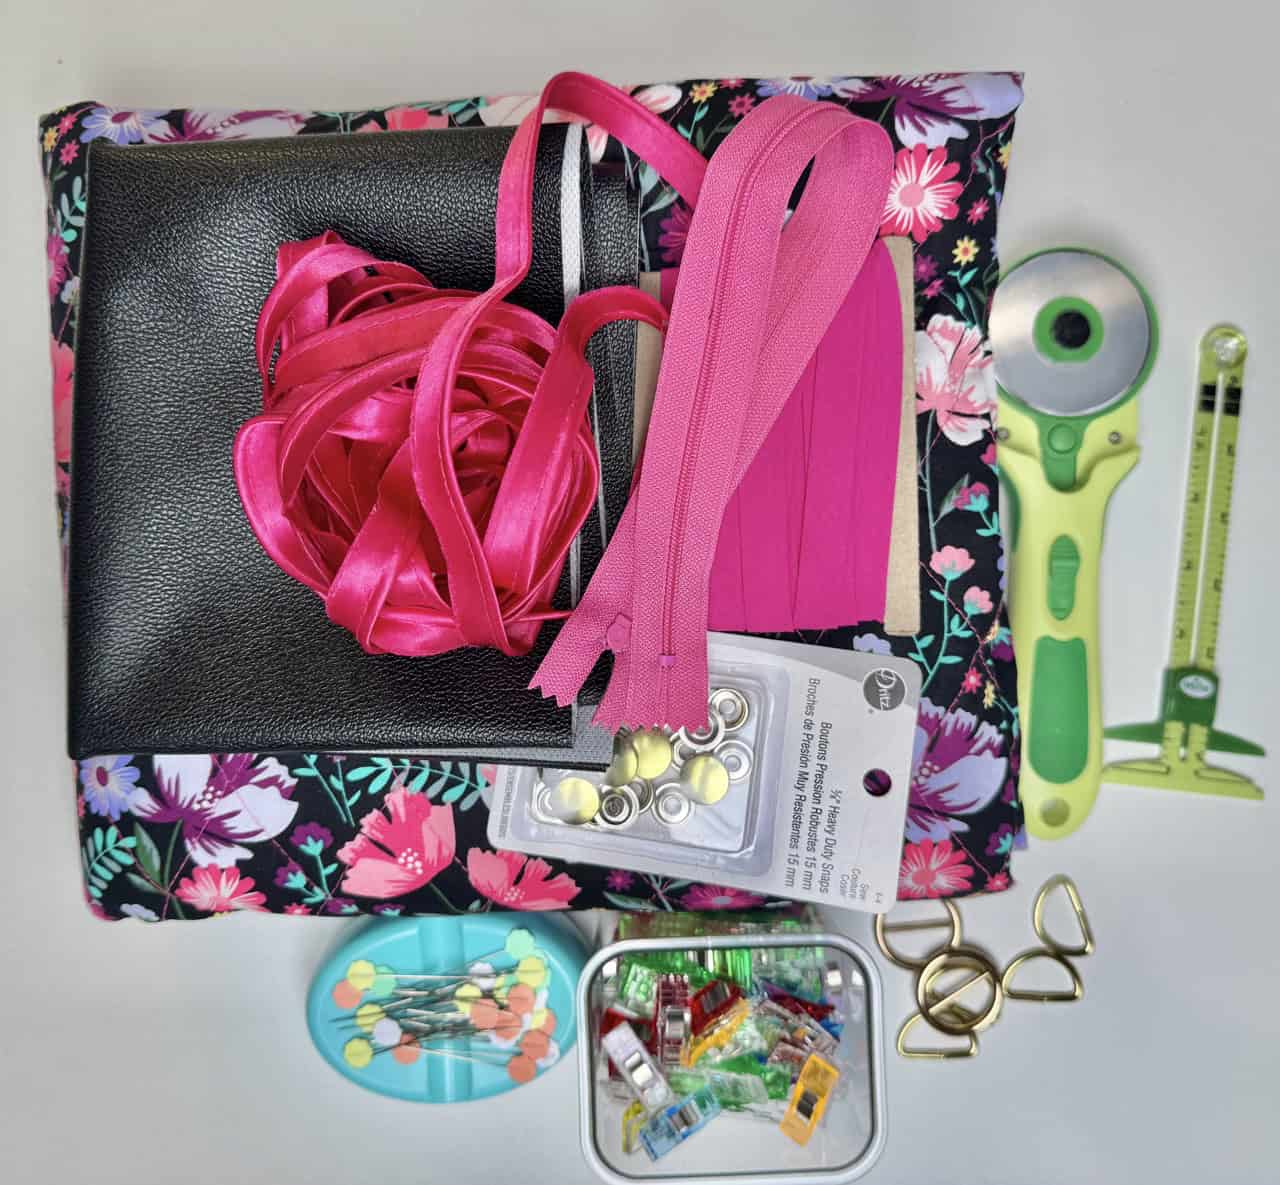
MATERIALS:
- Clover Rotary Cutter (60 mm)
- Clover Flower Pins
- Clover Wonder Clips
- Clover 5-in-1 Sliding Gauge
- size 90/14 or size 100/16 for heavy duty fabrics
- fabric
- contrast fabric for straps
- batting (optional depending on fabric)
- stabilizer for base
- 14 in exposed zipper
- heavy duty snaps
- D-rings
- adjustable slide buckle
- rivets (optional)
- double fold bias tape (optional)
- bias tape maxi piping (optional)
INSTRUCTIONS:
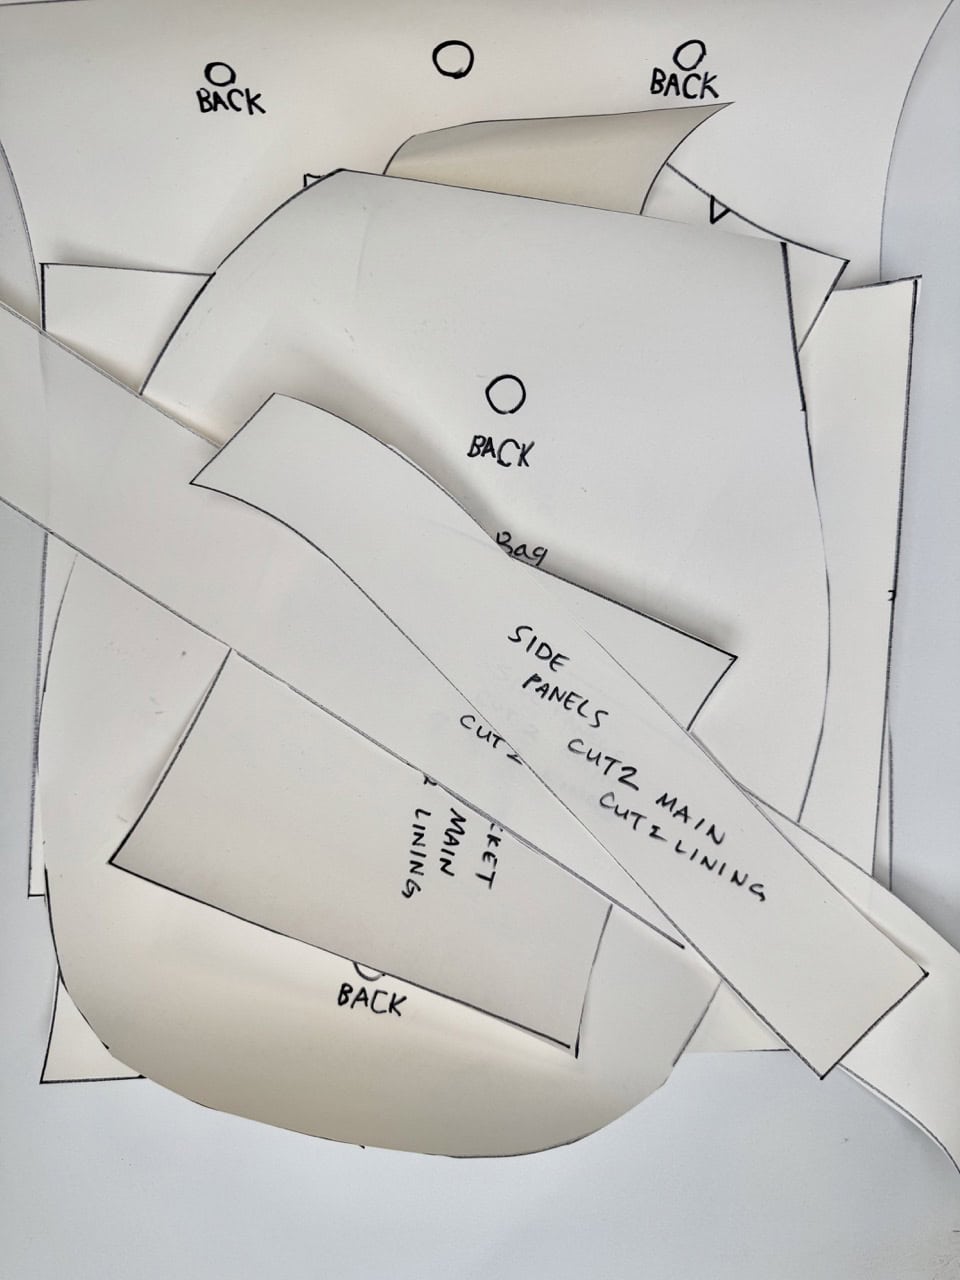
- First, cut out the pattern pieces for the bag. Below are the dimensions I used for the bag. These numbers can be adjusted based on personal preferences and needs!
-
- front and back bag – 15 x 17″
- side panels – 5 x 17″
- base – 5 x 15″
- side pocket – 8 x 8″
- straps – 2 x 36″ to create a 1″ wide strap
- racket bag side panel – 3 x 30″
- zipper panels – 2 x 15″
- Trace your racket, leaving 1″ allowance on all sides
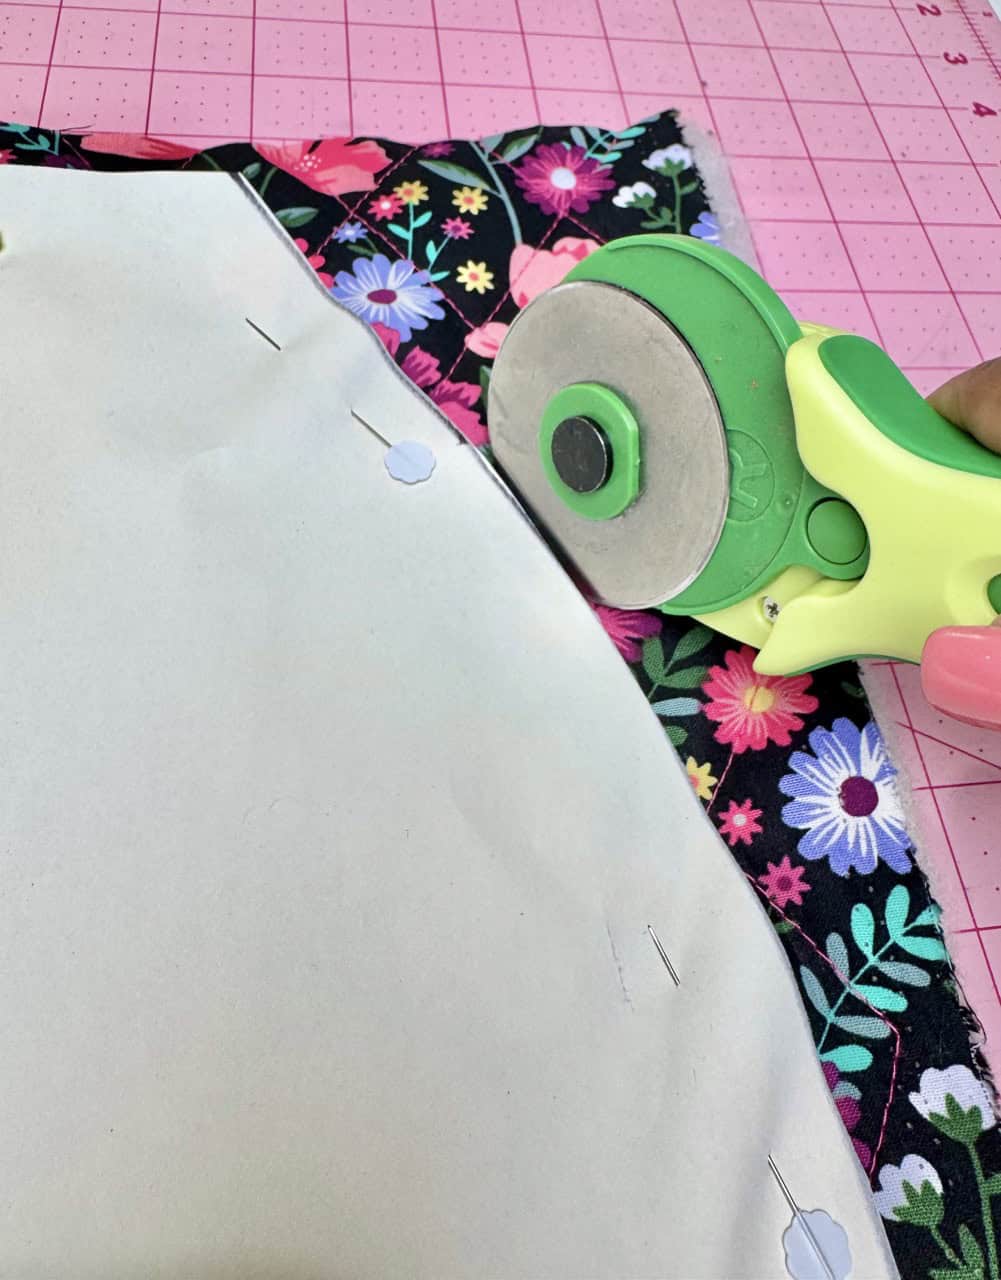
Cut out the pieces with the fabric, remember to cut out the bag straps with a contrast fabric. I used Clover Flower Pins to hold the pattern pieces to the fabric! I really liked using faux leather for the straps, but canvas is also a good material to use. I used the Clover Rotary Cutter (60 mm) because it works very well with bulky fabrics. The main bag fabric was already sandwiched with batting, so I did not have to use batting. I also loved the wrong sides of the bag fabric and wanted to use that as my “lining”.
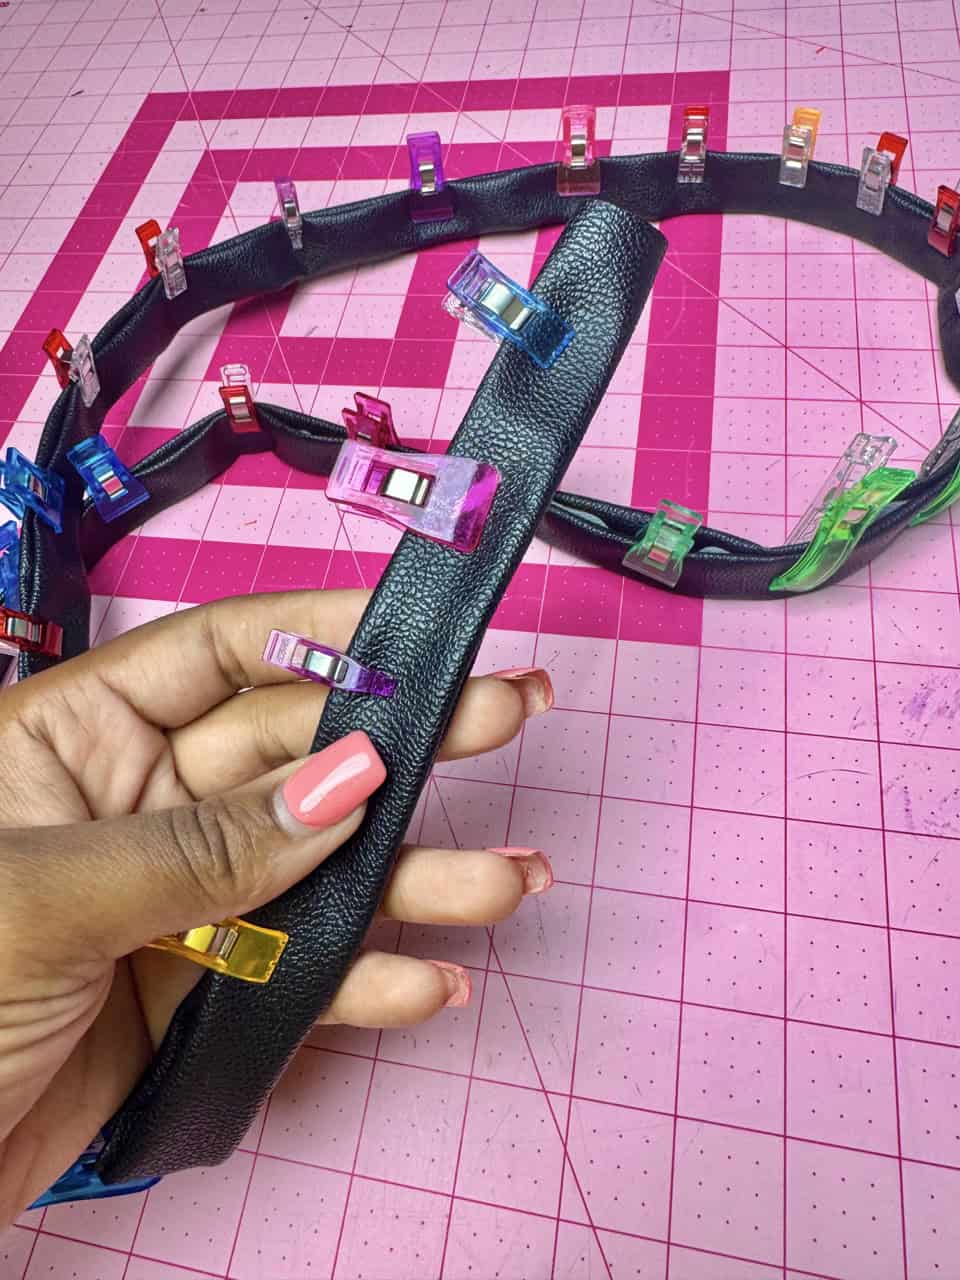
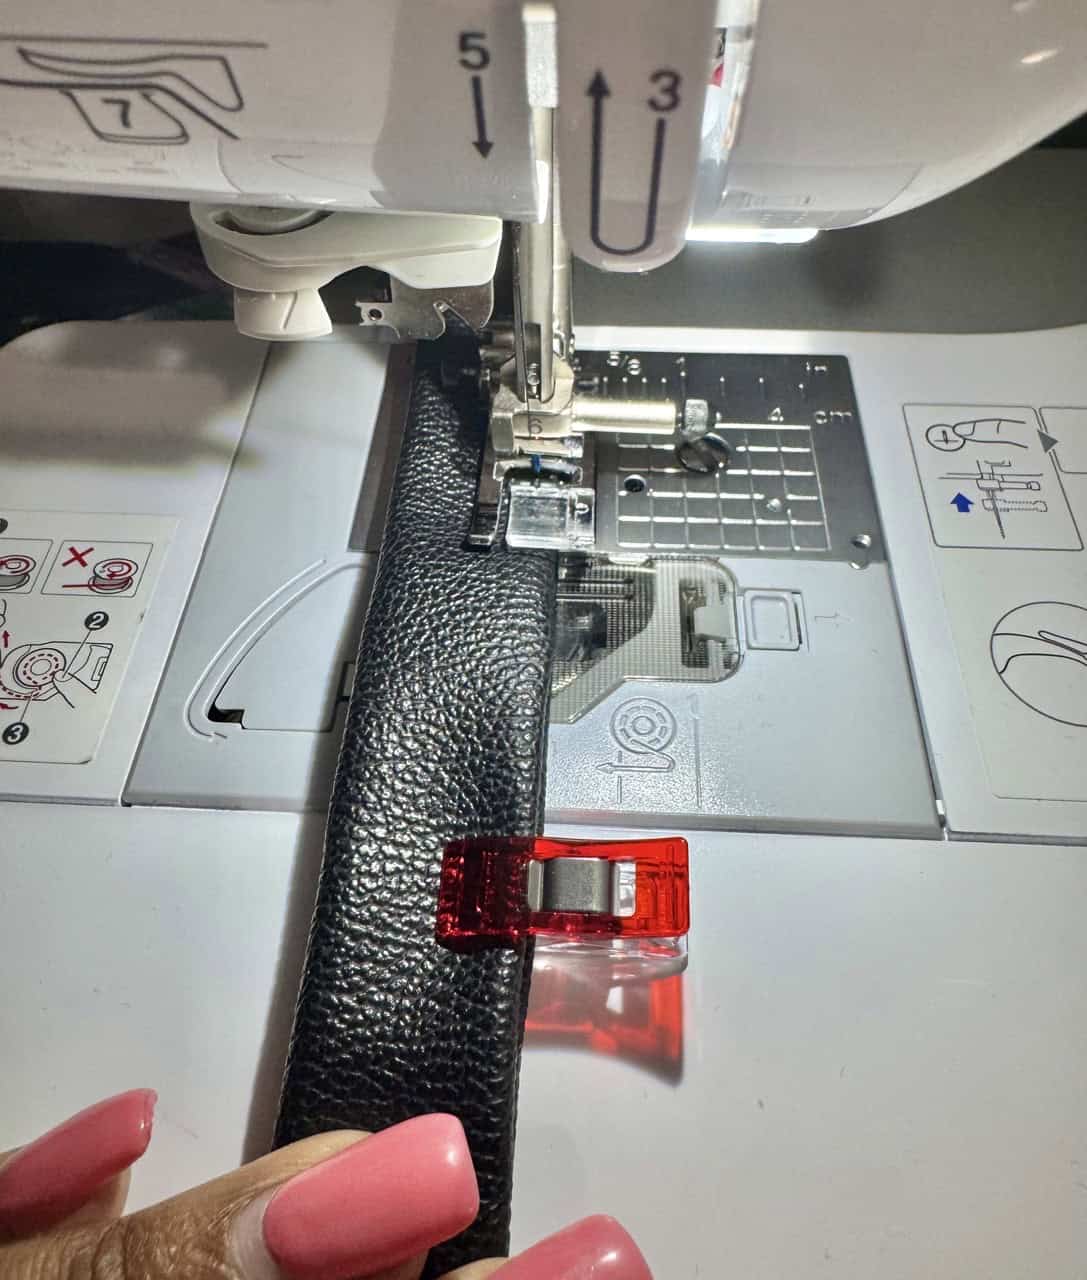
2. Create the straps. I don’t know what I would do without the Clover Wonder Clips. These were amazing for the straps because the straps were extremely thick and the pins were not able to penetrate through the straps. I wanted continuous straps, so I cut out 4 strap pieces and create two long straps, then folded them in 1/2 in on both sides, sandwiched them together and edgestitched on both sides. Then, added the adjustable sliders and D-rings. The tabs at the bottom is optional, but if you would like to use them, they need to be the same width as the straps.
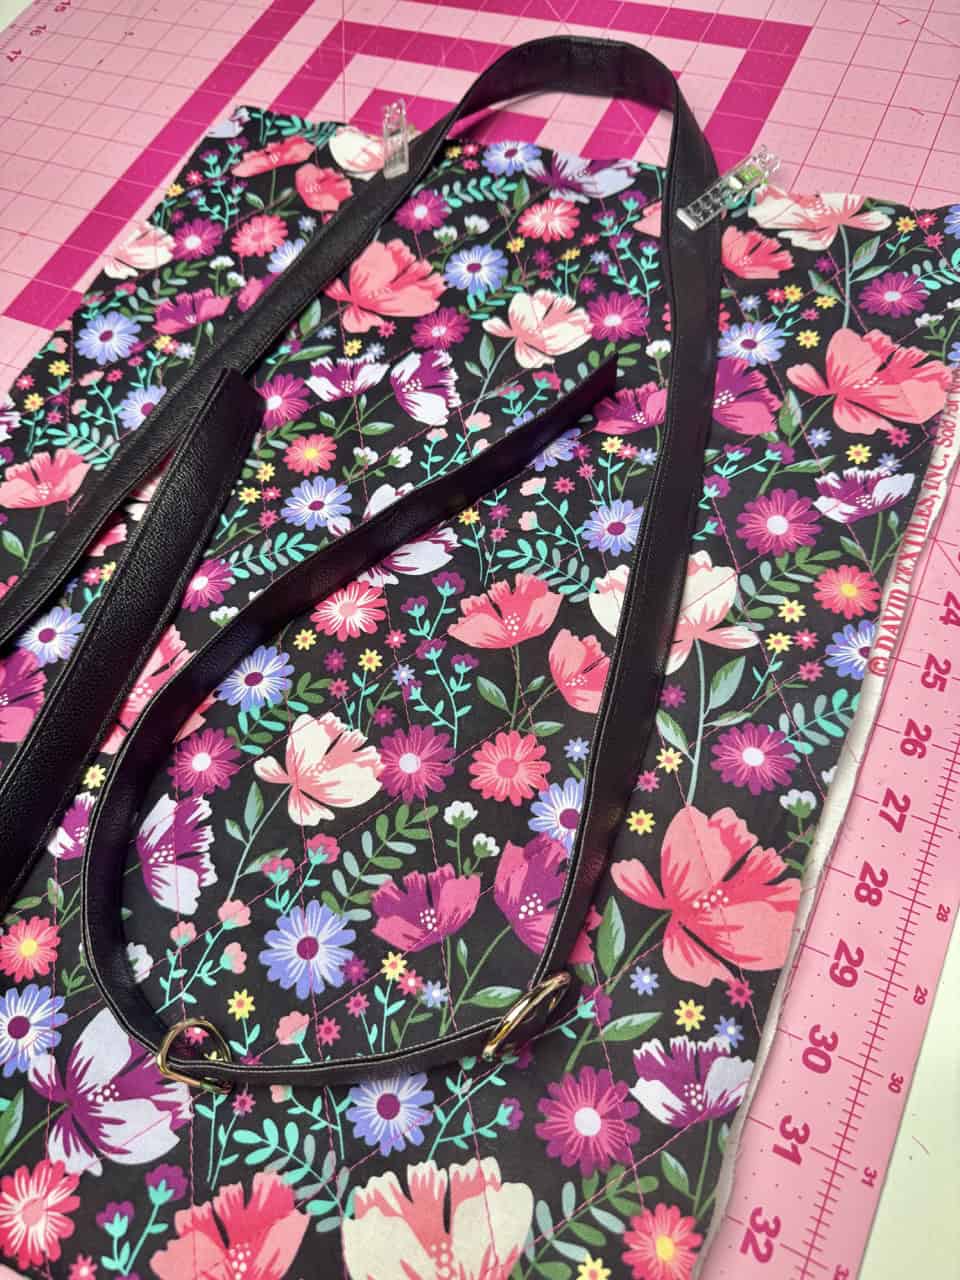
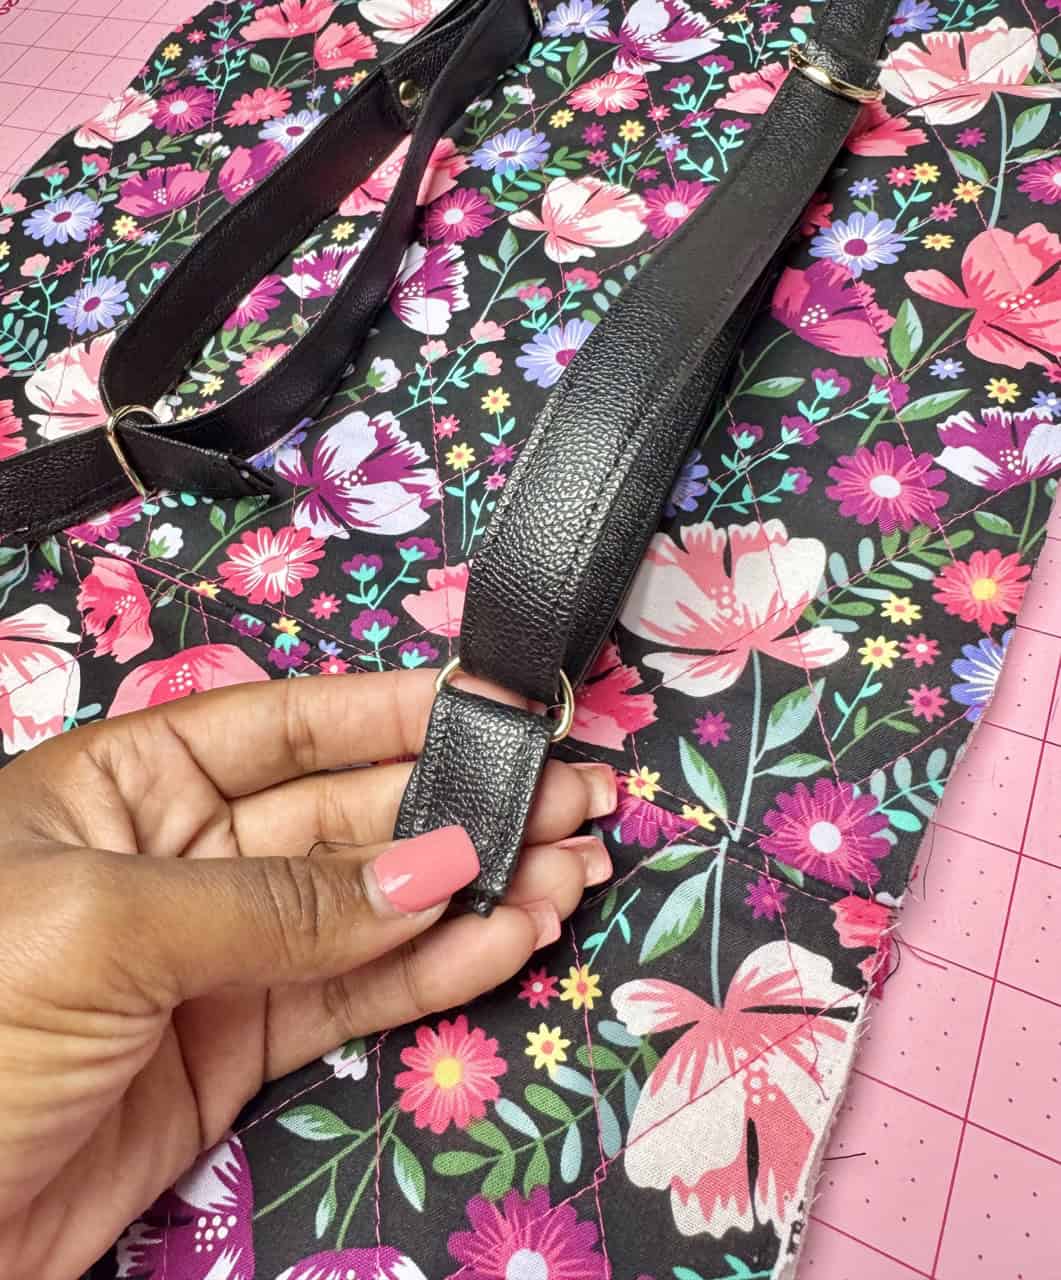
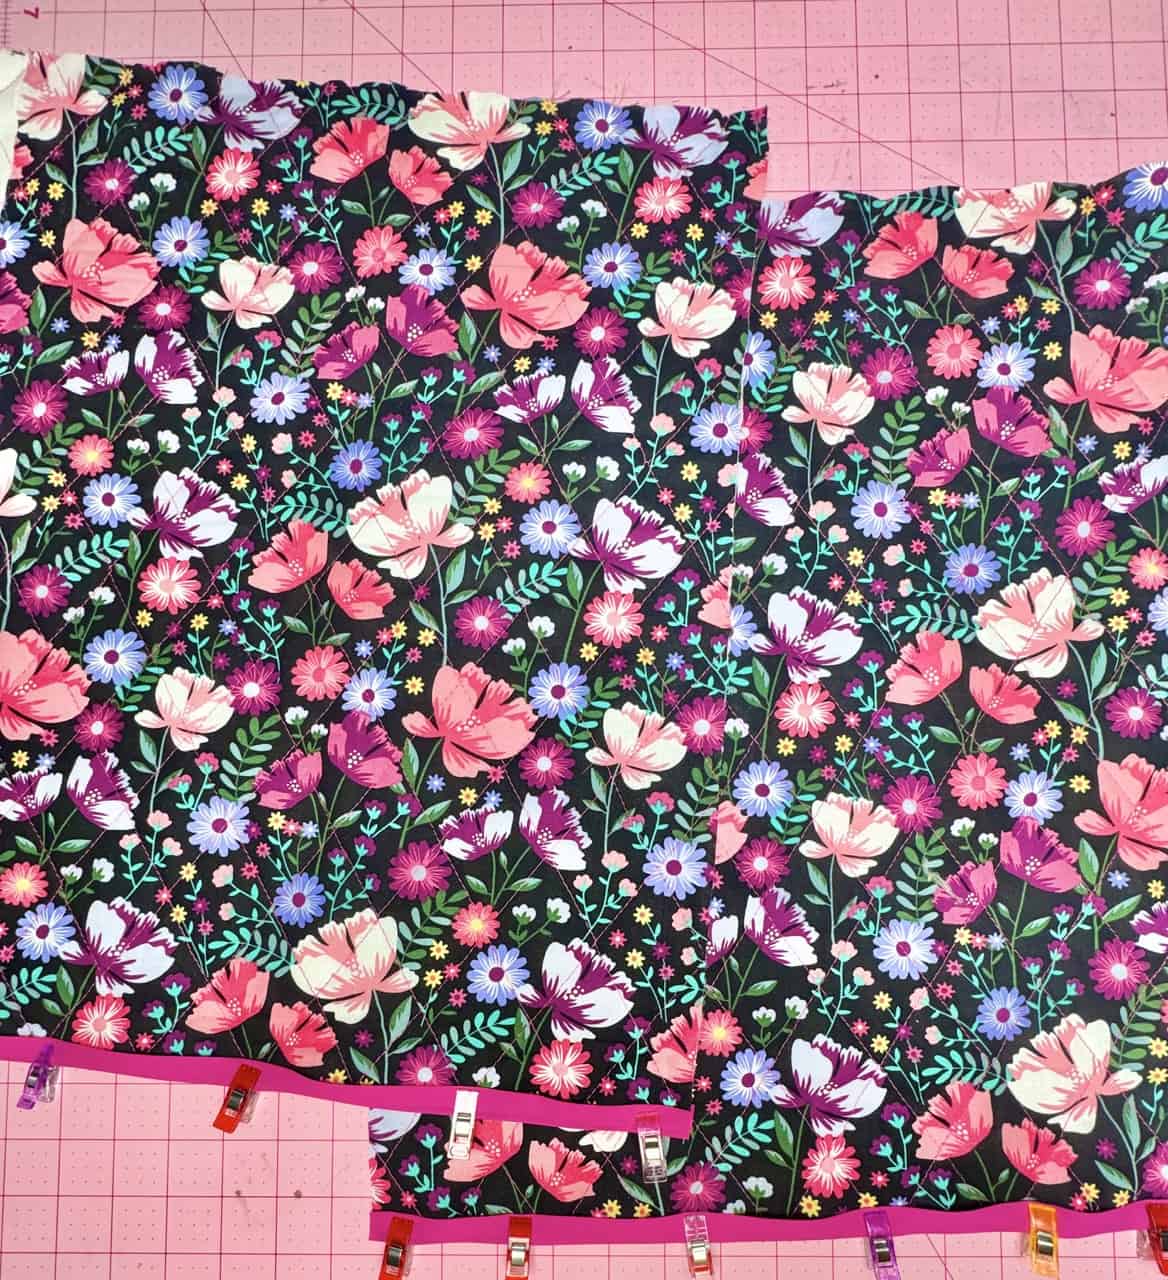
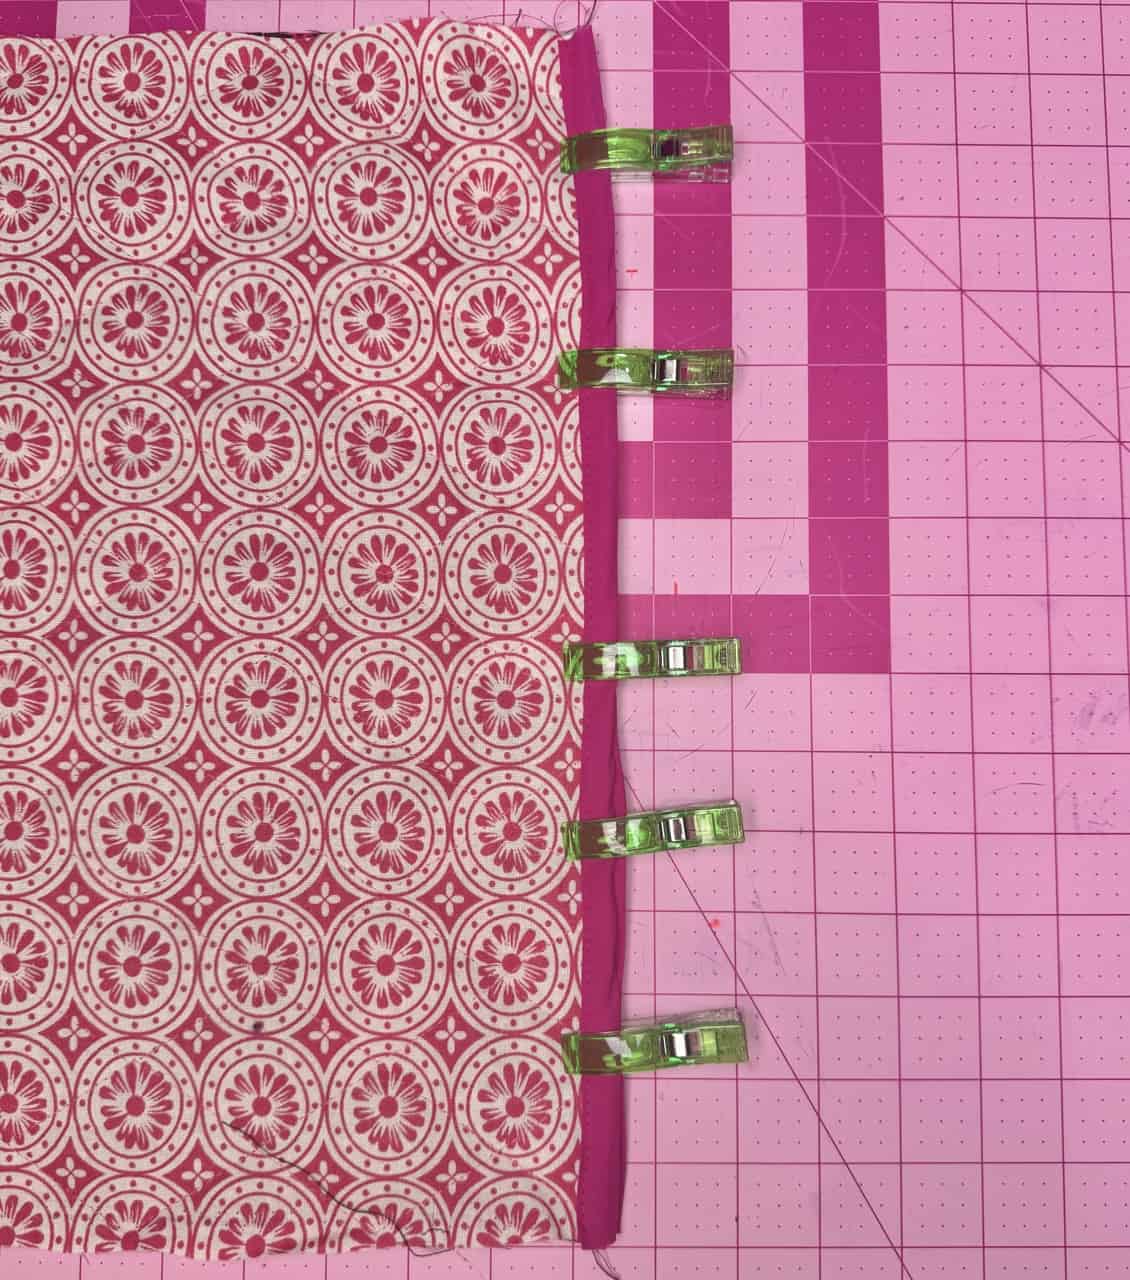
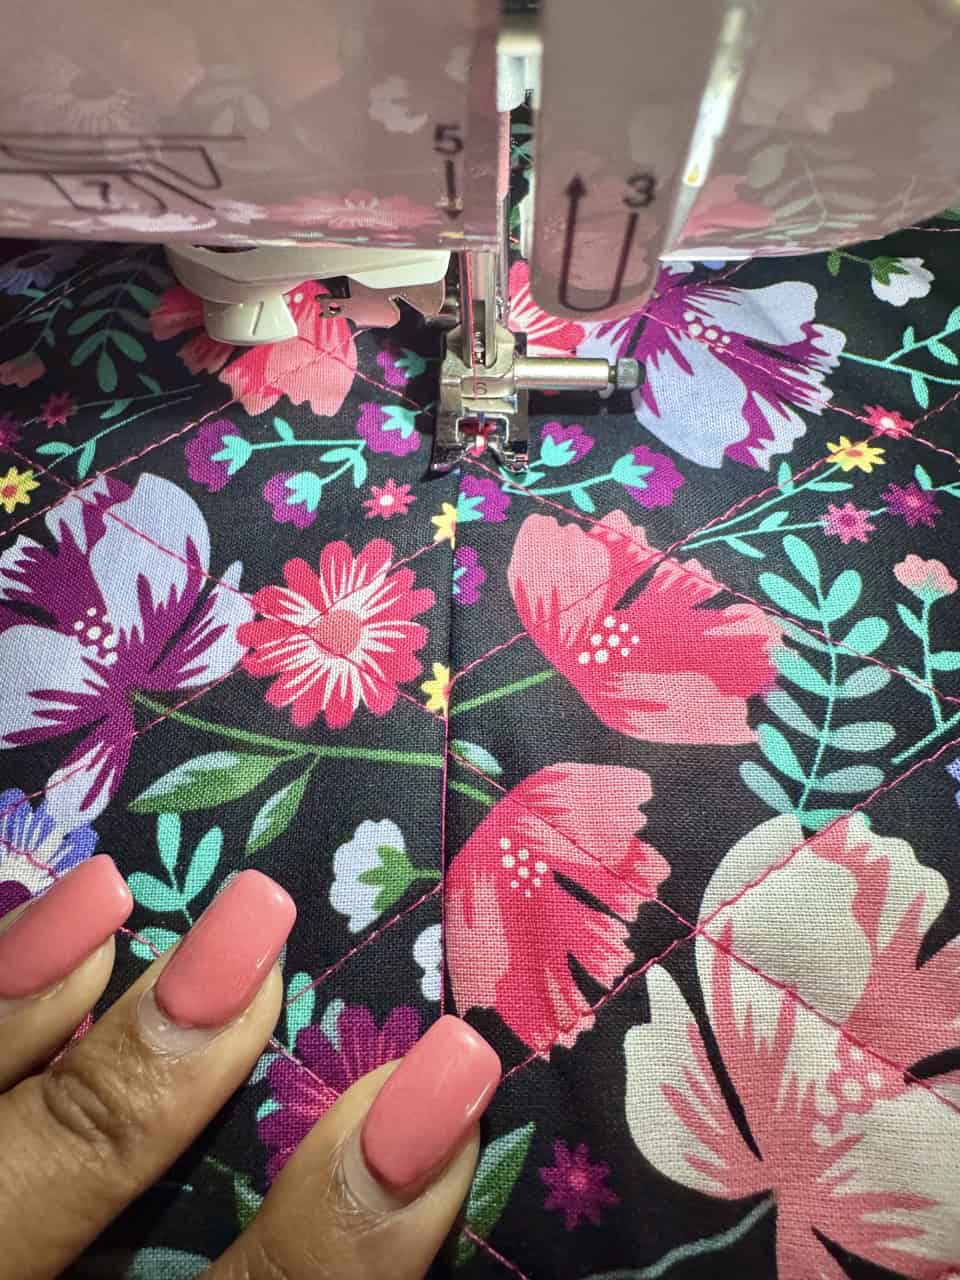
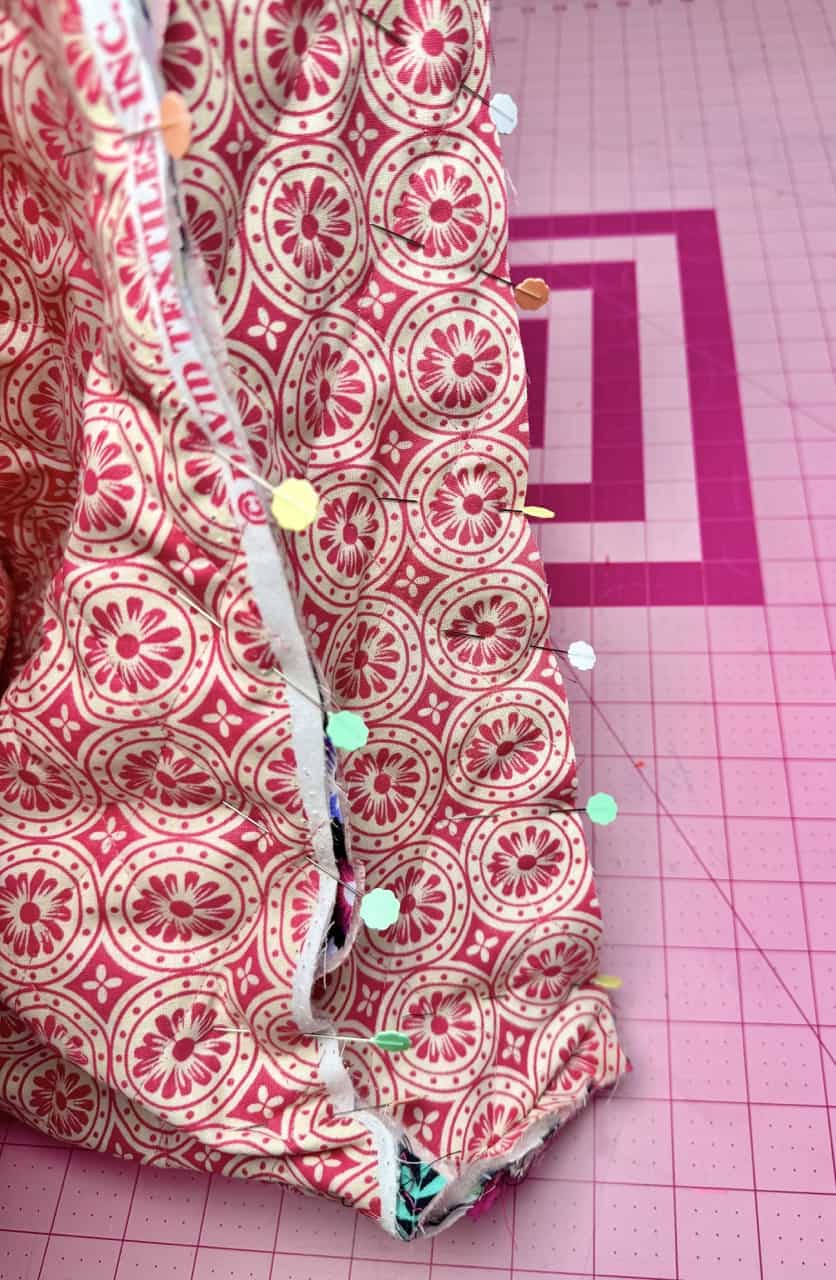
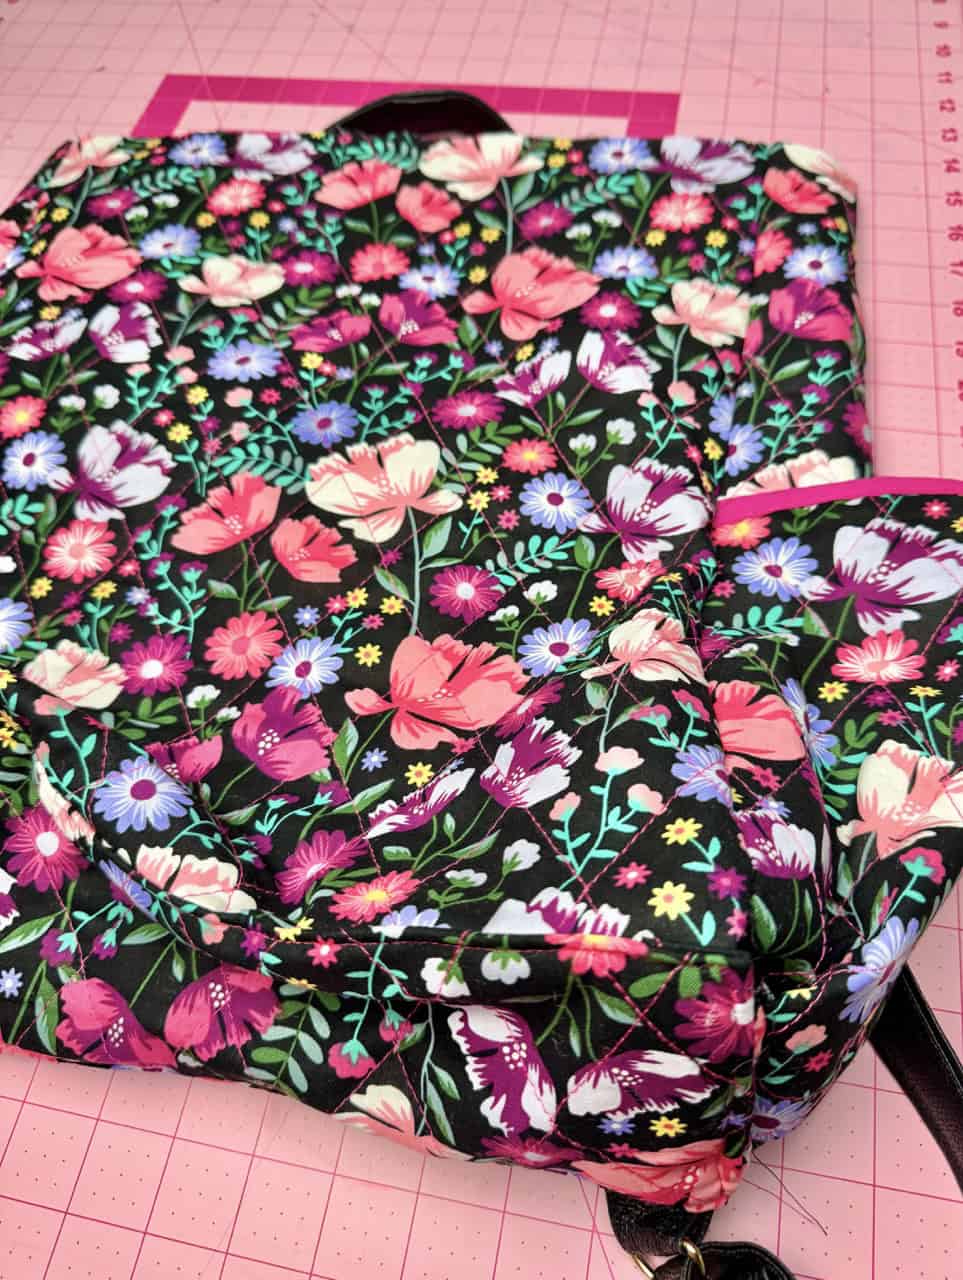
3. Put your front and back bag pieces together, right sides facing. I used double fold bias tape for the seam since I was not lining this bag. Topstitch both sides of the seam. Take your bag base and fold the edges in about 1/2 in. Place on the center of the front and back bag. Before sewing it onto the bag, add the bottom of the straps and then top stitch around it. Make sure you have 1/2 in on the sides to add the side panels. To add the top of the straps, use rivets. You can choose the width of how wide you want the top of the handle to be. I made it about a hands width. Use rivets to hold it in place or you can simply stitch it across in place.
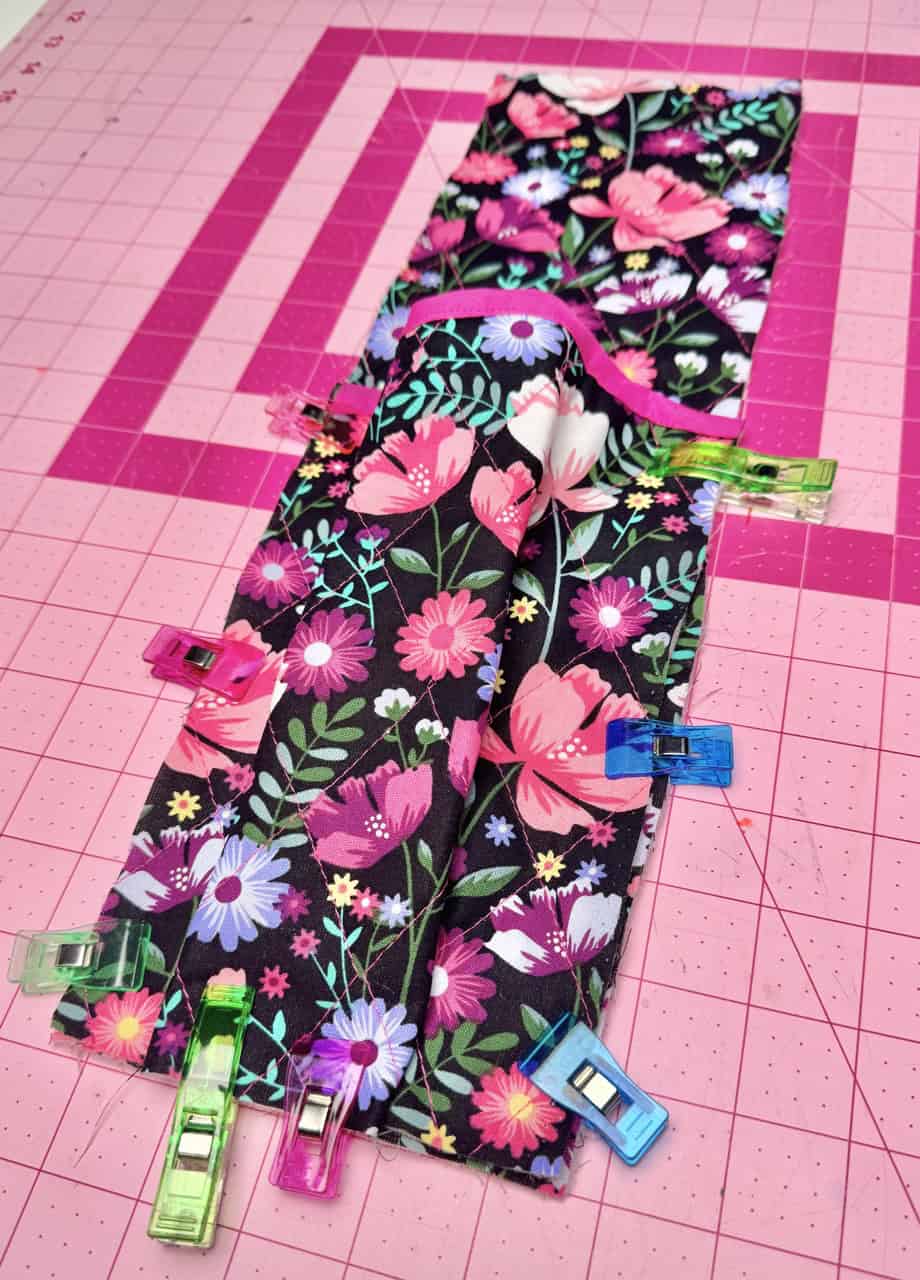
4. Add the side pockets to the side panels, creating a pleat the bottom of the pocket. Stitch around the pocket in place. With right sides together and using the Clover Wonder Clips, attach the side panels. Turn right sides out. You can create a stabilizer using the bag base measurements. I used cardboard and wrapping the cardboard in the fabric and glued it down. Then, placed it right sides up into the bag. It can help the bag stand up more effectively.
5. Now moving on to create the tennis racket bag, start with the zipper. Open up the zipper and place the zipper panels right sides with the zipper. Do this to both sides. Attach the racket bag side panel to the zipper panels, right sides facing. Topstitch the seam toward the side panels. You may need to trim the sides to make sure they are both the same width. For this size, you can fit two rackets. If you want to only fit one, trim it down 1/2 in on both sides.
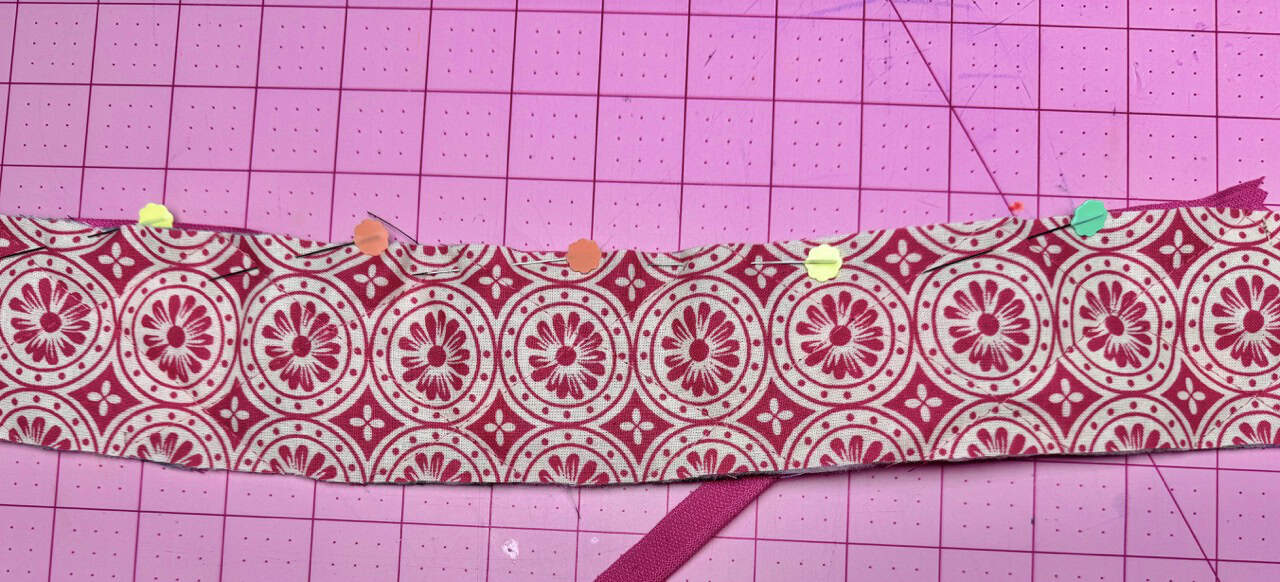
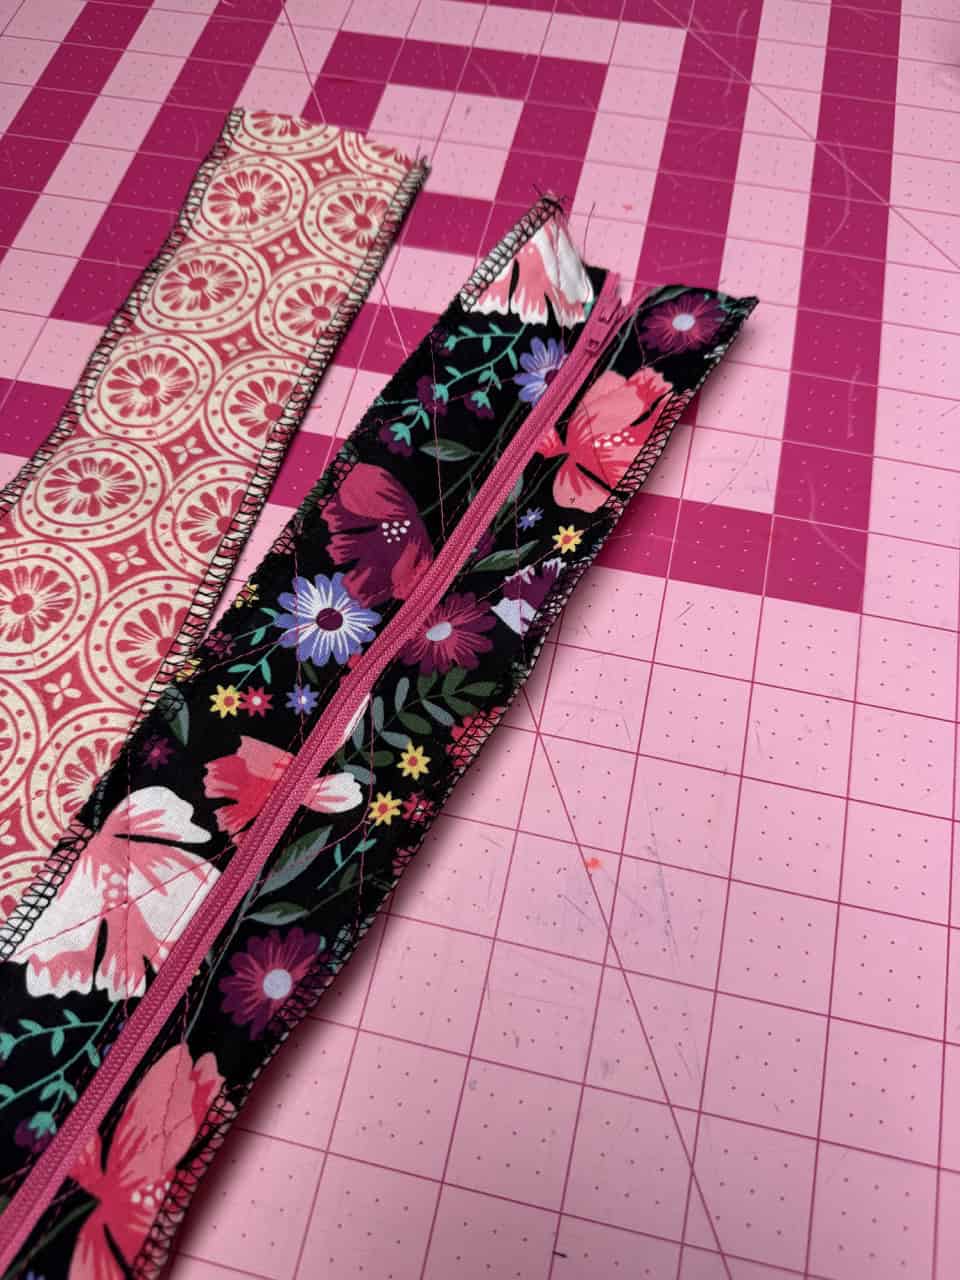
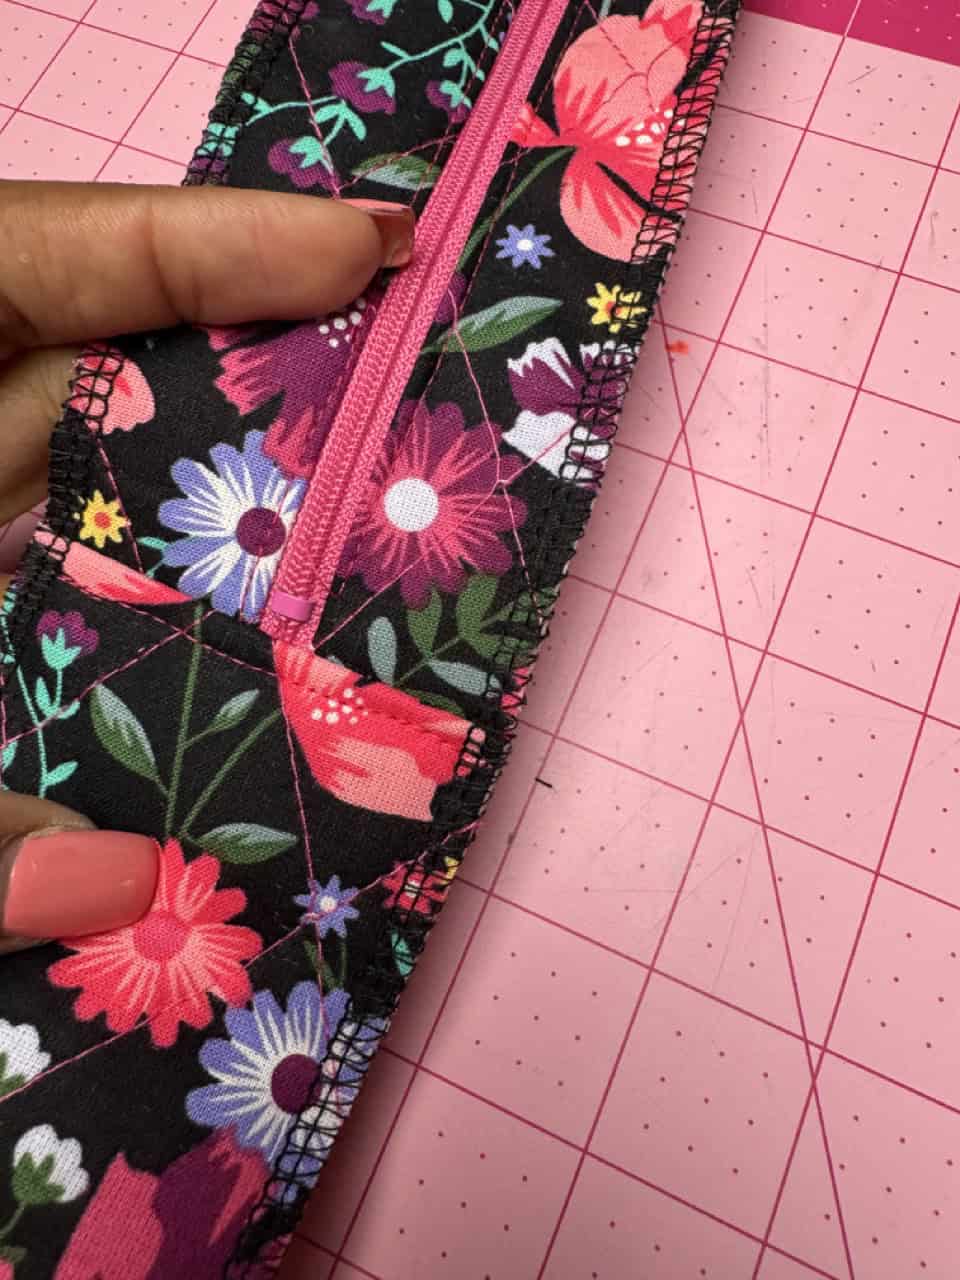
6. With right sides facing, attach the side panel and zipper to the racket bag. I used bias maxi piping to add some definition to the bag, which definitely made it stand out more. To finish off the top of the tennis bag and racket bag, use double fold bias tape.
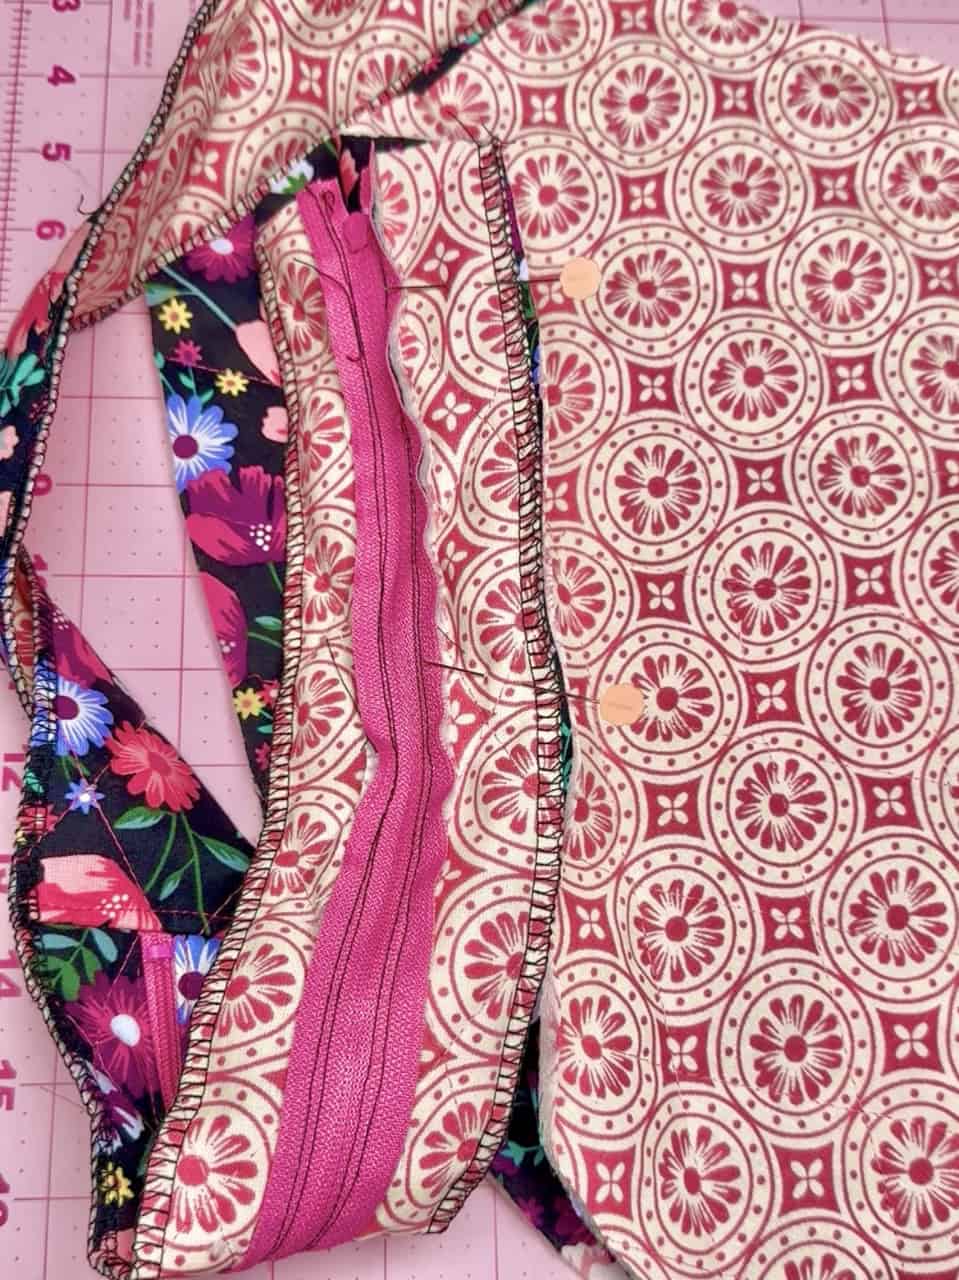
7. Lastly, attach the snaps to the front of the bag and the racket bag. The best way to place the snaps is around the racket bag in a T-formation or circle to make sure the racket bag is secure. I love using snaps because it looks clean and it’s easy to remove and add without making the tennis bag look too busy.

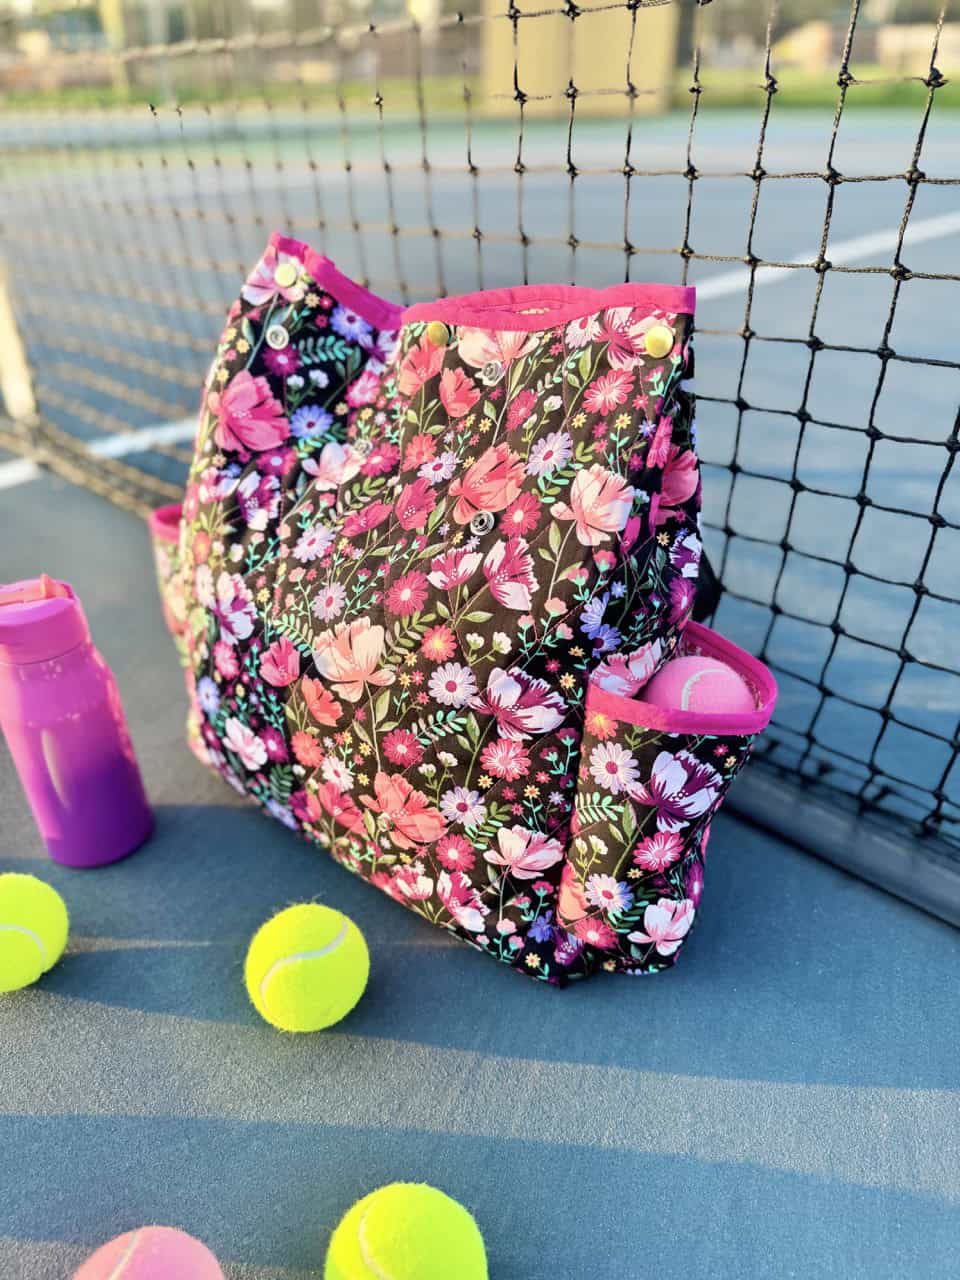
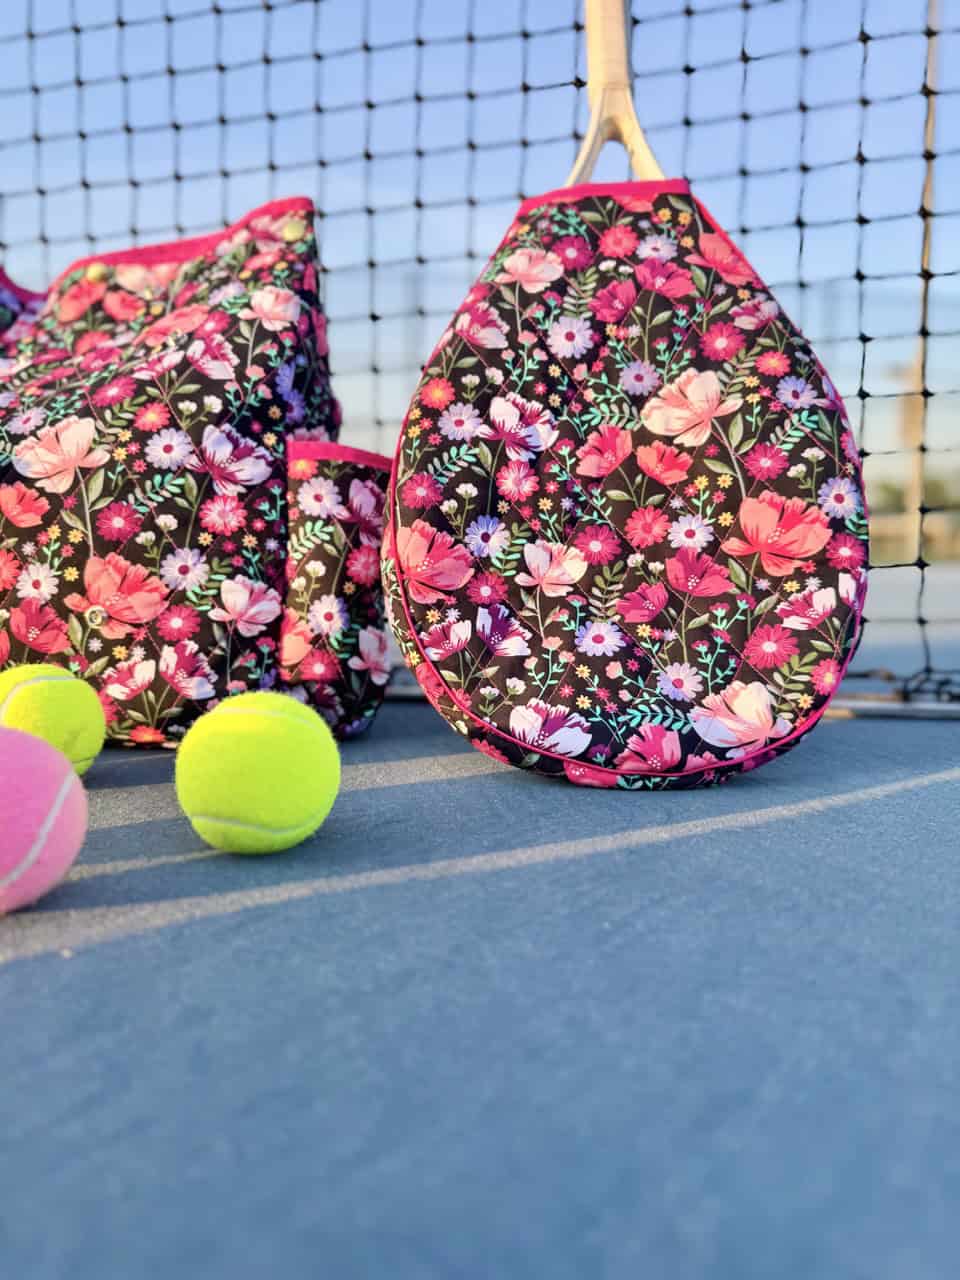
I had so much fun with creating this pattern and I hope this tennis bag inspires you to do the same. Whether you’re on the court or out and about, it’s always nice to carry something that feels like you. Here’s to summer days, learning new things, and showing up with a little extra flair, racket in hand!
If you want to keep up with me, Duana, on social media for other fun projects, follow me on social media: Instagram
If you want to keep up with all things Clover, follow us on: Facebook | Twitter | Instagram | Pinterest | YouTube | Ravelry


