

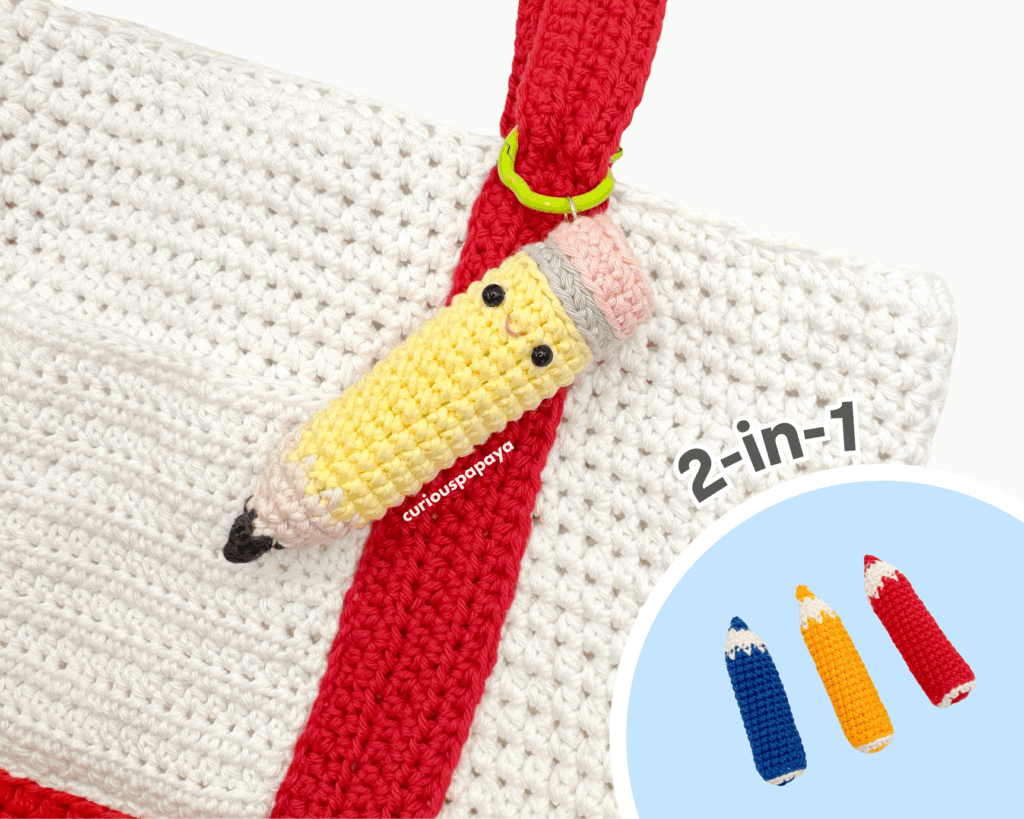
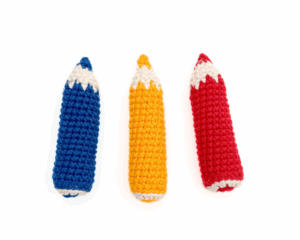
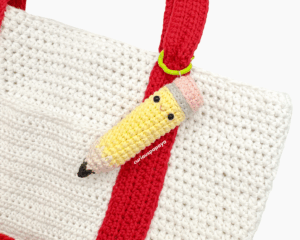
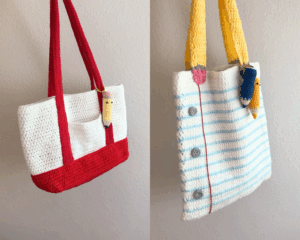
Bag charms are sooooo IN right now. Here’s a fun back-to-school themed make – and a bonus, it’s a 2-in-1 crochet pattern!!
-Amy (@curiouspapaya)
MATERIALS:
- Clover Amour Hook
- Clover Patchwork Scissors
- Clover Yarn Needle
- Clover Stitch Markers
- fiber fill stuffing
- two 6 mm safety eyes + pink or red embroidery thread for the mouth
- split ring, key ring, jewelry pliers
- yarn for the “pencil”
- #3 light worsted cotton yarn
- pink
- light gray
- yellow
- light tan
- dark gray
- #3 light worsted cotton yarn
- yarn for the “colored pencil”
- #3 light worsted cotton yarn
- main color of your choice
- light tan
- #3 light worsted cotton yarn
NOTES:
- Please do not copy/redistribute any part of this pattern as your own. This includes reposting/translating without permission. Feel free to sell your finished products in small quantities as long as you give credit to help support my work. Tag your creations with #curiouspapaya so I can feature you!
- This pattern is written in US terminology.
-
We will use the YUYU method of crocheting (yarn under, yarn under). This produces “x” shaped stitches. You are welcome to crochet however you prefer!
-
Difficulty: intermediate-beginner+
- Measurements: 4 in. x 1 in. [~10 cm x ~2.5 cm]
ABBREVIATIONS:
- blo: back loops only
- ch: chain
- dec: (invisible) decrease
- flo: front loops only
- sc: single crochet
- slst: slip stitch
- st(s): stitch(es)
- rnd(s): round(s)
- [#]: stitch count
- (…) x #: repeat instructions the number of times
PENCIL PATTERN:
Using a 2.75 mm Clover Amour hook + Pink yarn:
*Note: The pencil will be worked from the eraser to the lead tip. The top portion will be made in joined rnds.
If you prefer the premium PDF, you can find it HERE. Thank you for supporting!
- Round 1: Make a magic circle and (sc) x8 [8]
- Round 2: (inc) x8, slst into the blo of the first st to join the rnd [16]
- Round 3: ch 1 (counts as the first st), (blo) sc all around, slst into the first st to join the rnd [16]
- Round 4: ch 1 (counts as the first st), sc all around, in Gray yarn, slst into the first st to join the rnd [16]
Fasten off the Pink yarn.
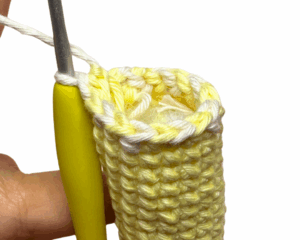
*Tip: The next two rnds will appear as 1 rnd. This technique will create a crisp straight line between the color change instead of a zig-zagged one.
- Round 5a: ch 1 (counts as the first st), (blo) loosely slst all around, slst into the first st to join the rnd [16]
- Round 5b: ch 1 (counts as the first st), (blo) sc all around, in Yellow yarn, slst into the first st to join the rnd [16]
*Note: The remainder of the pattern will be worked in continuous rnds.
- Round 6a: (blo) loosely slst all around [16]
- Round 6b: (blo) sc all around [16]
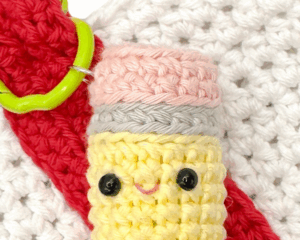
*Note: If making the optional face, make sure to pause halfway when making the next few rnds to add your facial features. The face should be on the opposite side as where the rnds were joined and positioned between rnds 6-7. Using Pink embroidery thread and a Clover darning needle, embroider a mouth 1 st wide and secure the thread tails into a knot on the inside of the piece. Then, insert the safety eyes 1 st away from each side of the mouth.
- Rounds 7-18 (12 rnds): sc all around [16]

Stuff well.
In the next rnd, we will alternate two colors. (y) = Yellow, (t) = Tan
- Rnd 19: [(y) sc, (t) sc] x8 [16]
Continue in Tan yarn and fasten off the Yellow yarn.
- Round 20: sc all around [16]
- Round 21: (2 sc, dec) x4 [12]
- Round 22: (sc, dec) x4 [8]
Change to Dark Gray yarn and fasten off the Tan yarn.
- Round 23: (2 sc, dec) x2 [6]
Stuff one last time using tweezers or the back of your hook to get into the narrow opening.
- Round 24: sc all around [6]
Fasten off and leave a tail for closing up the piece. Use your Clover darning needle to weave through the flo and pull the hole closed. Weave in the remaining tail.
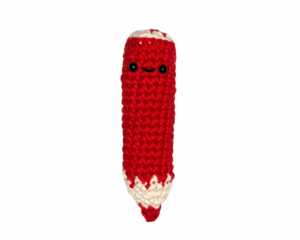
COLORED PENCIL PATTERN:
Using a 2.75 mm Clover Amour hook + the main color of your choice – here, I’m using Red yarn:
- Round 1: Make a magic circle and (sc) x8 [8]
slst into the next st and fasten off. In the previous st, join Light Tan yarn.
- Round 2: (inc) x8 [16]
Use the invisible finish (video tutorial).
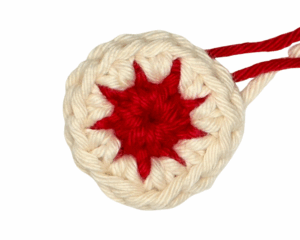
In the previous st, join Red yarn in the blo. Secure the two yarn tails into a knot.
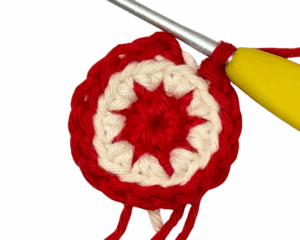
*Tip: The next two rnds will appear as 1 rnd. This technique will create a crisp straight line between the color change instead of a zig-zagged one.
- Round 3a: (blo) loosely slst all around [16]
- Round 3b: (blo) sc all around [16]
*Note: If making the optional face, make sure to pause halfway when making the next few rnds to add your facial features. The face should be on the opposite side as where the rnds were joined and positioned between rnds 5-6. Using Pink embroidery thread and a Clover darning needle, embroider a mouth 1 st wide and secure the thread tails into a knot on the inside of the piece. Then, insert the safety eyes 1 st away from each side of the mouth.
- Rounds 4-18 (15 rnds total): sc all around [16]
In the next rnd, we will alternate two colors. (r) = Red, (t) = Tan
- Round 19: [(r) sc, (t) sc] x8 [16]
Continue in Tan yarn and do not fasten off the Red yarn.
Stuff well.
- Round 20: sc all around [16]
- Round 21: (2 sc, dec) x4 [12]
- Round 22: (sc, dec) x4 [8]
Fasten off the Tan yarn and continue in Red yarn.
- Round 23: (2 sc, dec) x2 [6]
Stuff one last time using tweezers or the back of your hook to get into the narrow opening.
- Round 24: (sc, dec) x2 [4]
Fasten off and leave a tail for closing up the piece. Use your Clover darning needle to weave through the flo and pull the hole closed. Weave in the remaining tail.
FINISHING TOUCHES:
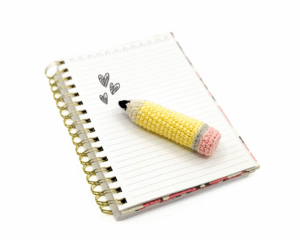
Using jewelry pliers, add the split ring onto the side of the pencil. Then, add the key ring onto it. Pair this bag charm with the Every Day Tote Bag or the Lined Paper Tote Bag for the cutest back-to-school look!
You’re finished! We’d love to see your creations over on social media. Tag your creations with #cloversquad and #curiouspapaya to share your makes 🙂
If you want to keep up with me, Amy, on social media for other fun projects, follow me on: Instagram
If you want to keep up with all things Clover, follow us on: Facebook | Twitter | Instagram | Pinterest | YouTube | Ravelry