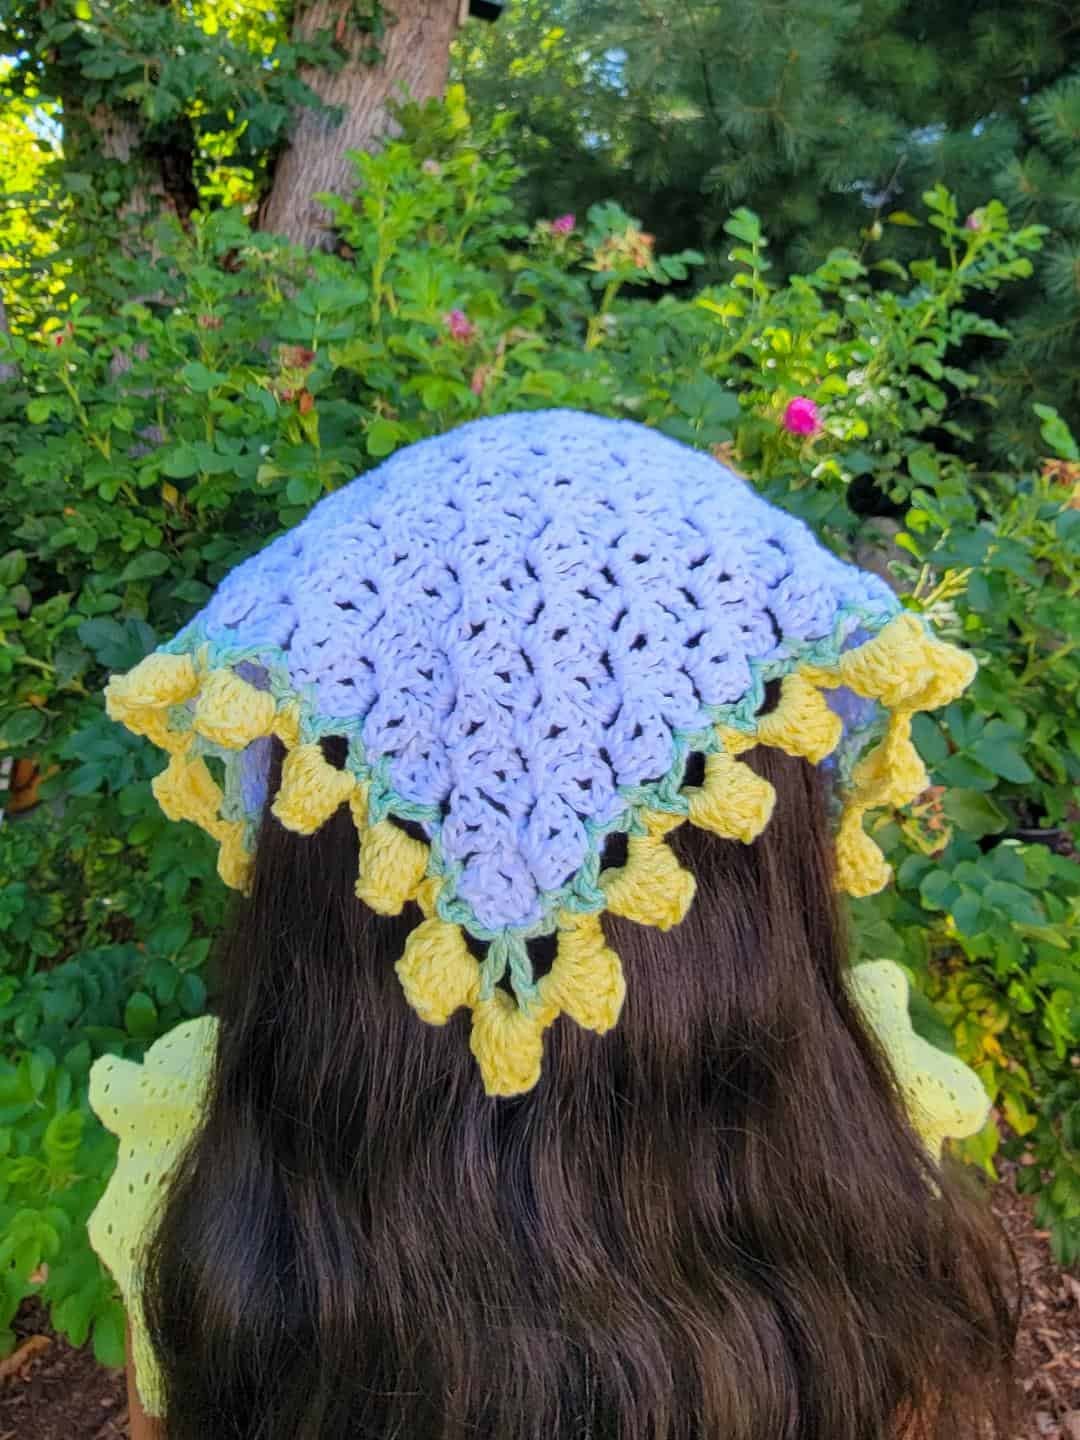
Summer Bandana *crochet pattern*
Hello, wonderful people! Looking for a headpiece that adds a touch of boho flair to your outfit? Allow me to present to you the Summer Bandana, my most recent crochet creation. It features a simple V-st C2C (Corner to Corner) stitch design with a lovely popcorn stitch border. This versatile accessory is fantastic for keeping your hair back on windy days while still looking elegant and attractive! It ties comfortably around your head.
Within the crochet world, the Corner to Corner (C2C) stitch pattern is very popular. The name comes from the fact that it is worked diagonally, starting from one corner, increasing to the widest point, and then reducing back to the opposite corner. However, since we just need to make the bandana’s triangle (base), there is no need to reduce with this design. Each diagonal block of the C2C pattern is composed of a chain of 3 and V-st (1DC, ch1, 1DC). After the row is finished, you turn and work more blocks into the spaces on either side of the block from the previous row. Although it appears somewhat difficult, working on this stitch is actually quite enjoyable and simple. It’s ideal for big projects because of its straightforward repeating pattern that allows you to work without thinking or counting too much!
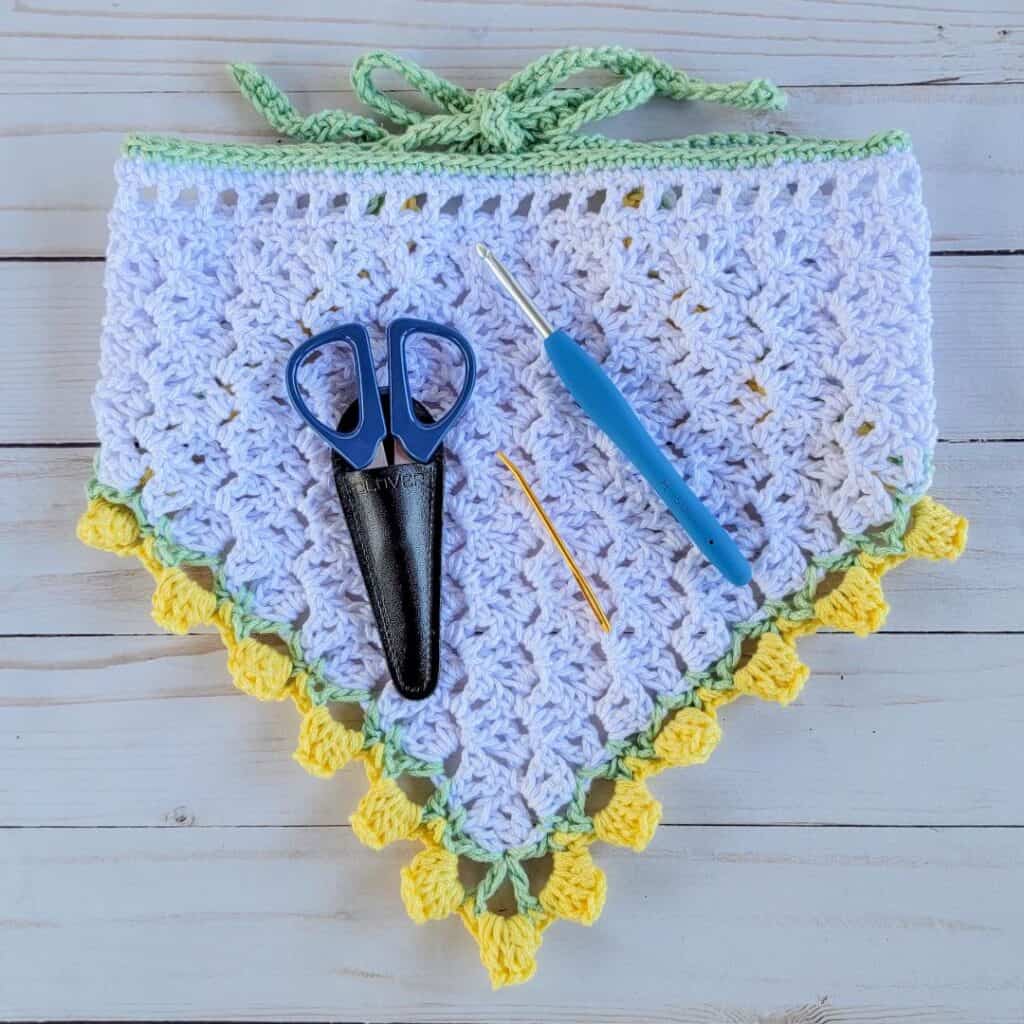
MATERIALS:
- Clover Amour Crochet Hook H (5.0 mm)
- Clover Jumbo Tapestry Needle (Bent Point)
- Clover Patchwork Mini Scissors
- Tape Measure
- cotton worsted weight yarn in white, green, and yellow colors (or your preferred colors)
NOTES:
- Read the pattern carefully before starting.
- This pattern uses US crochet terms.
- * Repeat the instructions following the single asterisk as directed.
- ( ) Work instructions within parentheses as many times as directed or work a group of stitches all in the same stitch or space.
- [ ] Work instructions within brackets as many times as directed.
- Gauge: Rows 1-6 measure approximately 4″ (unblocked)
- Skill level: intermediate
- Finished measurement: about 20 in (width) x 10 in (depth) – (unblocked)
ABBREVIATIONS:
- ch(s): chain(s)
- dc: double crochet
- rep: repeat
- sc: single crochet
- sk: skip
- slst: slip stitch
- sp(s): space(s)
- st(s): stitch(es)
- V-st: (1DC, ch1, 1DC) work all in the same st/sp
- PC: popcorn stitch – work 7DC in the same st/sp. Take the hook out of the working loop and insert it into the top of the 1st DC made, from front to back, pick up the working loop, and draw this to close the popcorn.
SUMMER BANDANA PATTERN:
Begin with one block in Row 1, two blocks in Row 2, three blocks in Row 3, and so forth. Increase the number of blocks until you have the required number of rows.
With white yarn (or your chosen color), ch6.
- Row 1: V-st in 5th ch from hook, 1DC in last ch (1 block made), and turn.
- Row 2: Ch6, V-st in 5th ch from hook (first block on Row 2 made), slst into top of turning ch-4-sp at start of previous block, ch3, (V-st, 1DC) in ch-4-sp (second block on Row 2 made), and turn.
- Row 3: Ch6, V-st in 5th ch from hook (first block on Row 3 made), slst into ch-3-sp in next block, ch3, V-st in the same ch-3-sp (second block on Row 3 made), slst into top of turning ch-4-sp at start of previous block, ch3, (V-st, 1DC) in ch-4-sp (third block on Row 3 made), and turn.
- Row 4: Ch6, V-st in 5th ch from hook, *slst into ch-3-sp in next block, ch3, V-st in the same ch-3-sp; Rep from * to last block (ch-4-sp), slst into top of turning ch-4-sp at start of previous block, ch3, (V-st, 1DC) in ch-4-sp and turn.
- Rows 5 – 17: Rep Row 4.
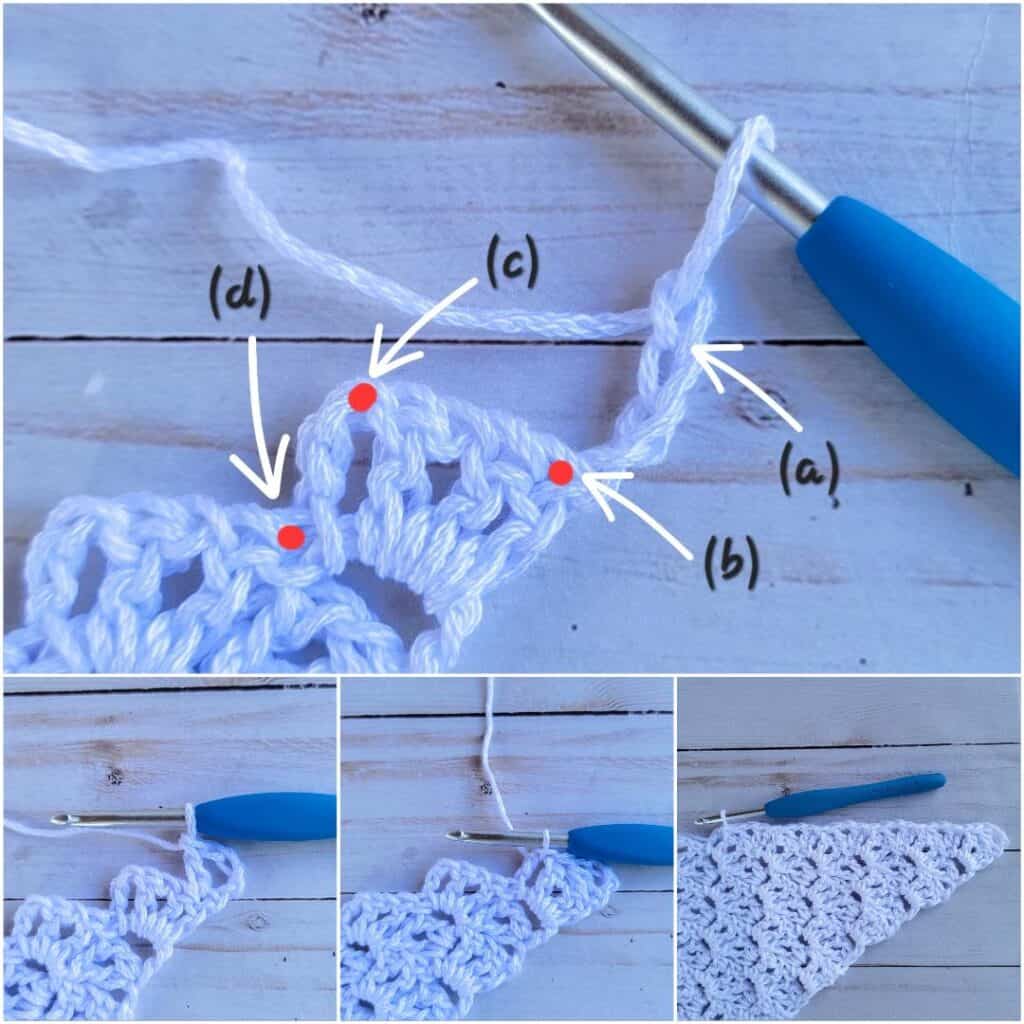
- Row 18: Please refer to the photos below. (a) Ch4 (count as 1DC + ch-1-sp), (b) 1DC in 1st st, *(c) slst into top of next ch-3-sp, (d) V-st in next st; rep from * to end of row and turn.
- Row 19: Ch1, 1SC in each st to the end of the row and turn. 71 sts
- Row 20: Ch4 (count as 1DC + ch-1-sp), *sk 1 st, ch1, 1DC in next st; Rep from * to end of row.
- Row 21: (Right Side) Rep Row 19. Fasten off and weave in all ends.
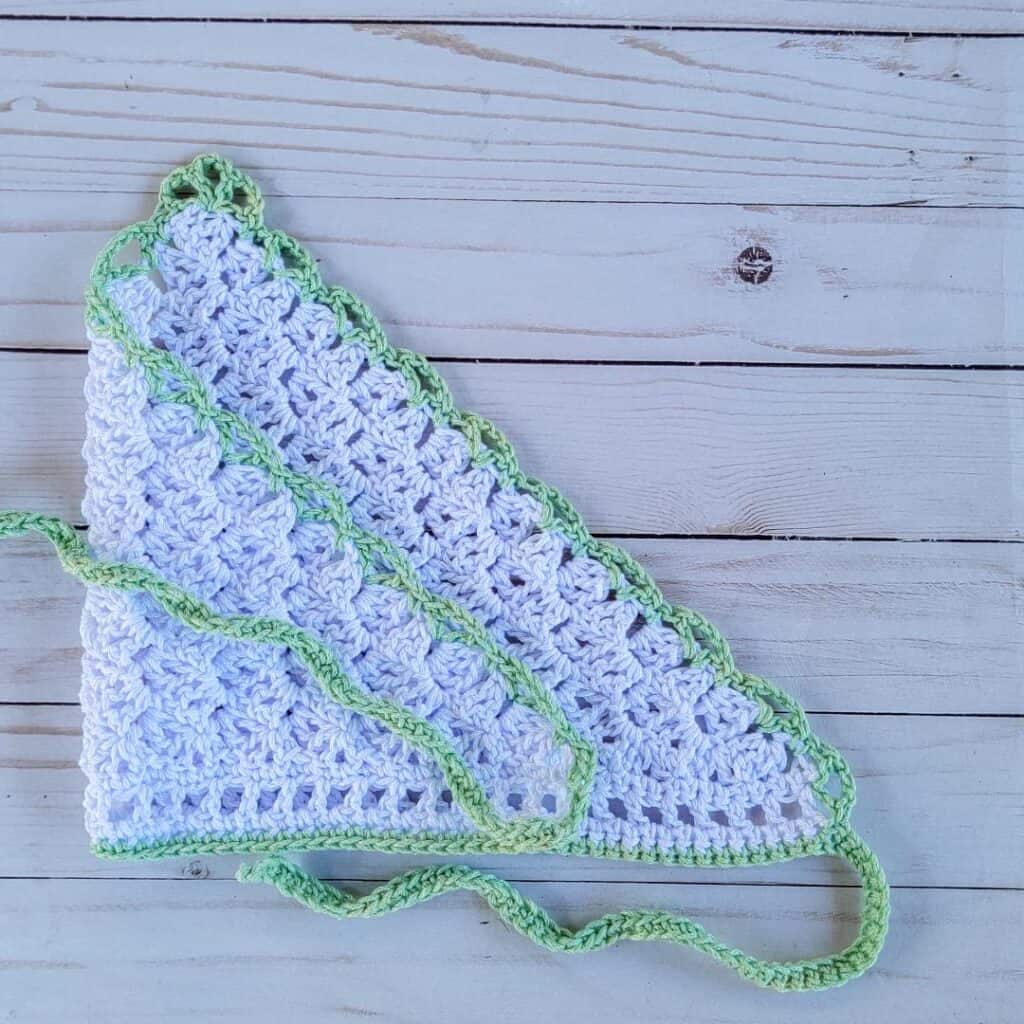
FIRST BORDER:
- Step 1: With green yarn (or your chosen color), ch50. Attach the chs just made to the triangle base (right side facing out) by working 1SC into the 1st st of Row 21 and in each stitch to the end of the row.
- Step 2: Ch51, 1SC in 2nd ch from hook and in each ch to end. Do not fasten off. Continue working around the sides of the triangle.
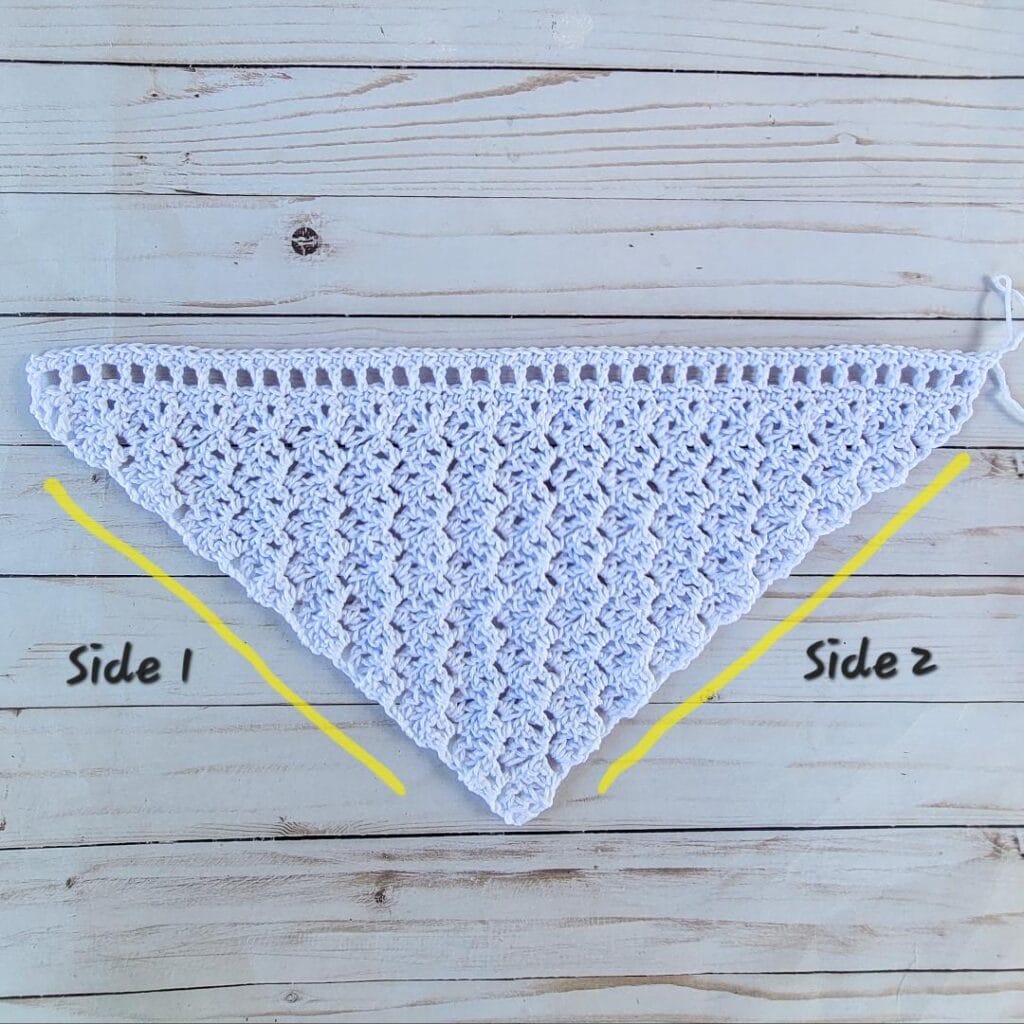
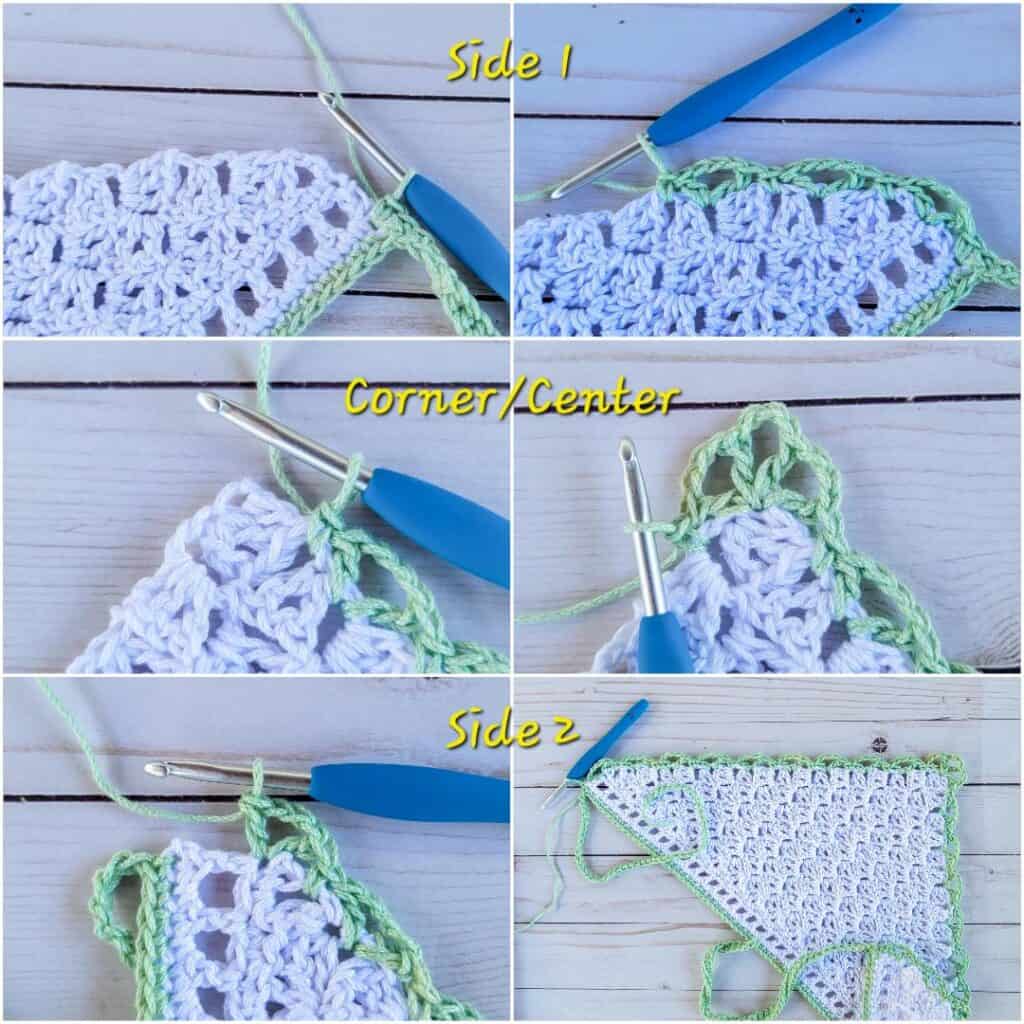
- Step 3: Side 1 of the Triangle. 1SC into the last st of Row 21 (the last st of white yarn), *sk next ch-sp, (1DC, ch3, 1DC) in next st, sk next ch-sp, 1SC in next ch-sp; Rep from * to last ch-sp (DC of first block of Row 1), sk next ch-sp, (1DC, ch3) 3 times into last st (the corner/center of the bandana), add another 1DC into the same st. Side 2 of the Triangle. **sk next ch-sp, 1SC in next ch-sp, sk next ch-sp, (1DC, ch3, 1DC) in next st; rep from ** to last st of Row 21, sk next ch-sp and 1SC in last st of Row 21.
- Step 4: 1SC in each ch to end. Fasten off and weave in all ends.
SECOND BORDER:
- Step 1: Side 1 of the Triangle. Attach yellow yarn (or your chosen color) into the 1st st, *1SC in 1st st, ch3, sk 1 st, PC in ch-3-sp, ch3 sk 1 st, *1SC in next st, ch3, sk 1 st, PC in ch-3-sp, ch3, sk 1 st; Rep from * to last SC st

- Step 2: Corner/Center. 1SC in next st, sk 1 st, [ch3, PC in ch-3-sp, ch3, 1SC in next st] 2 times, ch3, PC in next ch-3-sp, ch3, sk 1 sts
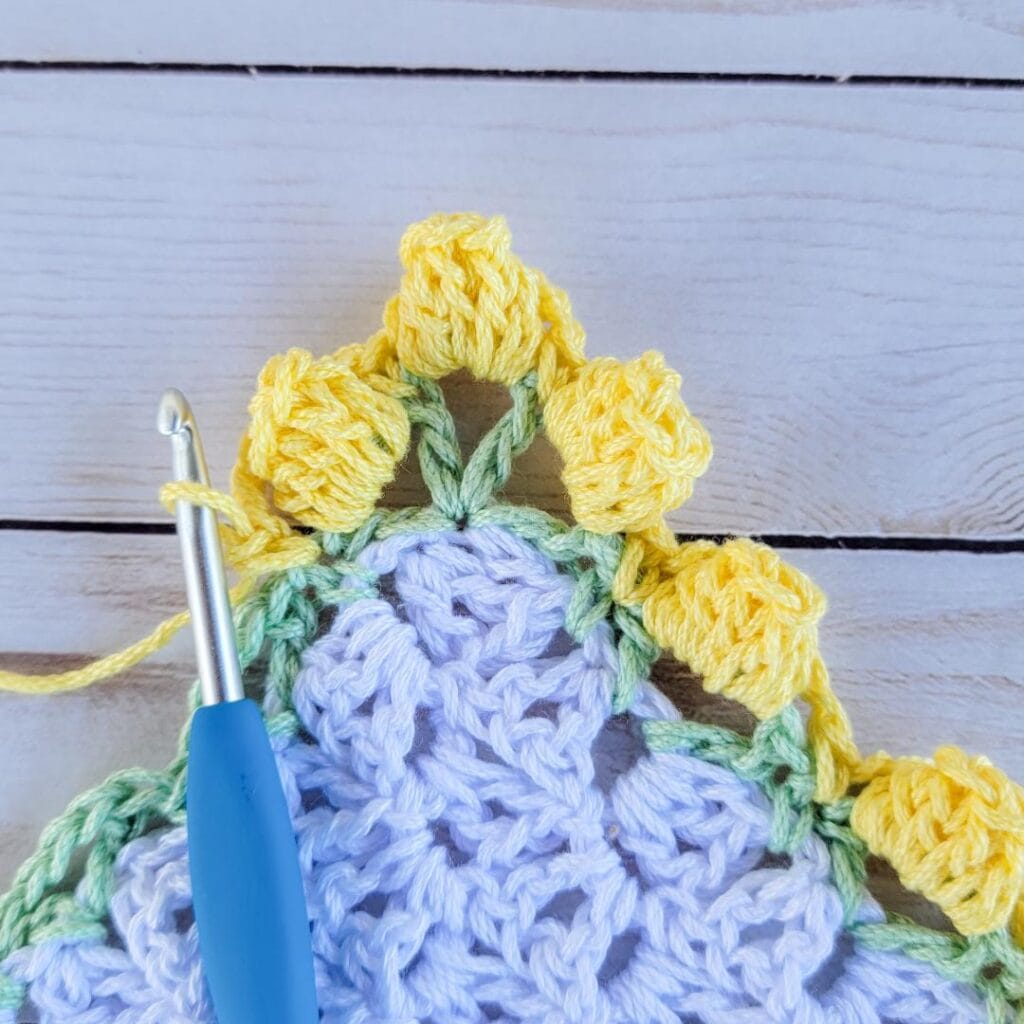
- Step 3: Side 2 of the Triangle. 1SC in next st, **ch3, sk 1 st, PC in ch-3-sp, ch3, sk 1 st, 1SC in next st; Rep from ** to end of side 2. Slst in the next st. Fasten off and weave in all ends. Once this is finished, you are all done!!!
I would love to see your version of this bandana! Please tag me @stringsandcuddles and use these hashtags to share: #stringsandcuddles #stringsandcuddlesdesigns
Also, please don’t hesitate to contact me with questions regarding this pattern. You may also reach out to me on Instagram (@stringsandcuddles)!
If you want to keep up with me, Elisa, on social media for other fun projects, follow me on social media: Instagram | Pinterest | Facebook | Blog | Ravelry
If you want to keep up with all things Clover, follow us on: Facebook | Twitter | Instagram | Pinterest | YouTube | Ravelry