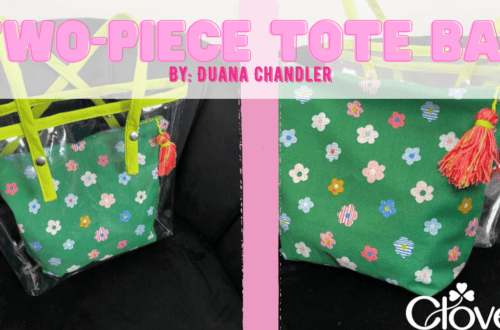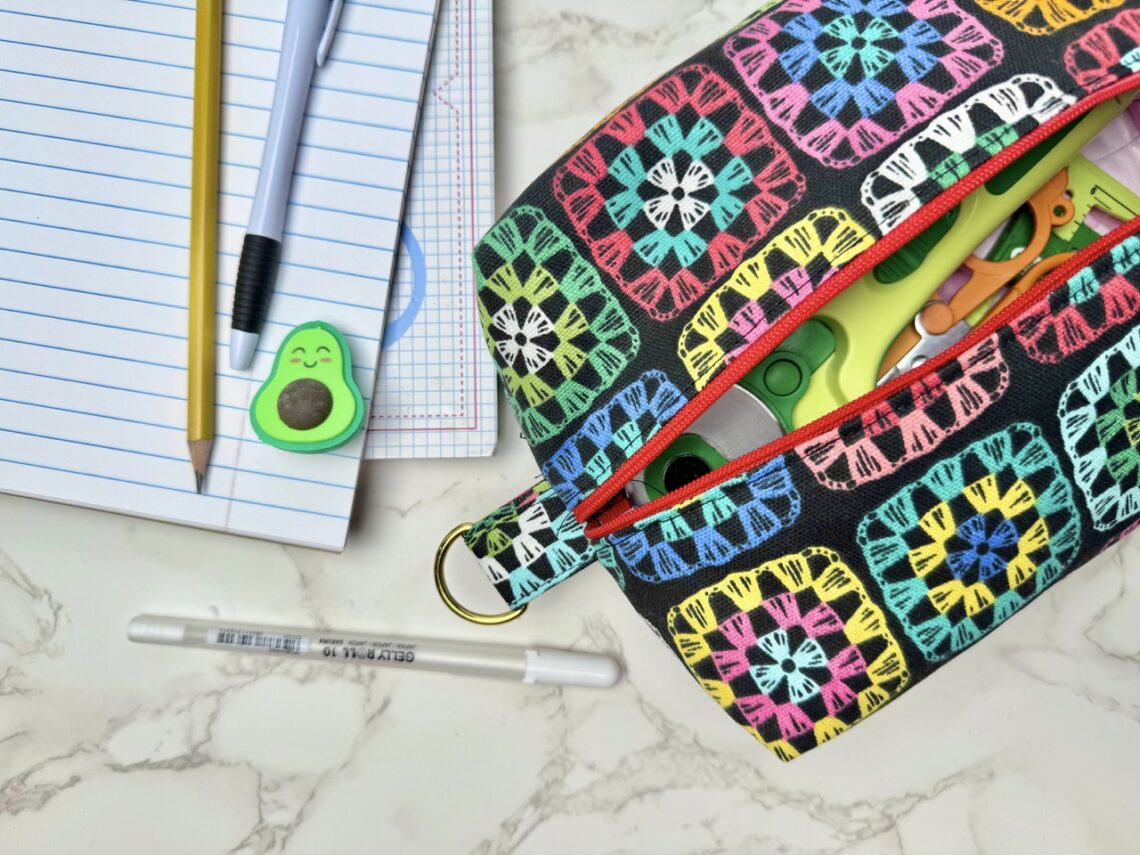
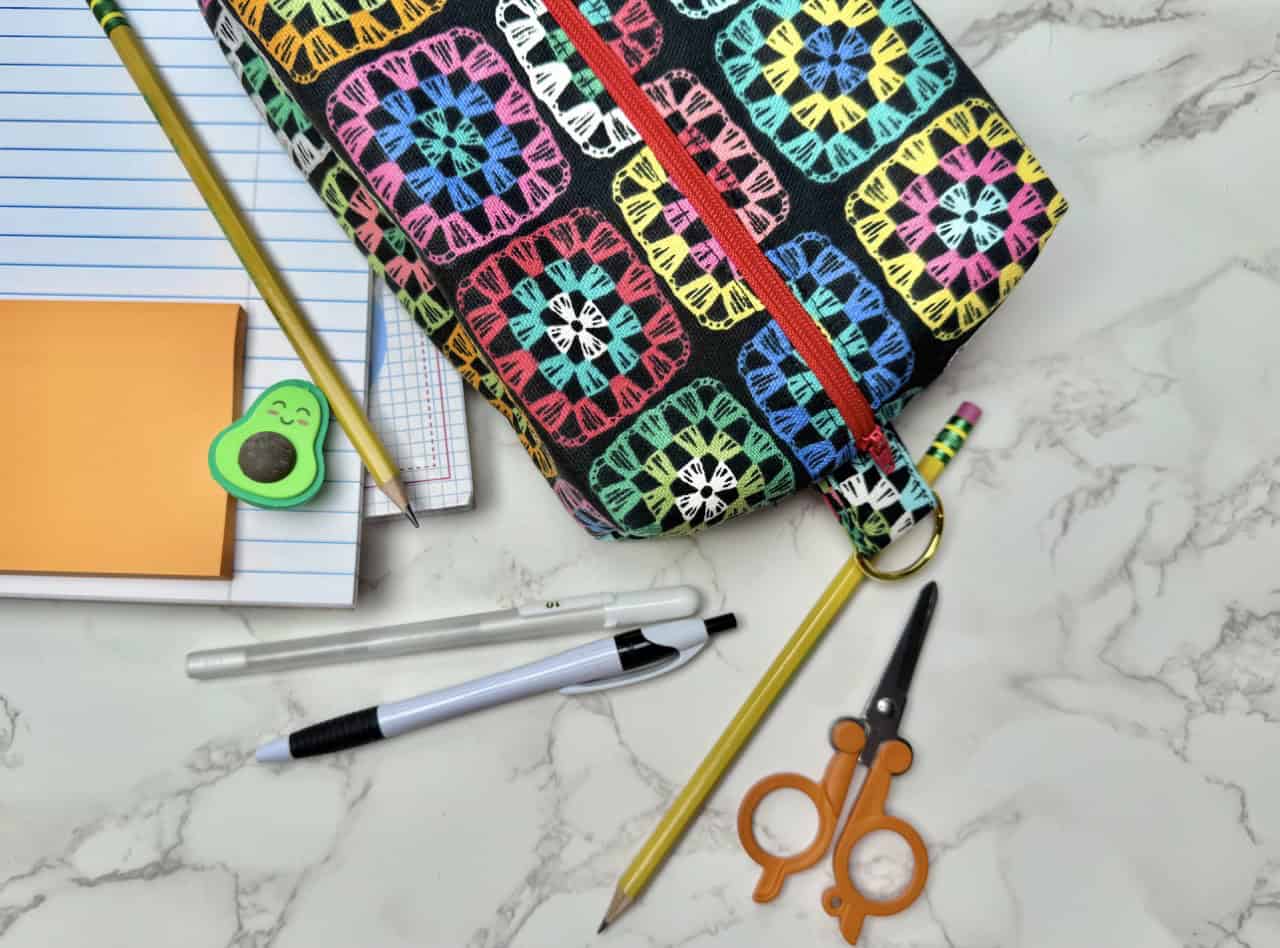
The Everyday Essentials Bag *sewing pattern!*
Back-to-school season is the perfect time to refresh the item you use for your everyday carry, and nothing is more practical than this project! The “Everyday Essentials Bag” works as a supplies pouch or a bag for your daily essentials. Use it with the removable straps to carry your phone, wallet, and on-the-go essentials, or remove the straps and slip it into your backpack as a pencil case for school supplies. It’s also the perfect handmade gift for a friend heading off to college or a busy teacher who needs to stay organized. In this blog tutorial, I’ll walk you through how to sew your own bag, which will be ready for whatever your day holds!
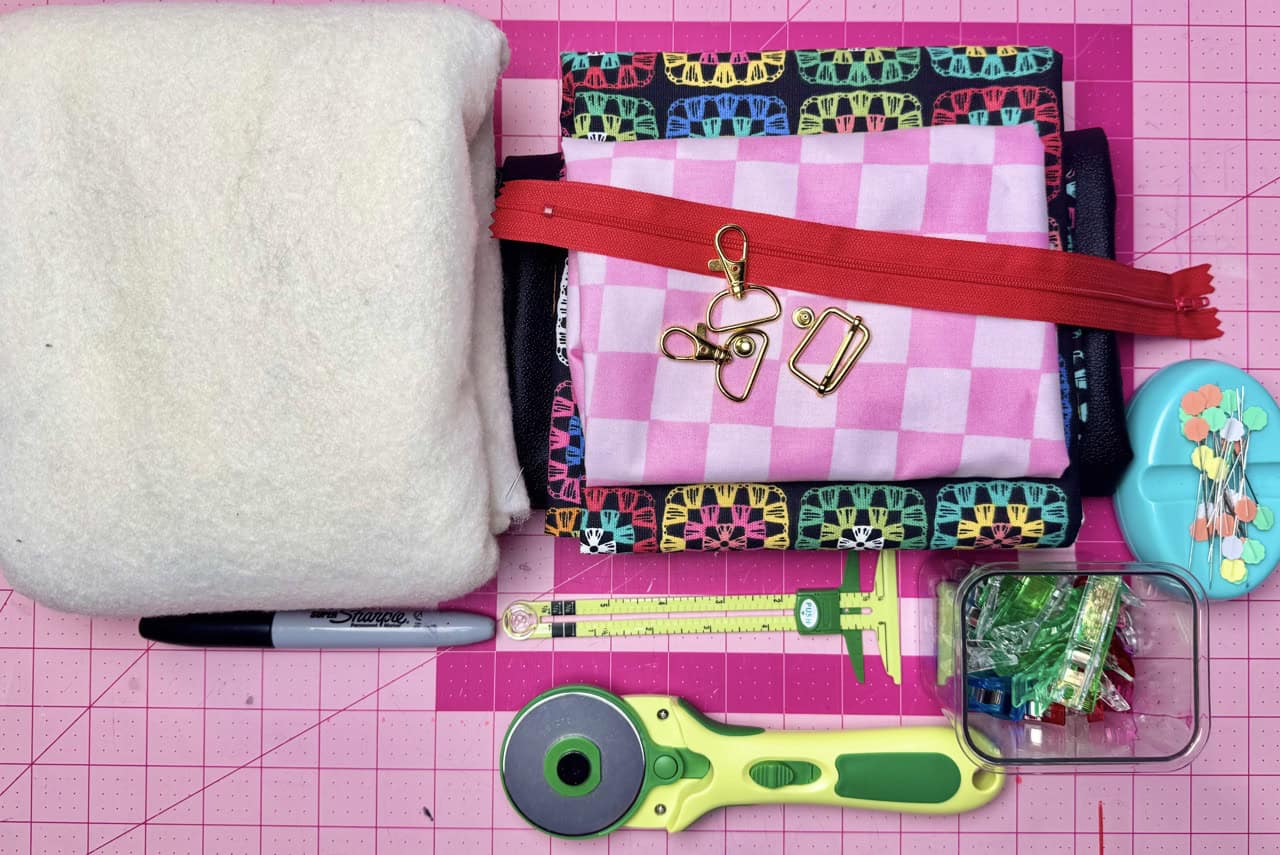
MATERIALS:
- Clover Rotary Cutter (60 mm)
- Clover Flower Pins
- Clover Wonder Clips
- Clover 5-in-1 sliding gauge
- 1 fat quarter for bag body and tabs
- 1 fat quarter for bag lining
- ¼ yard batting
- 1 yard contrast fabric for straps/handle
- 12” exposed nylon zipper
- two 1” swivel hooks
- one 1” adjustable slider
- two D-rings
- pattern used in this tutorial HERE
INSTRUCTIONS:
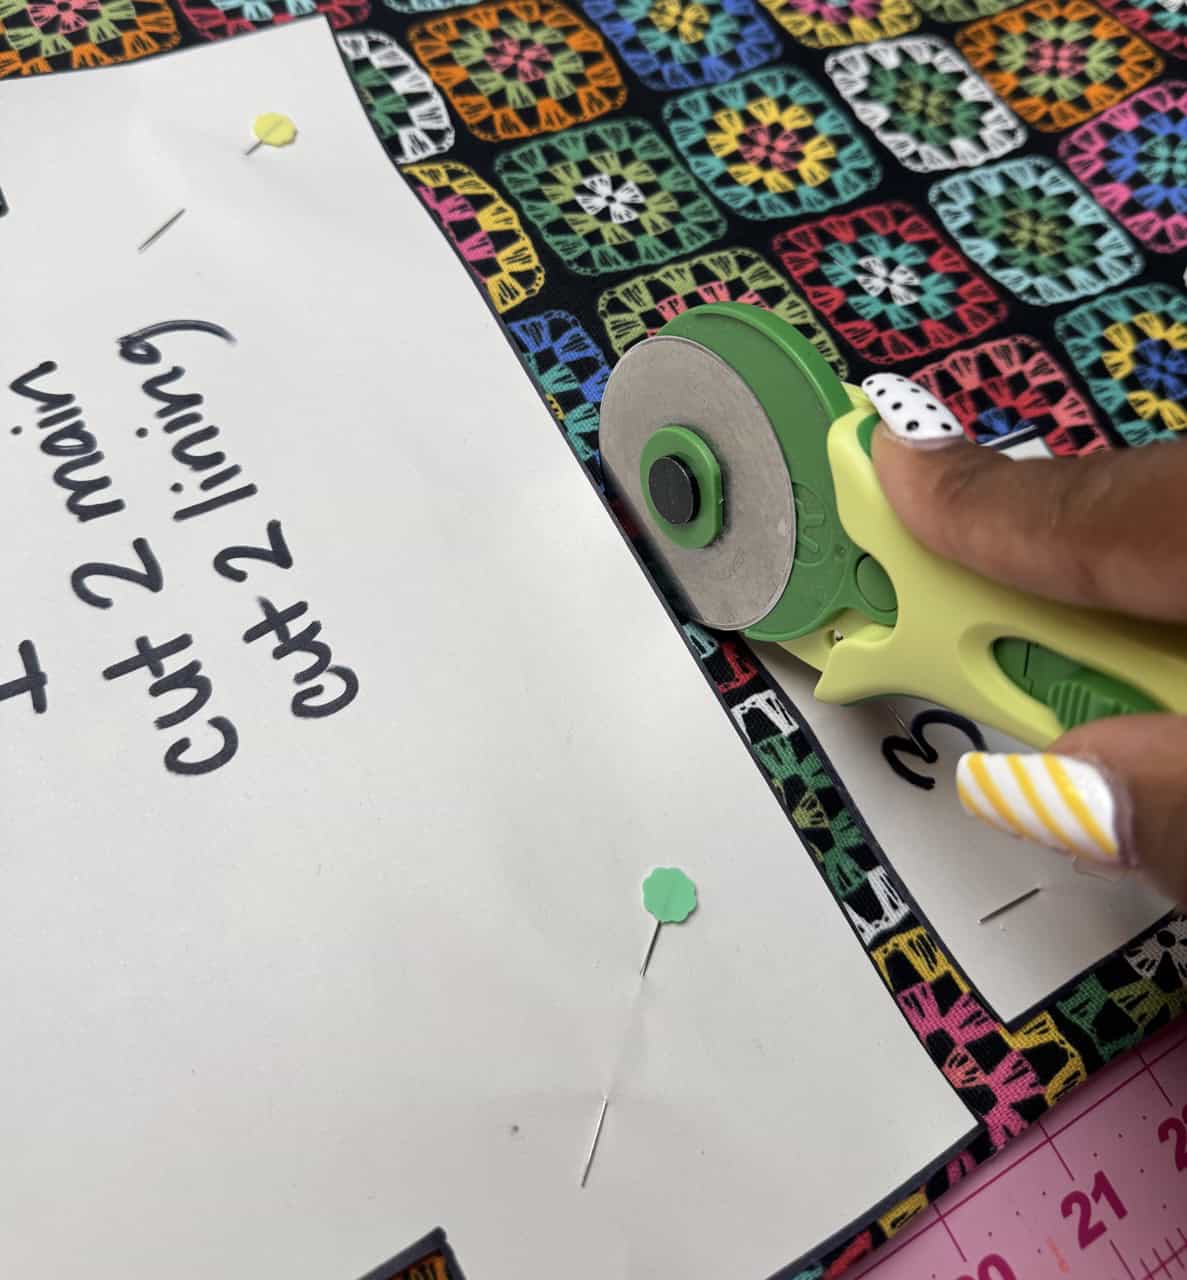
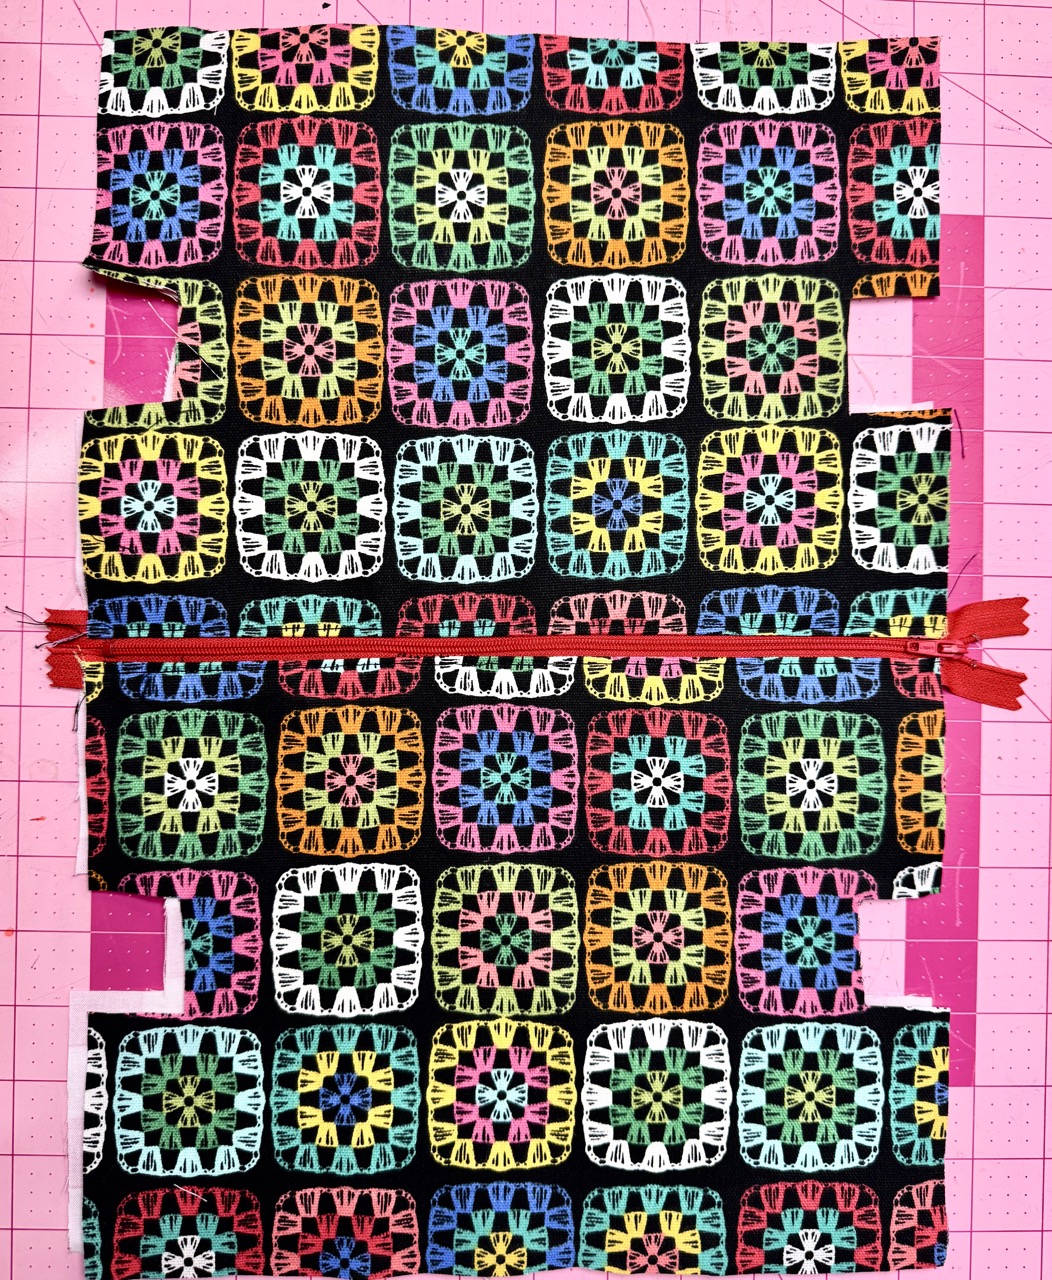
1) I created the pattern using the Clover 5-in-1 Sliding Gauge. It is perfect for adding seam allowance onto the pattern. Place pattern on fabric and hold in place using Clover Flower Pins. Cut the pattern out using Clover Rotary Cutter (60 mm).
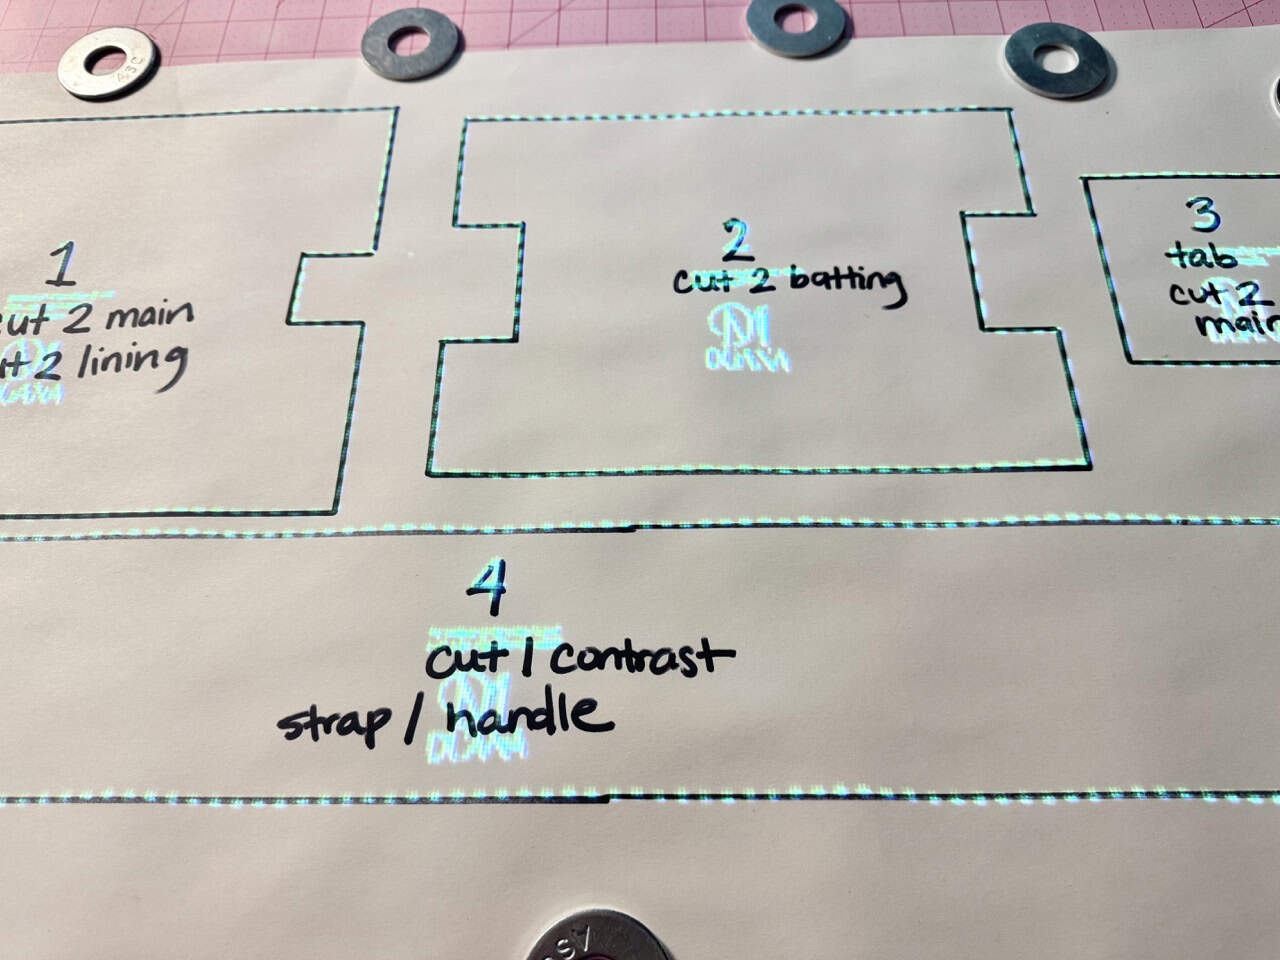
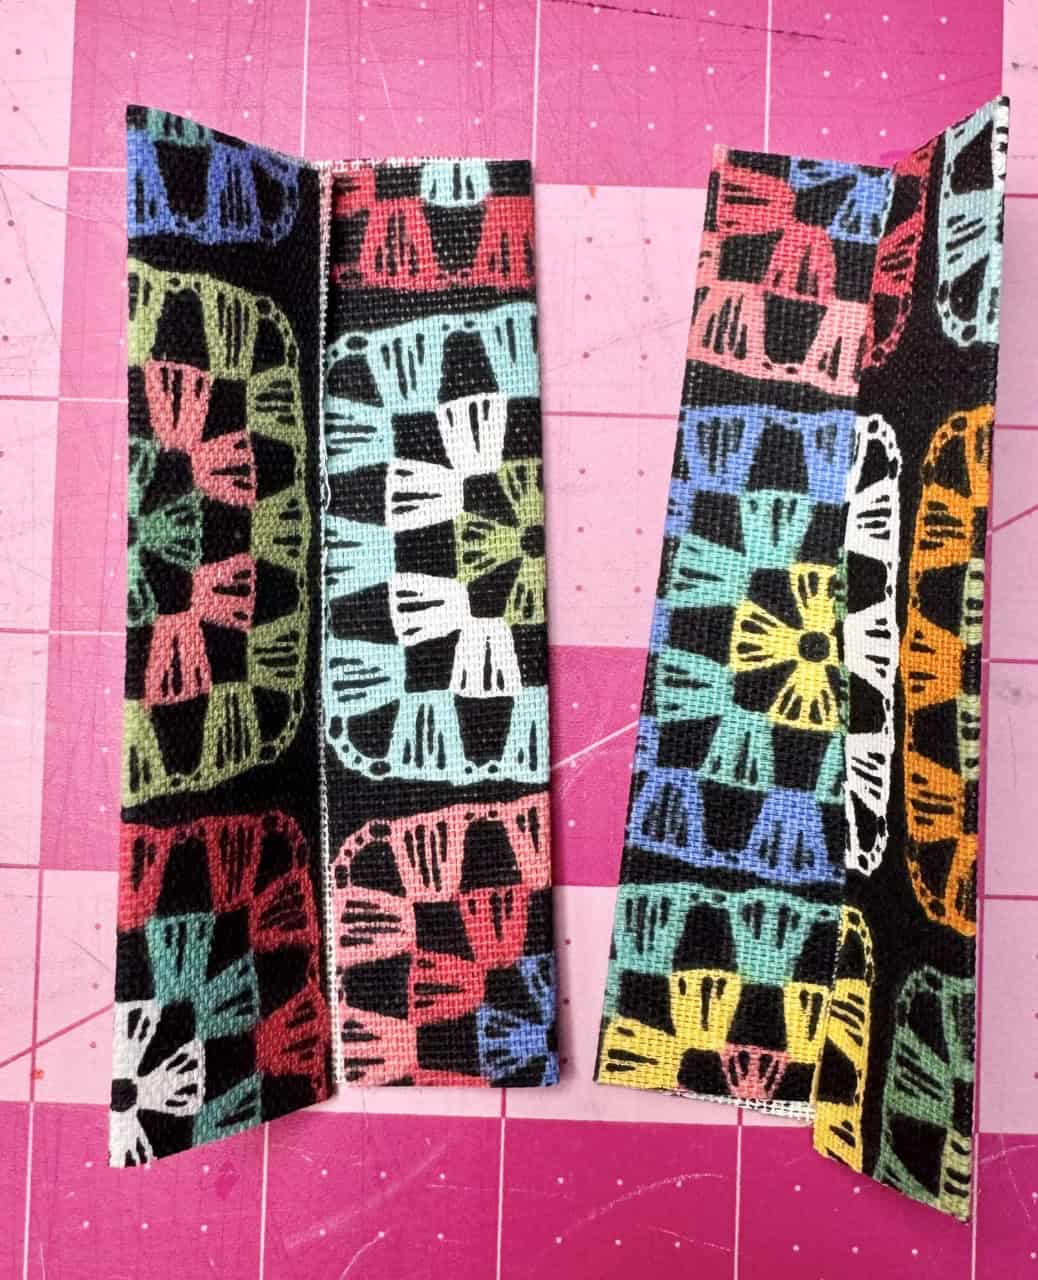
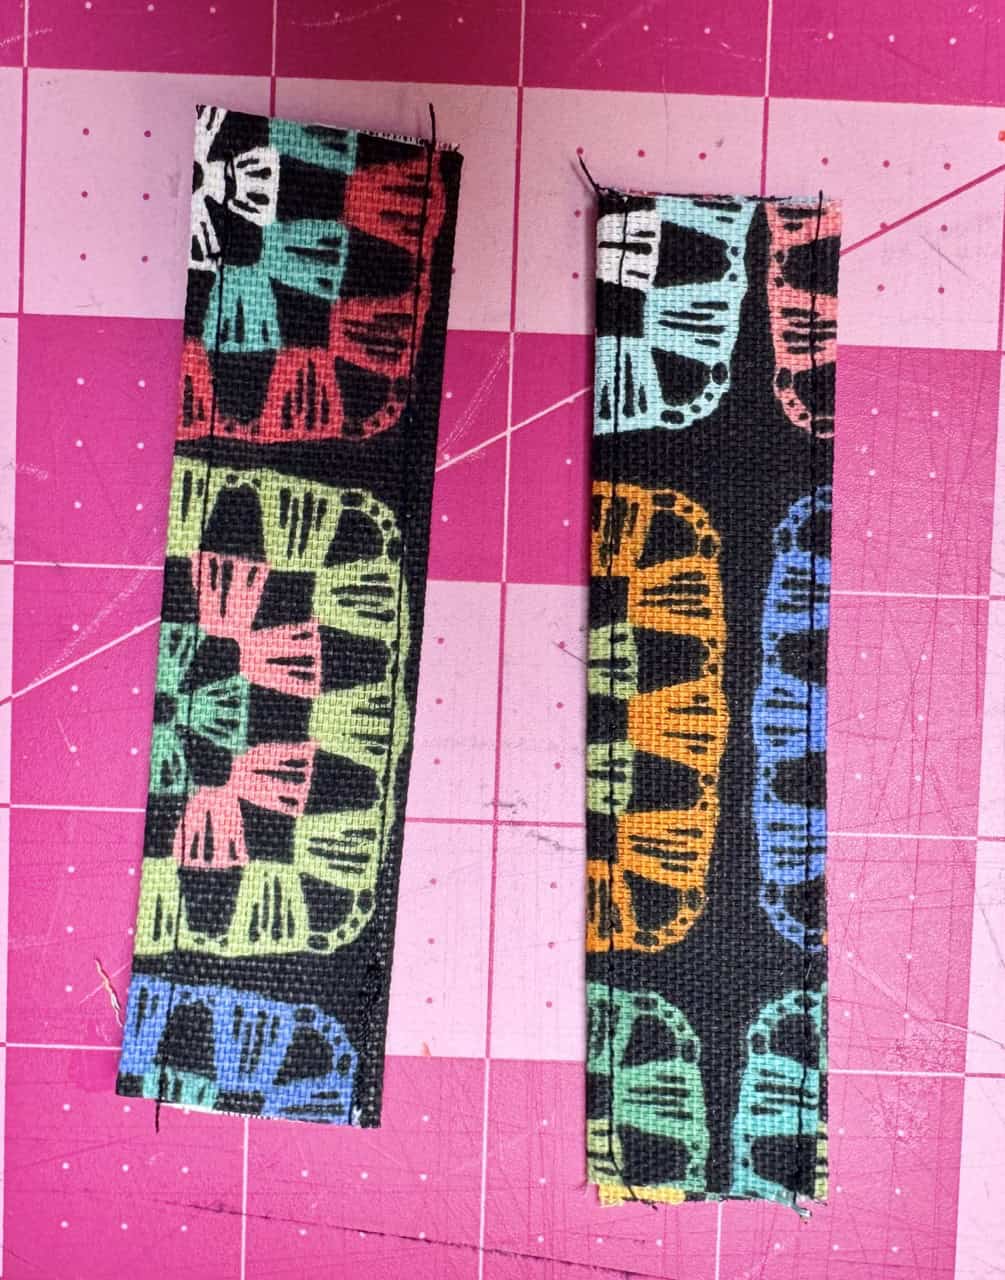
2) Make the tabs. Fold raw edges of the tabs (3) in by 1 inch, press, then fold in half again. Press and topstitch close to the folds. Finished tabs will measure 1 in x 4 in.
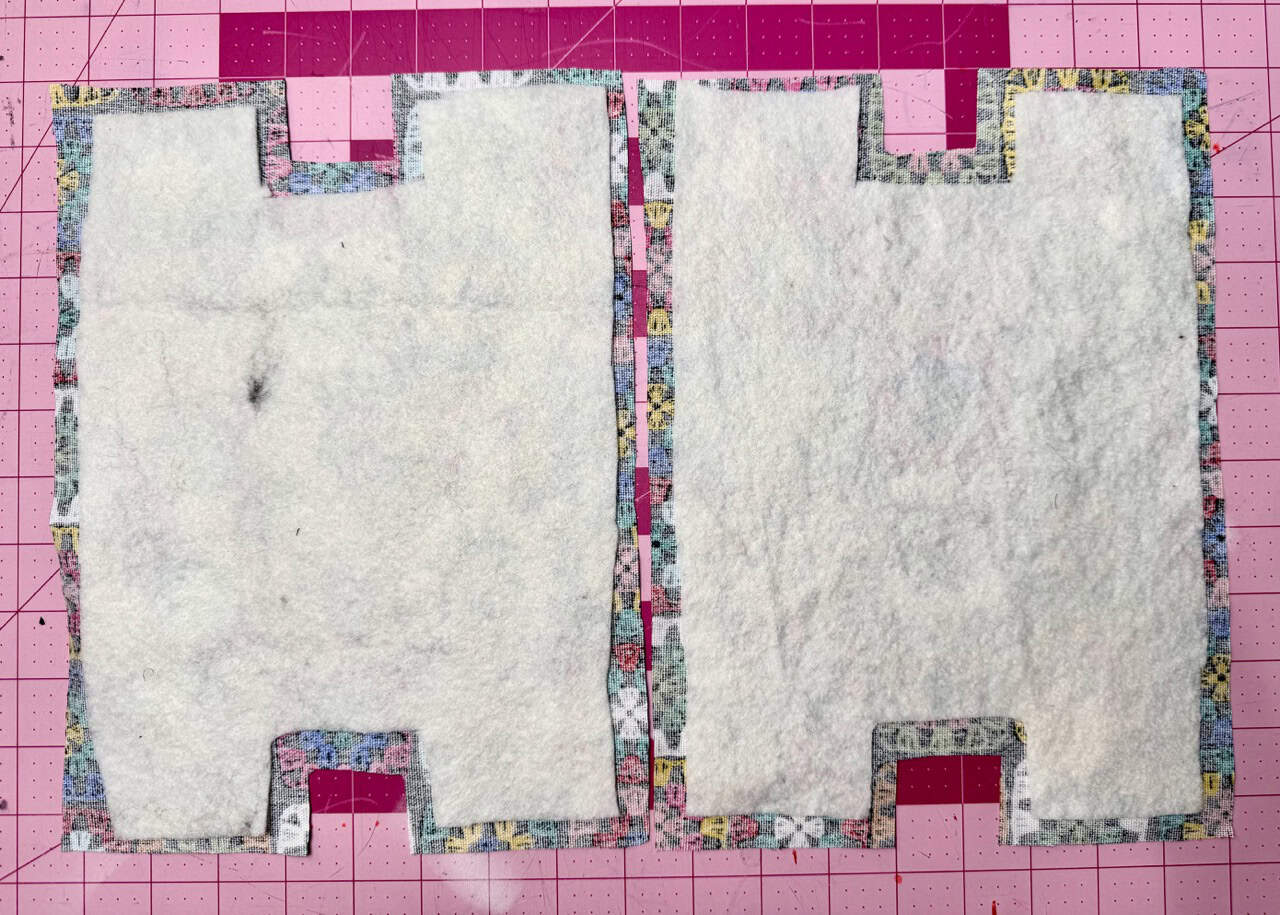
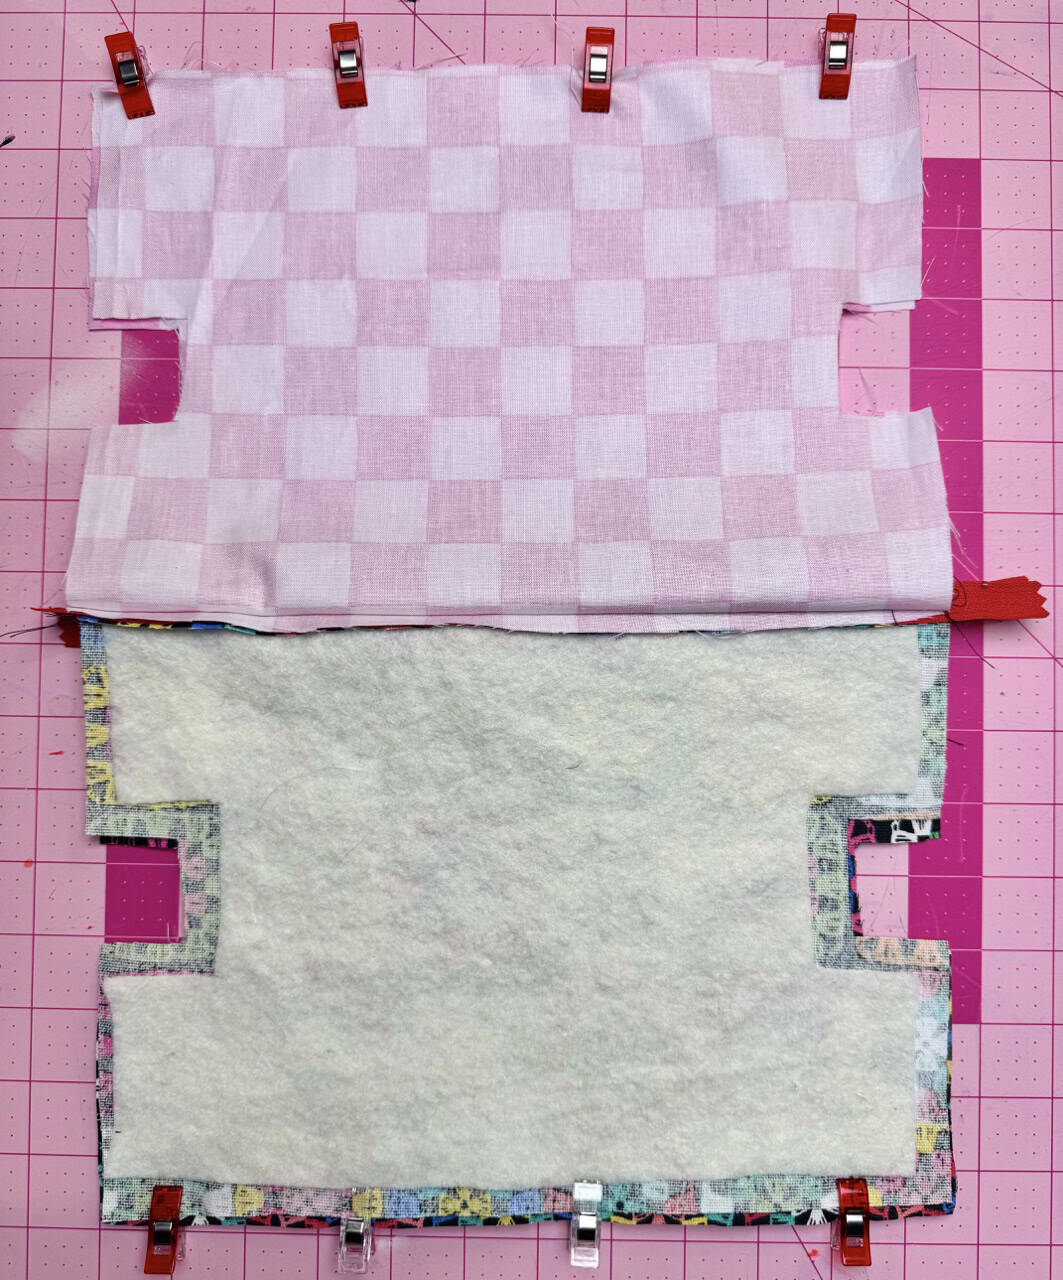
3) Prepare the body. Apply batting (2) to the bag body (1) pieces, using fusible adhesive to hold it in place.
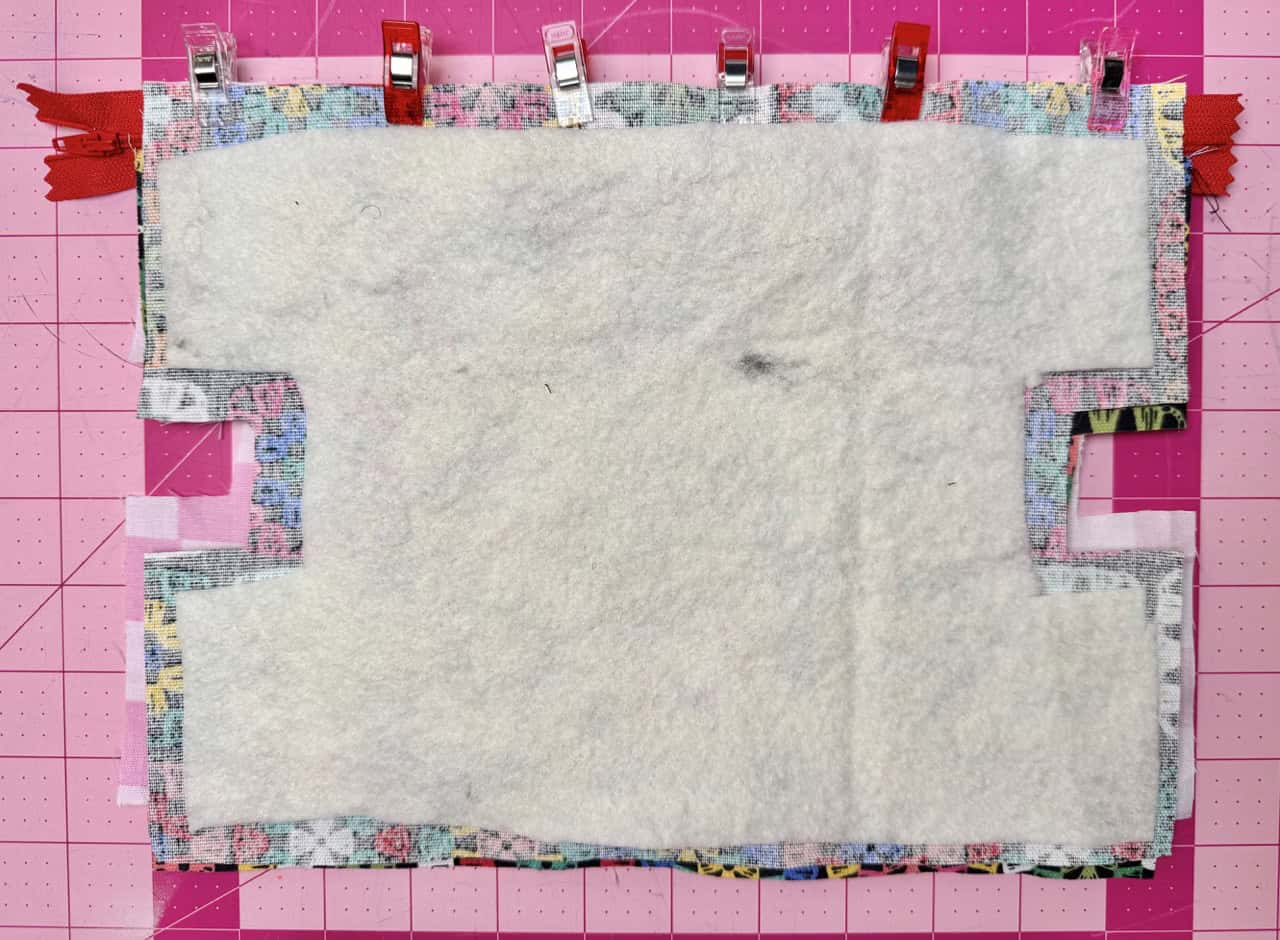
4) Install zipper. Layer outer fabric right side up with the zipper face down and the lining face down. Repeat on the other side of the zipper. Use Clover Wonder Clips to hold it in place. Sew with a zipper foot. Topstitch both sides of the zipper.

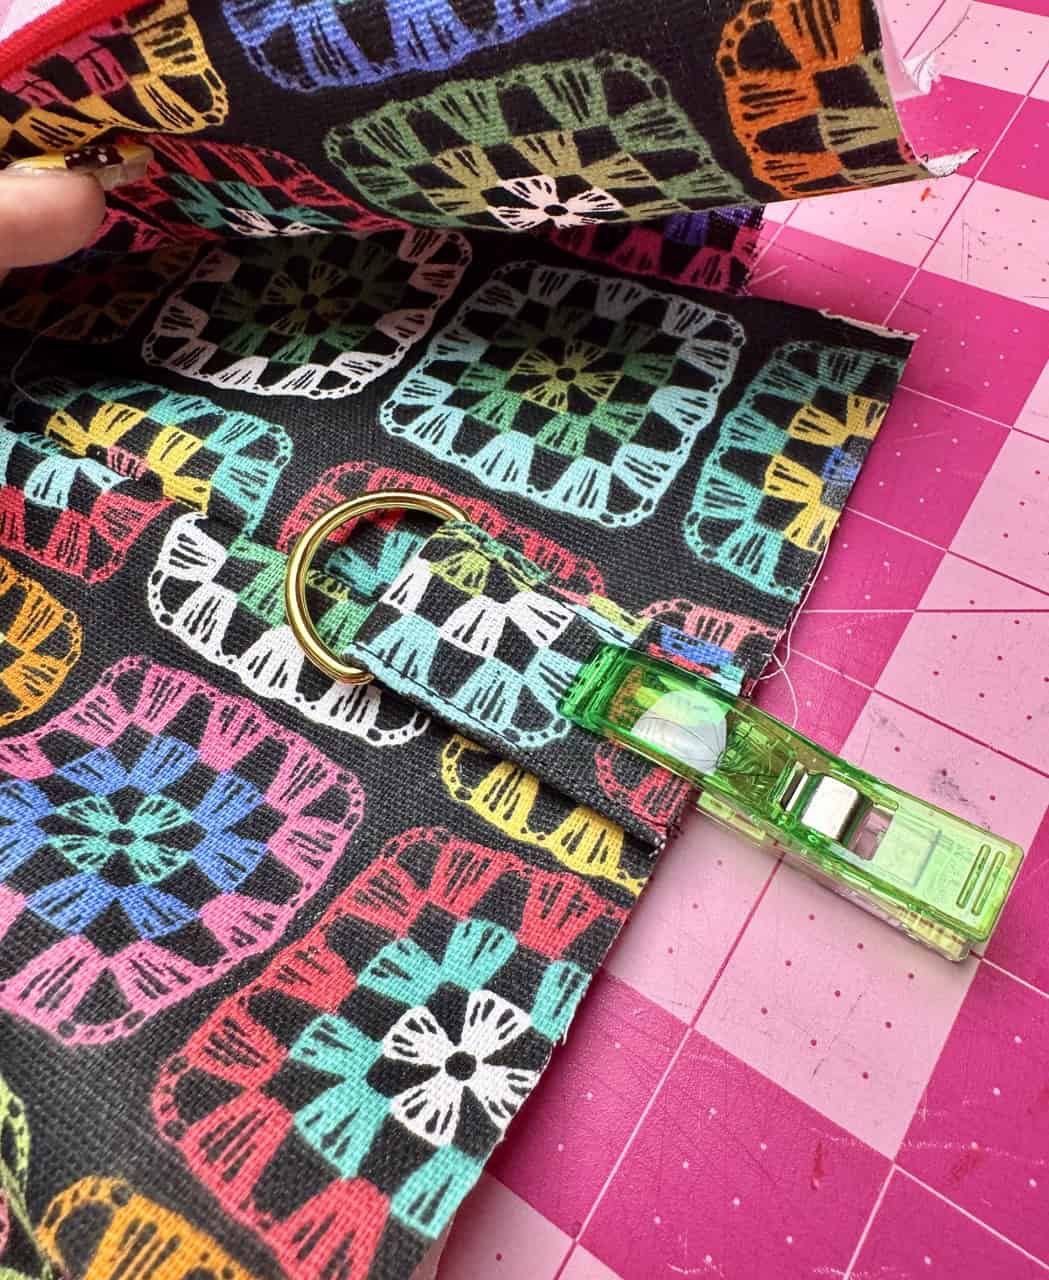
5) Sew sides: Unzip halfway. Place outer pieces right sides together and lining right sides together. Hold in place using Clover Wonder Clips. Sew each long side with a ¼” seam allowance. Turn bag and lining right sides out. Attach tabs with D-rings to both ends of the bag and baste in place with a 1/2” seam allowance. Pin to the bottom of the zipped end of the bag, centered across the seam with raw edges together and right sides together. Make sure the zipper is unzipped so that you can turn the bag right sides out. Sew ends: Stitch across with a ½” seam allowance, then trim to ¼”. Box corners by opening and flattening corners, sew with a ½” seam allowance, trim to ¼”.
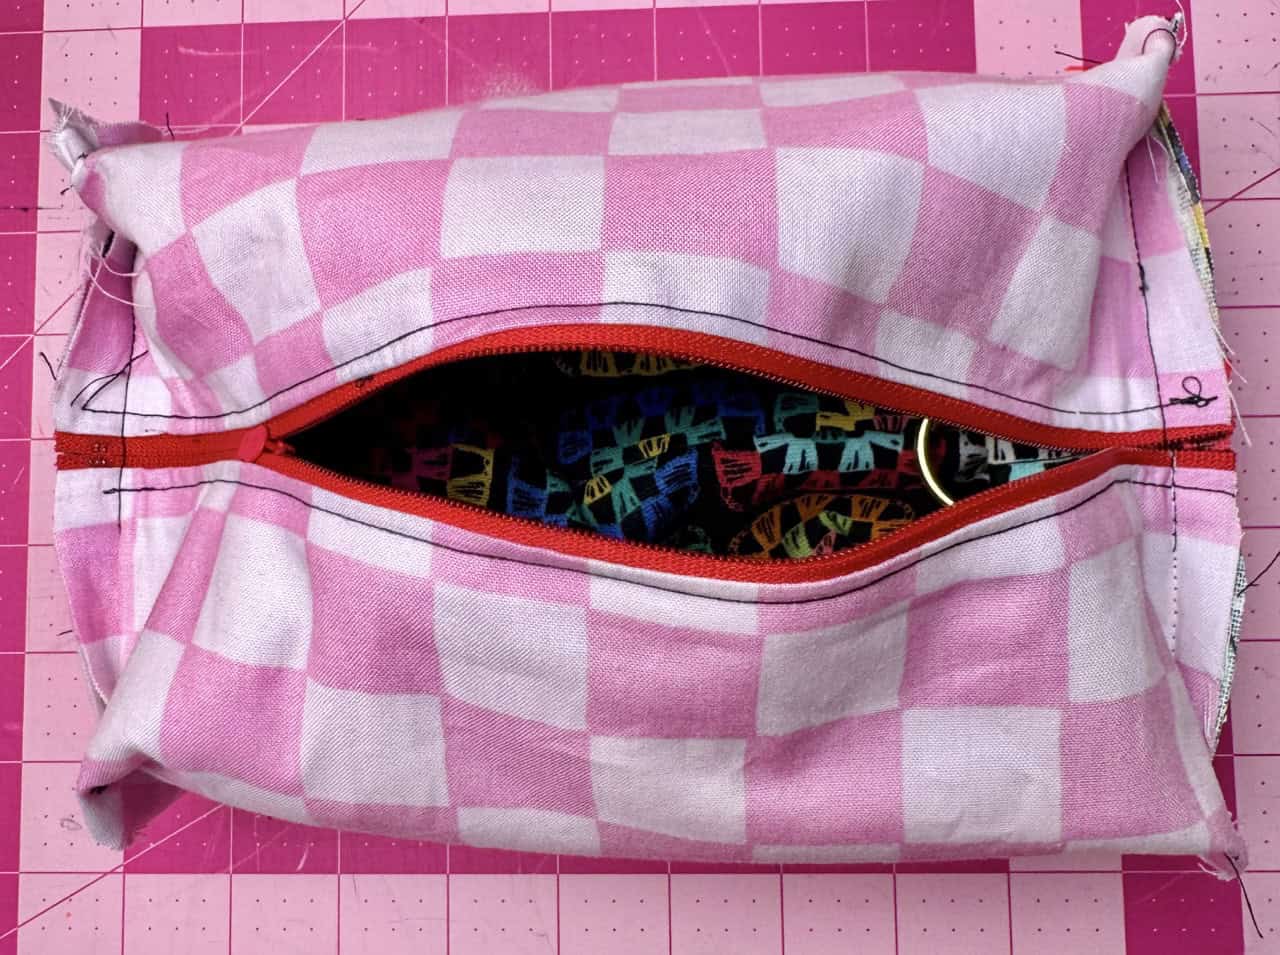
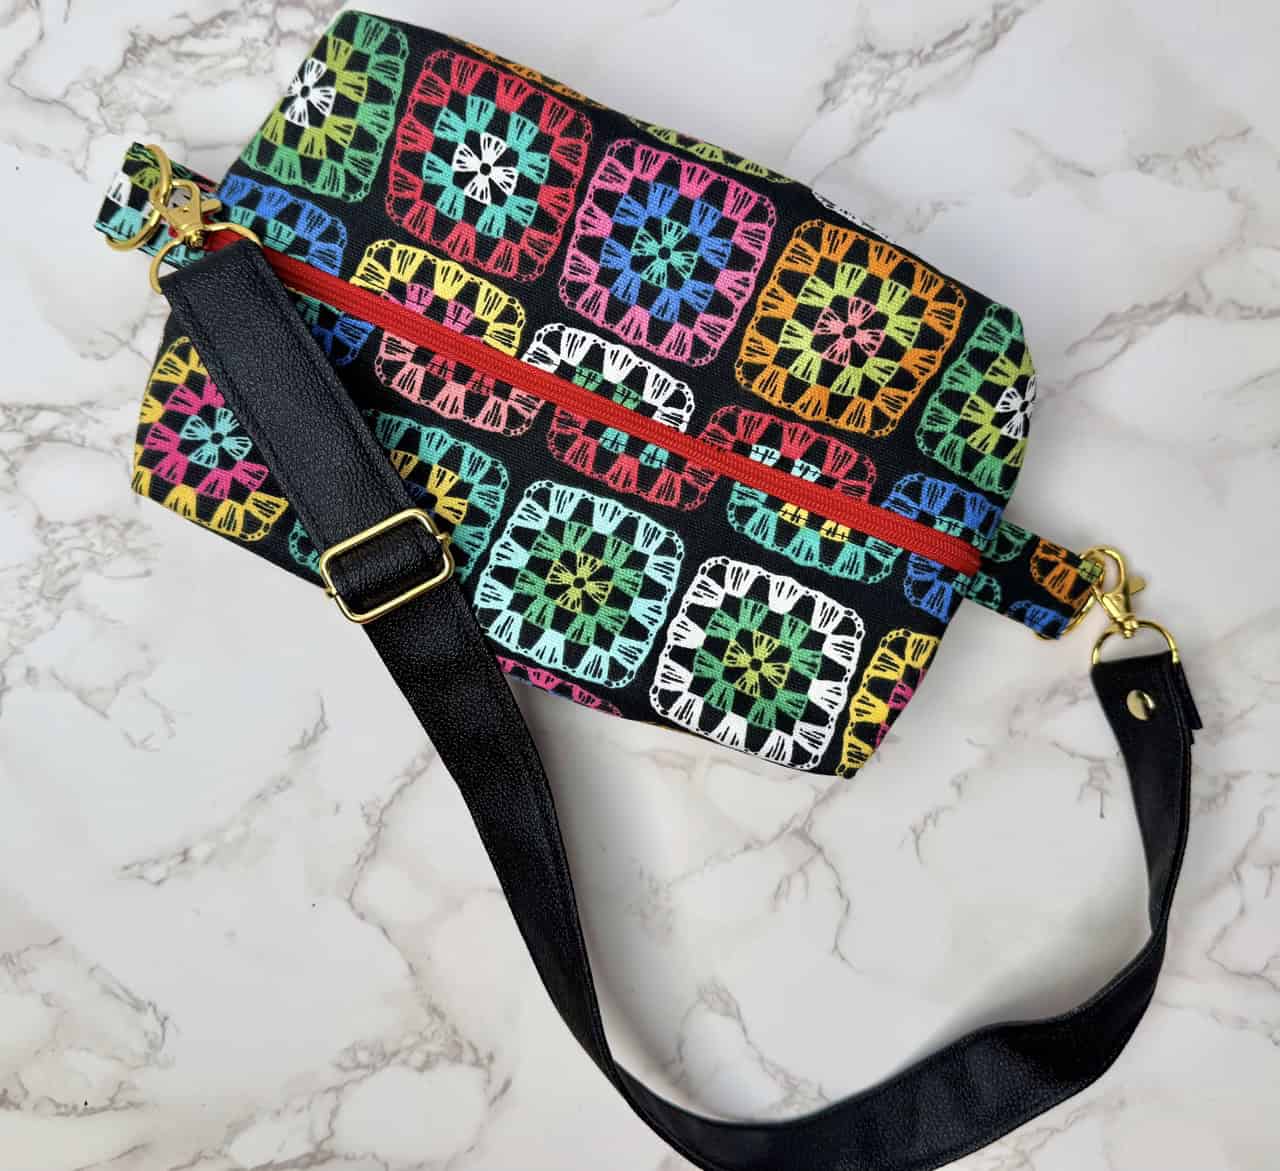
6) When done boxing the corners, this is what your bag will look like. Turn the bag right sides out.
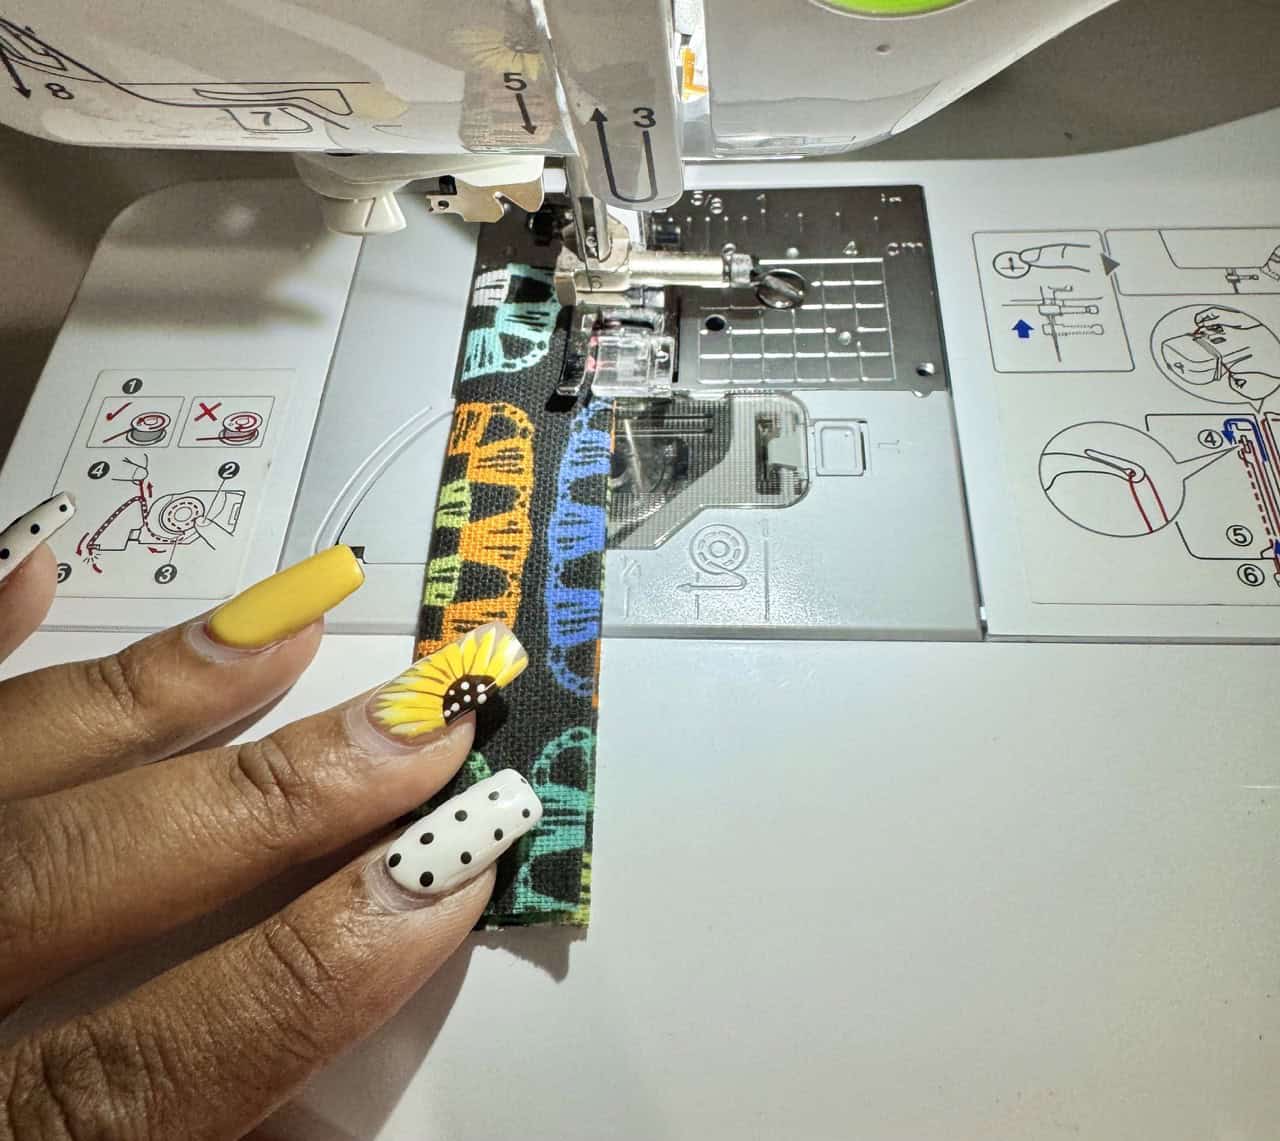
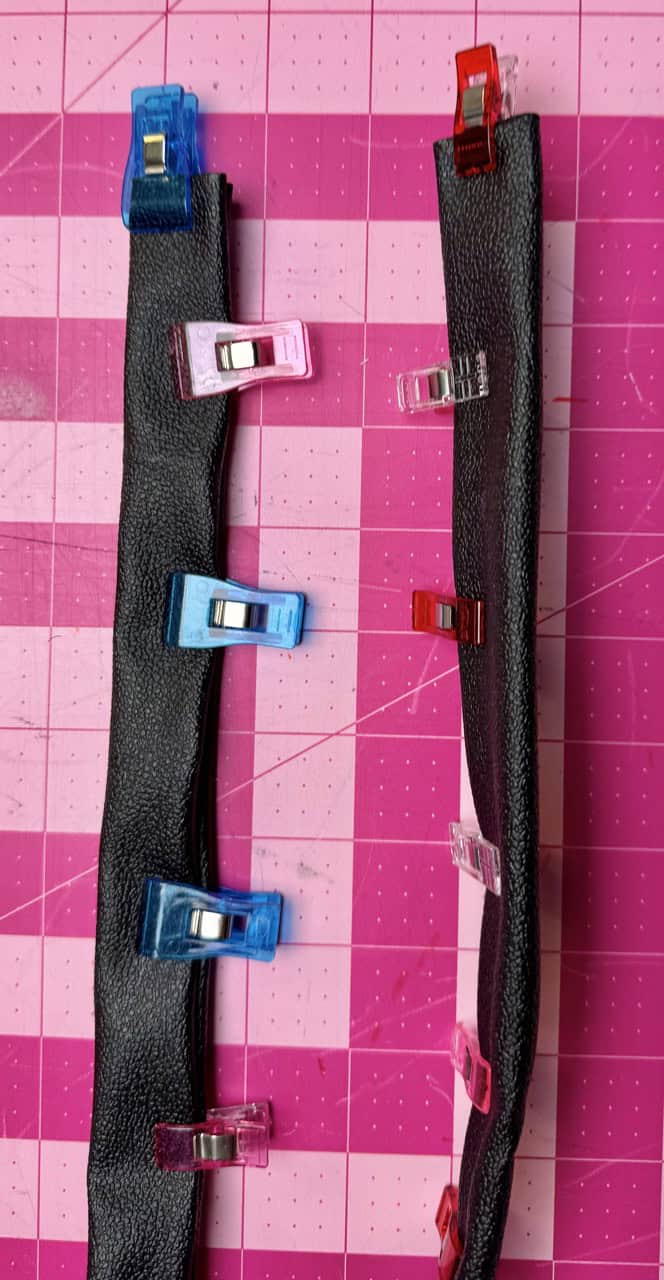
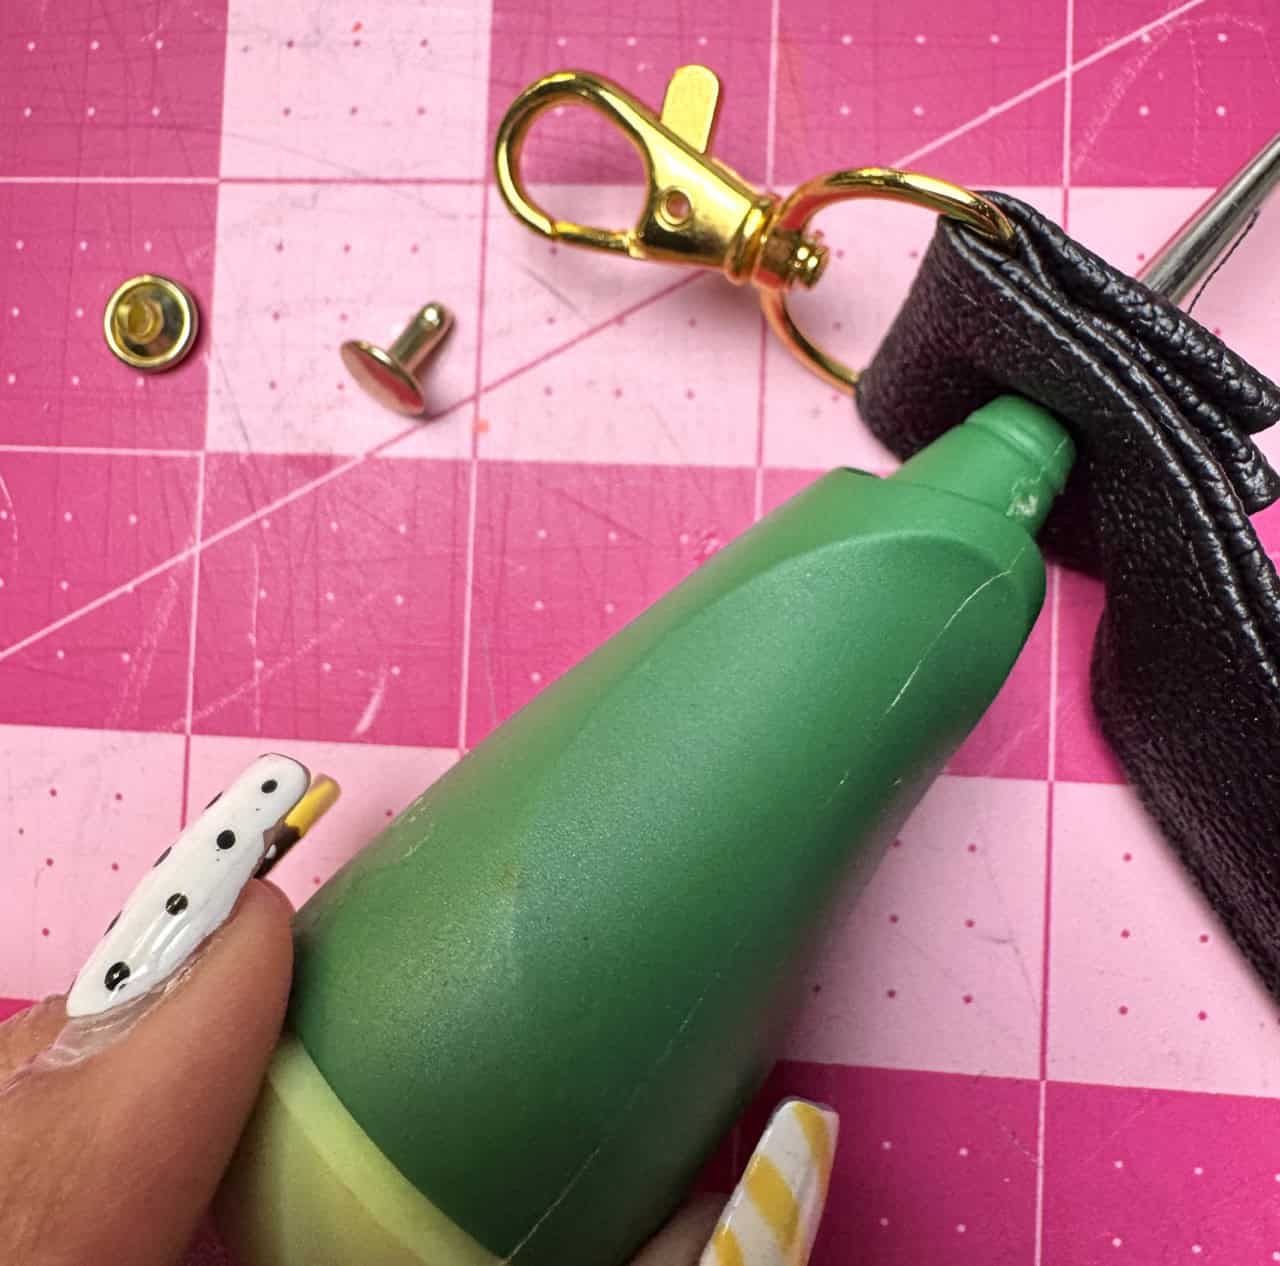
7) Make straps: Fold short ends under ½”. Fold long sides in by 1” and hold in place using the Clover Wonder Clips, then in half. Edgestitch both sides of the strap. Pass the strap through the slider, then through swivel hooks. Fold 1/2” of the end back and secure with stitching or a rivet. I made the holes for the rivet using an awl.

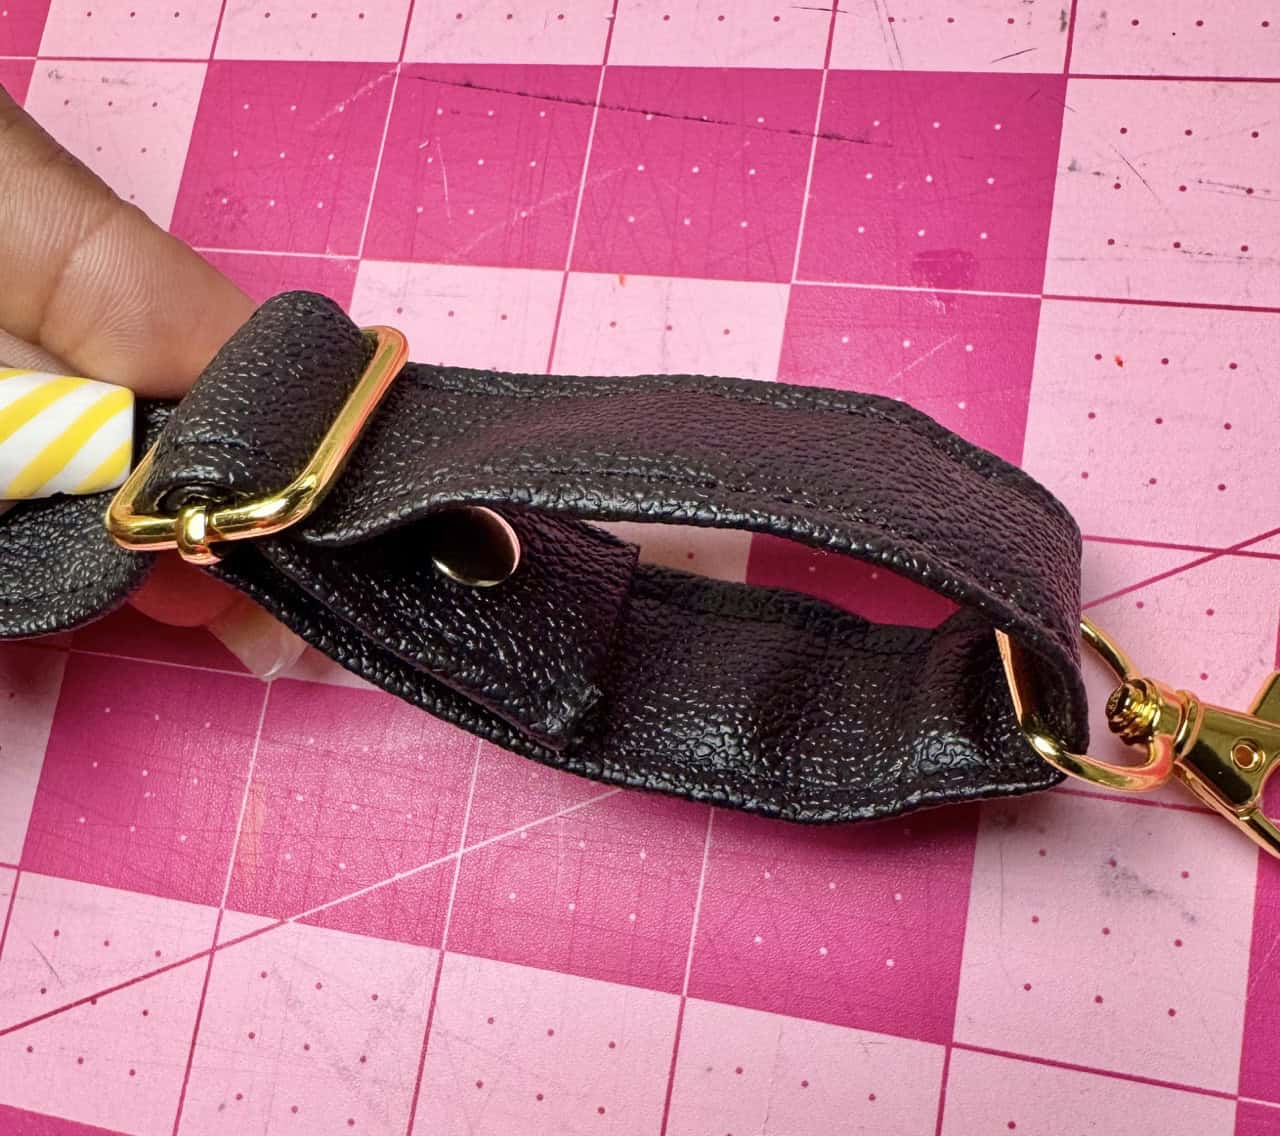
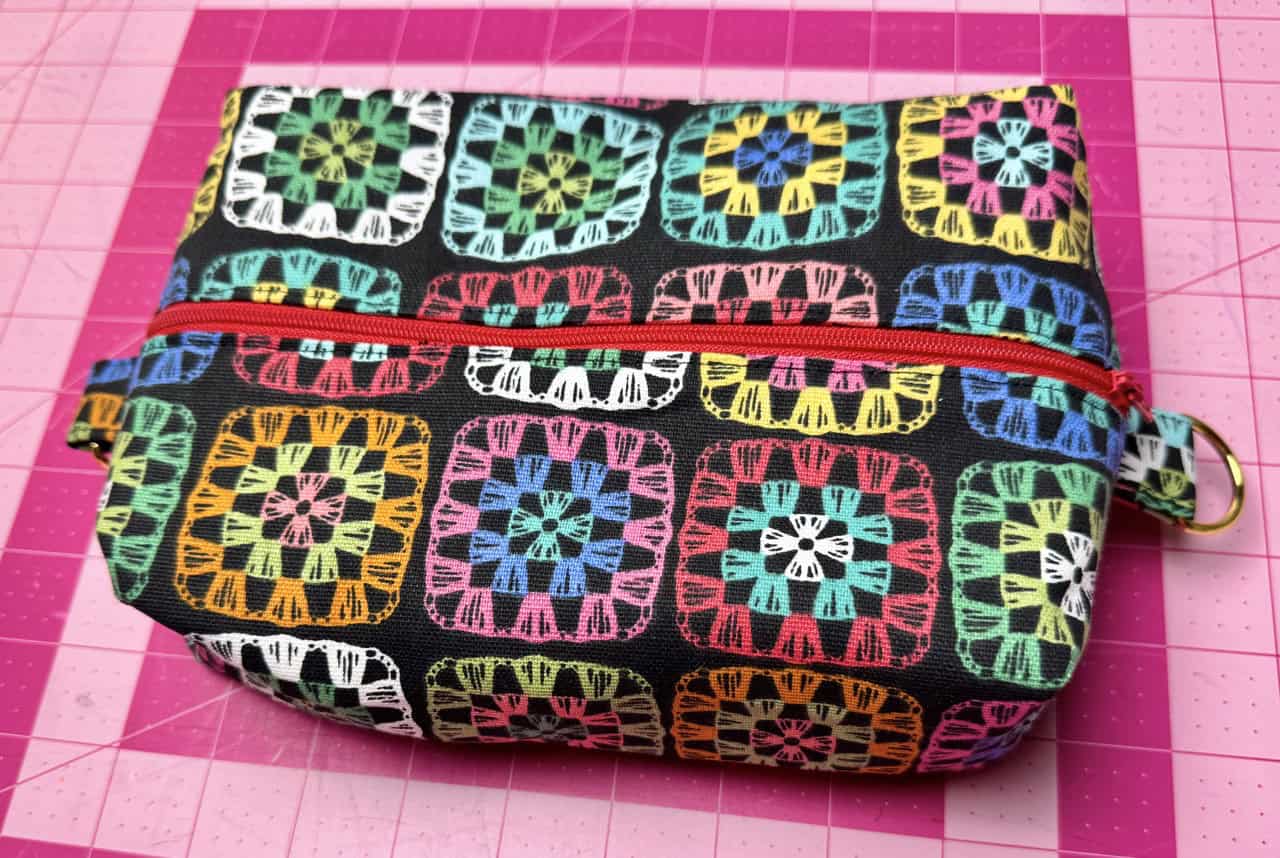
8) Clip swivel hooks to D-rings. Your “Everyday Essentials Bag” is now complete!

Whether worn with straps or used as a pouch, the “Everyday Essentials Bag” is a project you’ll be proud to carry or gift to someone special. Take your time, enjoy the process, and before you know it, you’ll have a handmade bag that’s both stylish and useful every day 🙂 Happy sewing!
If you want to keep up with me, Duana, on social media for other fun projects, follow me on social media: Instagram
If you want to keep up with all things Clover, follow us on: Facebook | Twitter | Instagram | Pinterest | YouTube | Ravelry