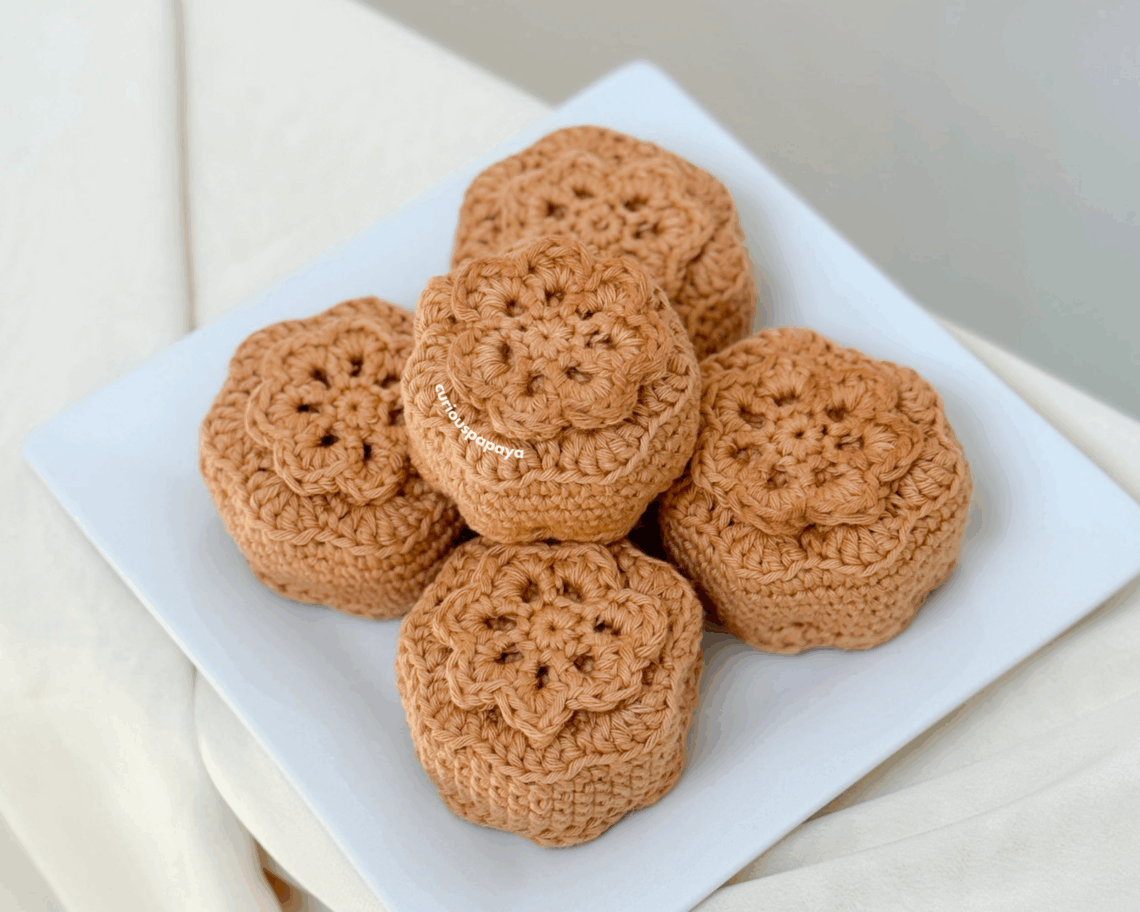
Mid Autumn Festival Mooncakes
Celebrated on the 15th day of the 8th lunar month, the Mid-Autumn Festival is a beloved holiday across East and Southeast Asia—including China, Korea, Japan, and Vietnam. It’s all about family reunions, giving thanks, and enjoying the harvest season.
As a Taiwanese-Korean-American, I’ve always looked forward to one thing: mooncakes! These rich, round pastries come with sweet or savory fillings (like mung bean or salted egg yolk) and symbolize unity and togetherness. Pro-tip: they’re best enjoyed in small bites with a warm cup of tea! – Amy (@curiouspapaya)
MATERIALS:
- Clover Amour Hook (2.75 mm)
- Clover Patchwork Scissors
- Clover Yarn Needle
- Clover Stitch Markers
- fiber fill stuffing
- hot glue
- one sheet of mesh canvas + a sharpie
- note: You may substitute mesh canvas for cardboard so long as it can give structure to your mooncake!
- #3 light worsted cotton yarn
- warm brown color
NOTES:
- Please do not copy/redistribute any part of this pattern as your own. This includes reposting/translating without permission. Feel free to sell your finished products in small quantities as long as you give credit to help support my work. Tag your creations with #curiouspapaya so I can feature you!
- This pattern is written in US terminology.
- This pattern will be worked in continuous rounds (a spiral).
- I recommend crocheting in the standard way (by yarning over). Do not use the yarn under method of crocheting for this pattern.
- Difficulty: intermediate+
- Measurements: 2.5 in. [6.35 cm] in diameter
ABBREVIATIONS:
- blo: back loops only
- ch: chain
- dc: double crochet
- hdc: half double crochet
- sc: single crochet
- slst: slip stitch
- st(s): stitch(es)
- rnd(s): round(s)
- [#]: stitch count
- (…) x #: repeat instructions the number of times
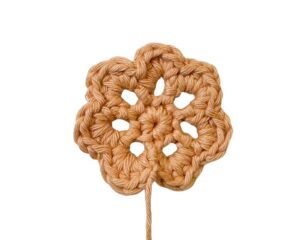
FLOWER PATTERN:
Using a 2.75 mm Clover Amour hook:
If you prefer the printable PDF, you can find it HERE. Thank you for supporting my designs!
*Note: It is important to make the pattern in the order that it is written. This is so we can assemble it correctly.
- Round 1: Make a magic circle and (sc) x7, slst into the first st to join the rnd and mark it with a stitch marker. [7]
- Round 2: (ch 5, slst into the next st) x7. You should have a total of 7 small loops.
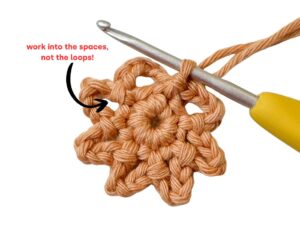
- Round 3: Working into the chain spaces (the big gap made from the chain), *NOT* the back loops, make (sc, hdc, dc, hdc, sc) x7 [42] slst into the marked st and fasten off. Leave a 12 in. [~30.5 cm] tail for sewing.
MOONCAKE PATTERN:
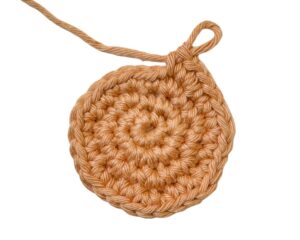
- Round 1: Make a magic circle and (sc) x7 [7]
- Round 2: (inc) x7 [14]
- Round 3: (sc, inc) x7 [21]
- Round 4: (sc, inc, sc) x7 [28]
*Note: In the next round, we will create shell stitches. These are made by making 5 dc into one st.
- Round 5: (sc, skip the next st, 5 dc into the next st, skip the next st) x7, slst into the first st [42]
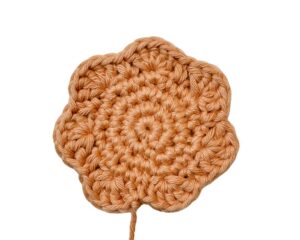
This will be the bottom piece (part A). Fasten off and leave a 18 in. [~46 cm] tail for sewing.
Repeat rnds 1-5 for the top piece (part B) but do not fasten off. Instead, continue onto the next steps.
- Round 6: (blo) sc all around [42]
- Rounds 7-10 (4 rnds total): sc all around [42]
Fasten off and leave a 12 in. [~30.5 cm] tail for the shaping of the sides.
ASSEMBLY:
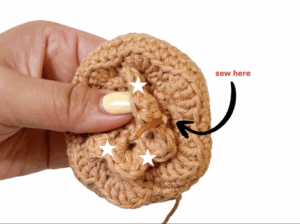
- Step 1: Align each petal with part B as shown in the image.
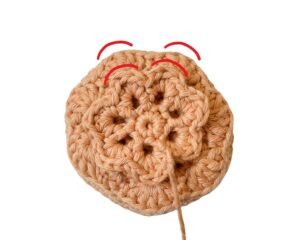
- Step 2: Using the Clover darning needle, thread the flower’s yarn tail.
- Step 3: Sew each flower petal at its vertices being careful to not pierce through the top side of the flower.
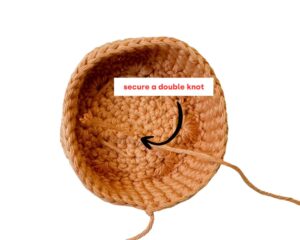
- Step 4: Secure the remaining yarn tail into a knot on the inside of the mooncake.
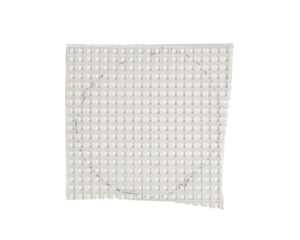
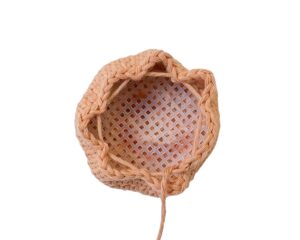
- Step 5: Trace two circles that are 2 in. [~5 cm] in diameter onto a mesh canvas. Cut them out and modify as needed.
- Step 6: Use hot glue to secure them onto the insides of part A and B to give them structure.
- Step 7: Next, thread the yarn tail from the top piece, part B.
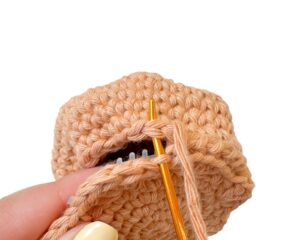
- Step 8: To shape the sides of the mooncake – counting from the start of the rnd, mark every 6 sts with a stitch marker.
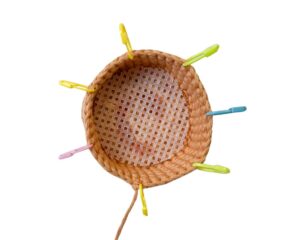
- Step 9: On the last rnd we worked, weave the yarn tail to the inside of the piece. Then, weave from the inside to the outside of each marked st and gently tug. The curved edges will begin to take form.
*Tip: Be careful not to tug too much or part A will not fit well!
- Step 10: Secure the yarn tail into a knot again.
- Step 11: Thread the yarn tail from the bottom piece, part A.
- Step 12: Align the curved edges of part A and B.
- Step 13: Sew the two pieces together, going through the blo of the part A and both loops of part B. Pause when you have 1/3 to go!
- Step 14: Stuff the mooncake well.
- Step 15: Finish sewing up the mooncake and weave in the excess yarn tail.

You’re finished! We’d love to see your creations over on social media. Tag your creations with #cloversquad and #curiouspapaya to share your makes 🙂
If you want to keep up with me, Amy, on social media for other fun projects, follow me on: Instagram
If you want to keep up with all things Clover, follow us on: Facebook | Twitter | Instagram | Pinterest | YouTube | Ravelry