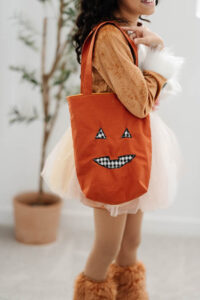
A Reversible Trick-or-Treat Tote Bag
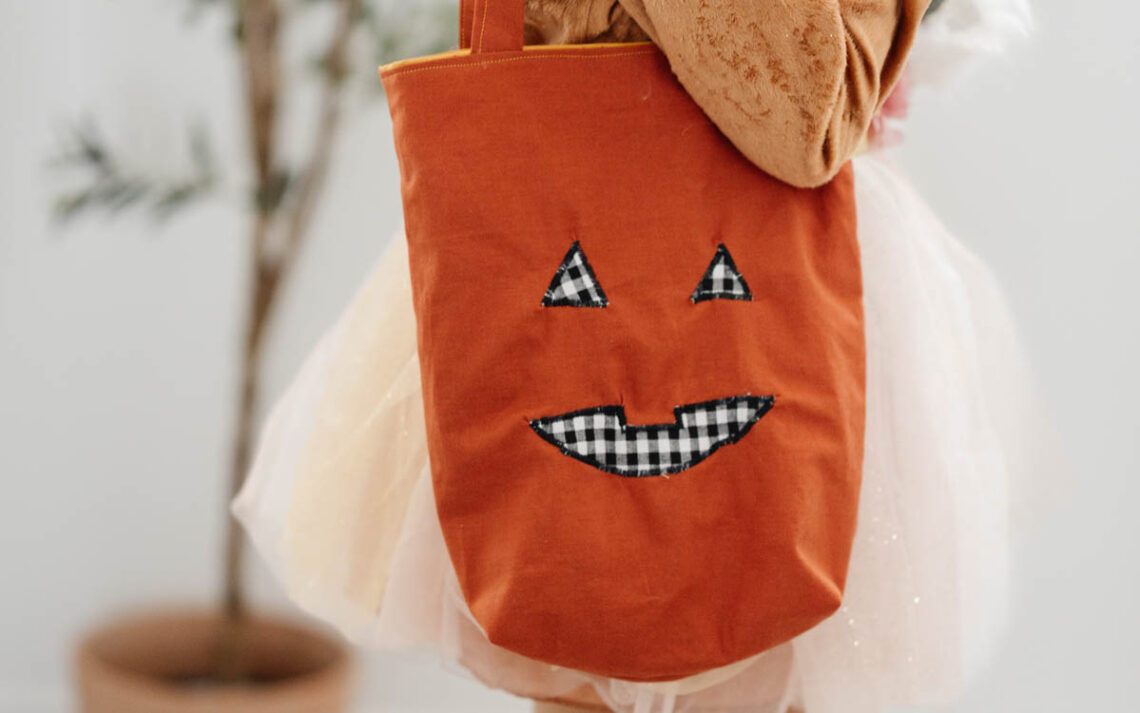
This Halloween, 10-year-old sewist Cataleya created her own reversible tote bag—perfect for trick-or-treating and for everyday use afterward.
She wanted something strong enough to hold candy yet cute enough to reuse for books and crafts once the season ends.
She used cotton fabric and her favorite Clover sewing tools to design a simple, festive, and functional project. Her favorite part was adding a black gingham pumpkin face for a playful Halloween touch!
MATERIALS:
(Finished size: Approximately 11.75″ W × 14.75″ boxed corners)
- Rotary Cutter – for smooth, clean cutting through cotton layers
- Water Erasable Tracing Paper – to mark pumpkin face details before sewing
- Double Tracing Tool – for tracing outlines onto the Water Erasable Tracing Paper
- Metal Hera with Stylus – to help guide the fabric while stitching the pumpkin face for better control
- Magnet Pin Caddy – to keep pins secure and easy to grab
- Hot Roller – for quick, crisp pressing for straps
- Wonder Clips – to hold layers together while stitching
- Heart-Shaped Pins – cute AND perfect for keeping fabric in place
- Seam Ripper – for when she messes up (it happens!)
- Roll & Press – makes a crease without even using the iron
- Point Turner – the BEST for poking out corners
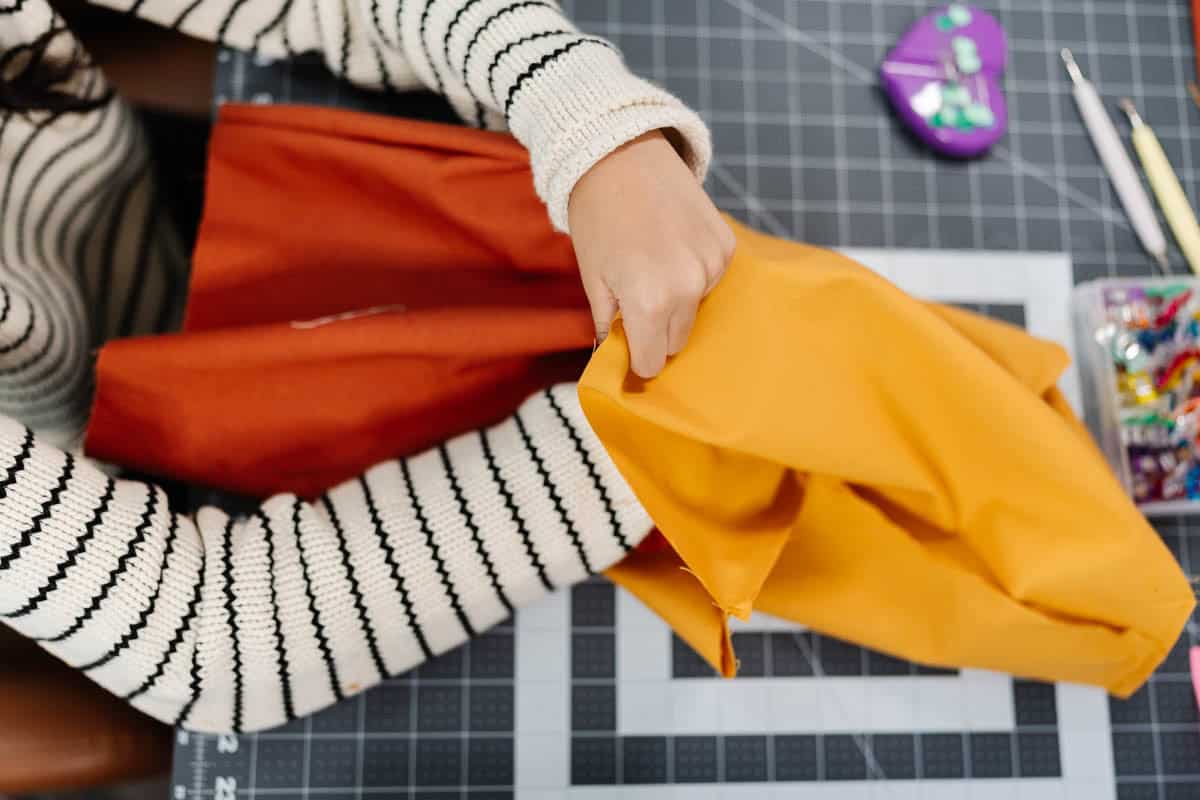
- Fabric: All cotton
- (2) Outer pieces – 12″ × 15″ (burnt orange)
- (2) Inner pieces – 12″ × 15″ (mustard)
- (2) Straps – 4″ × 21″ (mustard)
- (1) Black gingham square – 10″ × 10″ (for pumpkin face)
- Thread: All-purpose cotton
- (1) Black Thread (for pumpkin eyes and mouth)
- (1) Orange Thread (for the rest of the bag and straps)
- Scissors
- 4″ Ruler
- Heat Pen
- Iron + Wool Mat
TRICK-OR-TREAT BAG INSTRUCTIONS:
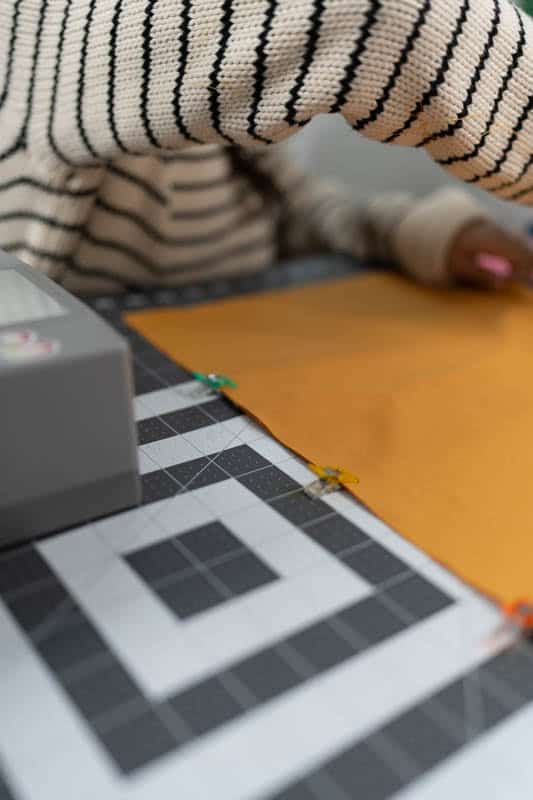
Cataleya used the Clover Rotary Cutter to cut all her cotton pieces and the 8″ × 8″ gingham square for the pumpkin face. Before sewing, she ironed all of her fabric pieces to remove any wrinkles and make sure each cut stayed smooth and accurate. A freshly pressed fabric makes measuring, marking, and sewing much easier — and helps every seam look clean and professional.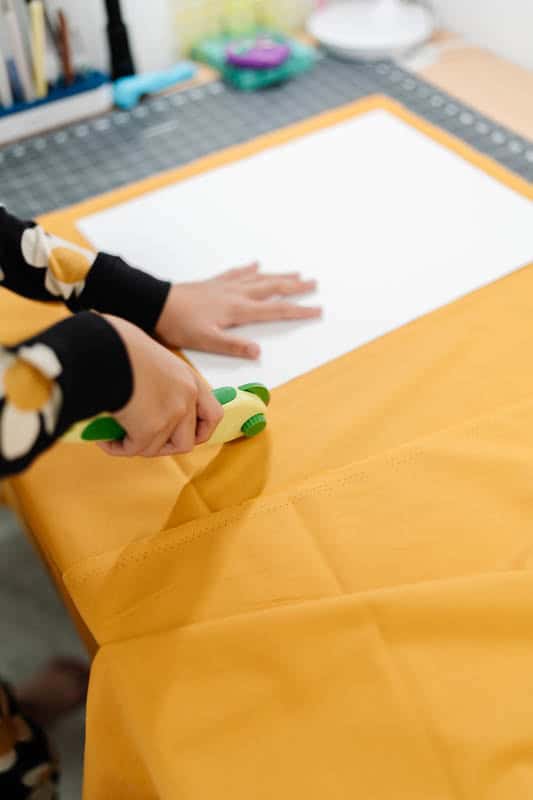
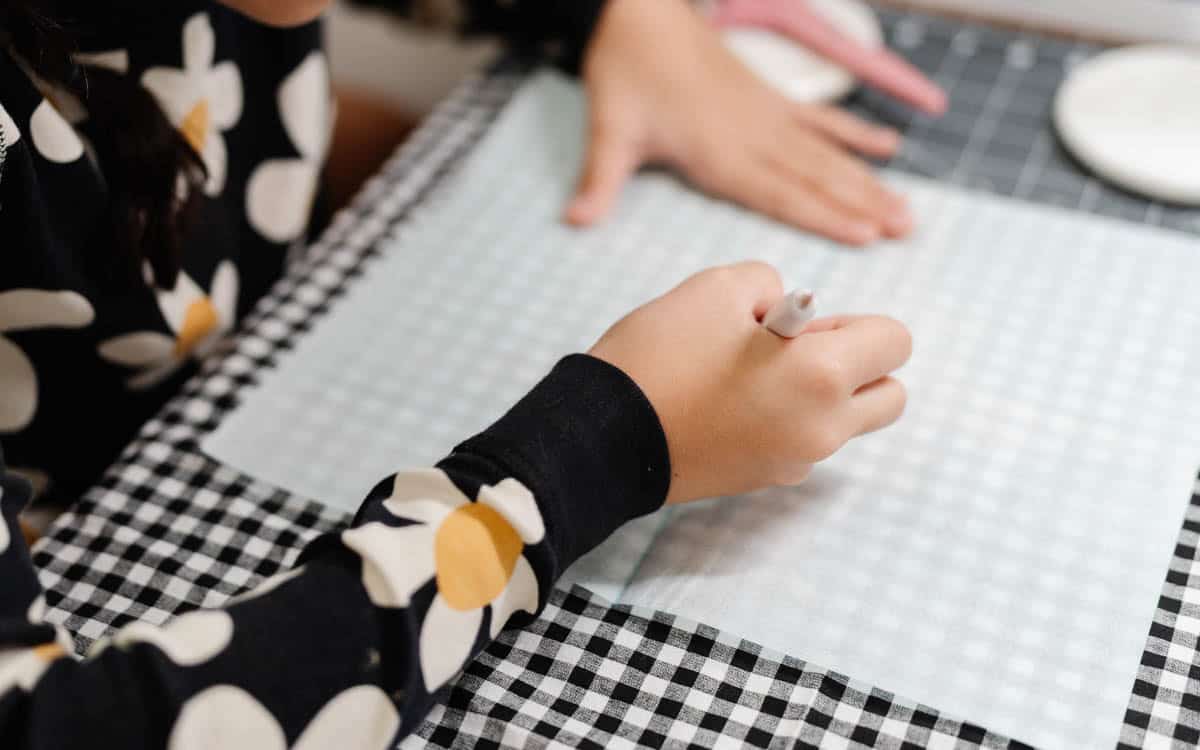
She traced the pumpkin face details onto the black gingham fabric using Water Erasable Tracing Paper and the Double Tracing Tool. Then, she used scissors to carefully cut out the eyes and mouth shapes before sewing them onto the bag.
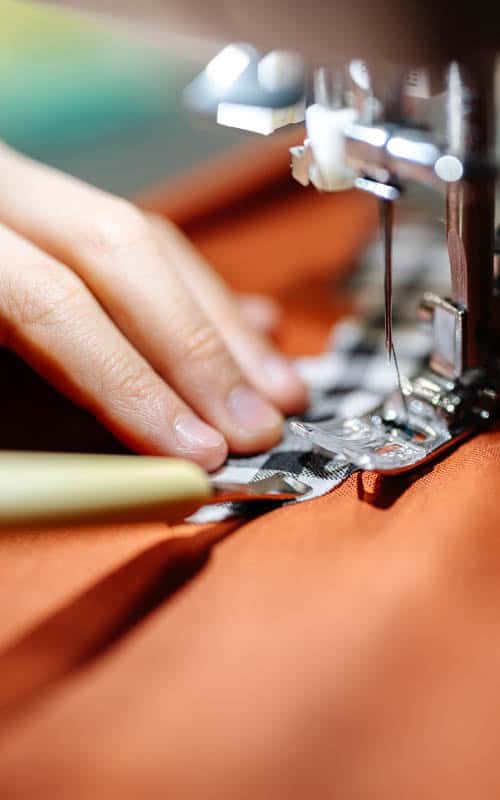
Cataleya positioned her black gingham eyes and mouth on the front panel and stitched around each shape using a zigzag stitch set to 5.0 width and 0.4 length. She carefully guided the fabric to help it feed smoothly through the machine’s feeders, using the Metal Hera with Stylus — the Hera side helped her maintain smooth curves and even spacing. This stitch not only secured the edges neatly but also gave the pumpkin face a bold, appliquéd finish.
Using the Hot Roller, she folded each long edge of her 4″ × 21″ strap pieces over by 3/4″ and pressed them flat to create clean edges. Then, she folded each strap in half lengthwise, pressed again, and used the Hot Roller once more to set the folds in place. To finish, she topstitched along both long edges with a 1/8″ seam allowance, giving the straps a neat, professional look and extra durability.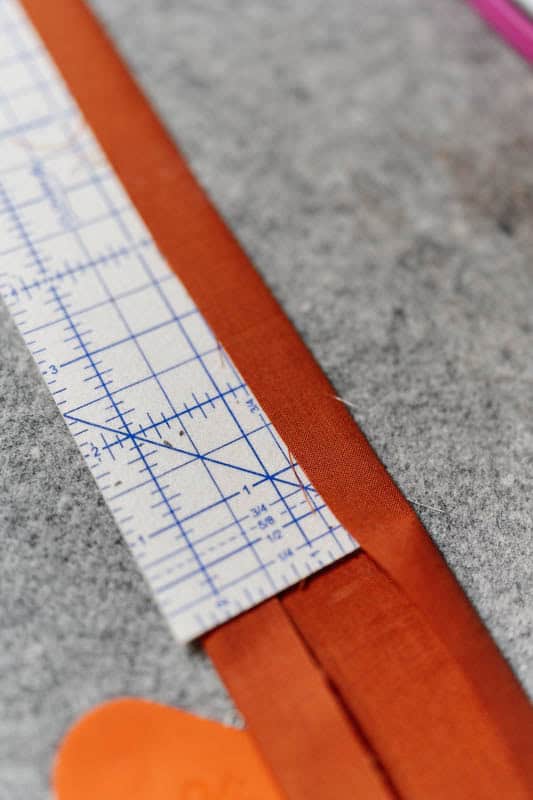
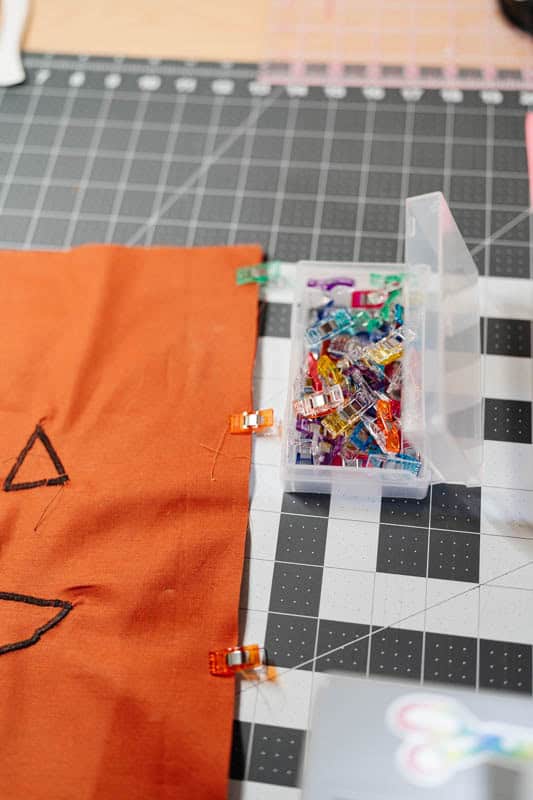
Next, Cataleya worked on the inner lining. First, she switched her machine stitch setting to a straight stitch after finishing the pumpkin face. She placed both inner fabric pieces right sides together, used Wonder Clips to hold everything in place, and sewed the long sides and bottom with a 1/8″ seam allowance — making sure not to sew across the top. She left a 4″ opening at the bottom center, which she marked with a heat pen — this gap would be used later to turn the bag right-side out once everything was assembled. After sewing, she clipped the corners to reduce bulk and help the finished bag lie flatter once turned.
For the outer fabric, Cataleya followed the same steps as she did for the inner lining. She placed both outer pieces right sides together, used Wonder Clips to hold them in place, and sewed along both long sides and the entire bottom edge with a 1/8″ seam allowance, keeping the top edge open.
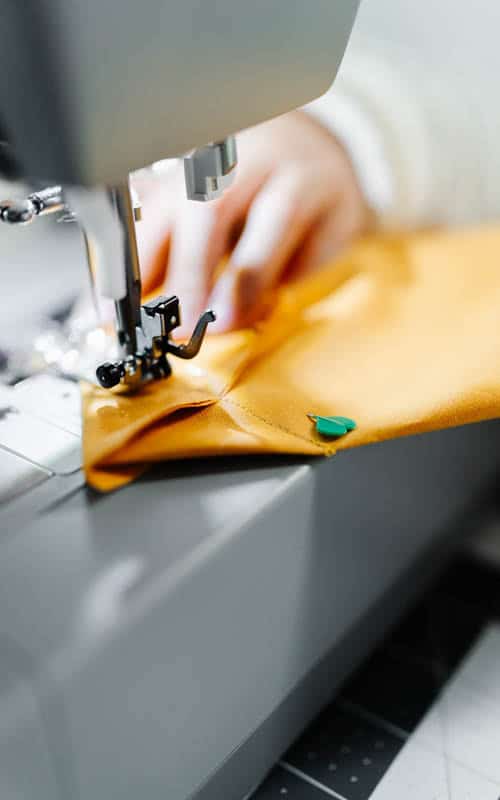
Next, Cataleya popped open the two bottom corners of both the outer and inner fabric pieces to create flat triangles. She used her heart pins to keep the fabric from shifting, then measured 3″ from the tip of each corner using a ruler. With her heat pen, she drew a straight line across each corner and sewed directly on that line to form the boxed shape. After sewing, she used scissors to trim off each corner, eyeballing about 1/8″ from the stitch line to reduce bulk while keeping the seams secure.
This next part can feel a little tricky! Cataleya placed the outer bag inside the inner lining, making sure both pieces were right sides together. She adjusted the layers until everything felt smooth and the seams lined up evenly.
Then, she measured 4″ in from each side seam and clipped with her Wonder Clips the first strap in place, sandwiching it between the outer and inner layers with the strap ends pointing down inside the bag. She repeated the same step on the opposite side for the second strap, making sure both straps were straight and even. Once everything was aligned, she secured the layers with Wonder Clips all the way around the top edge, ready for sewing.
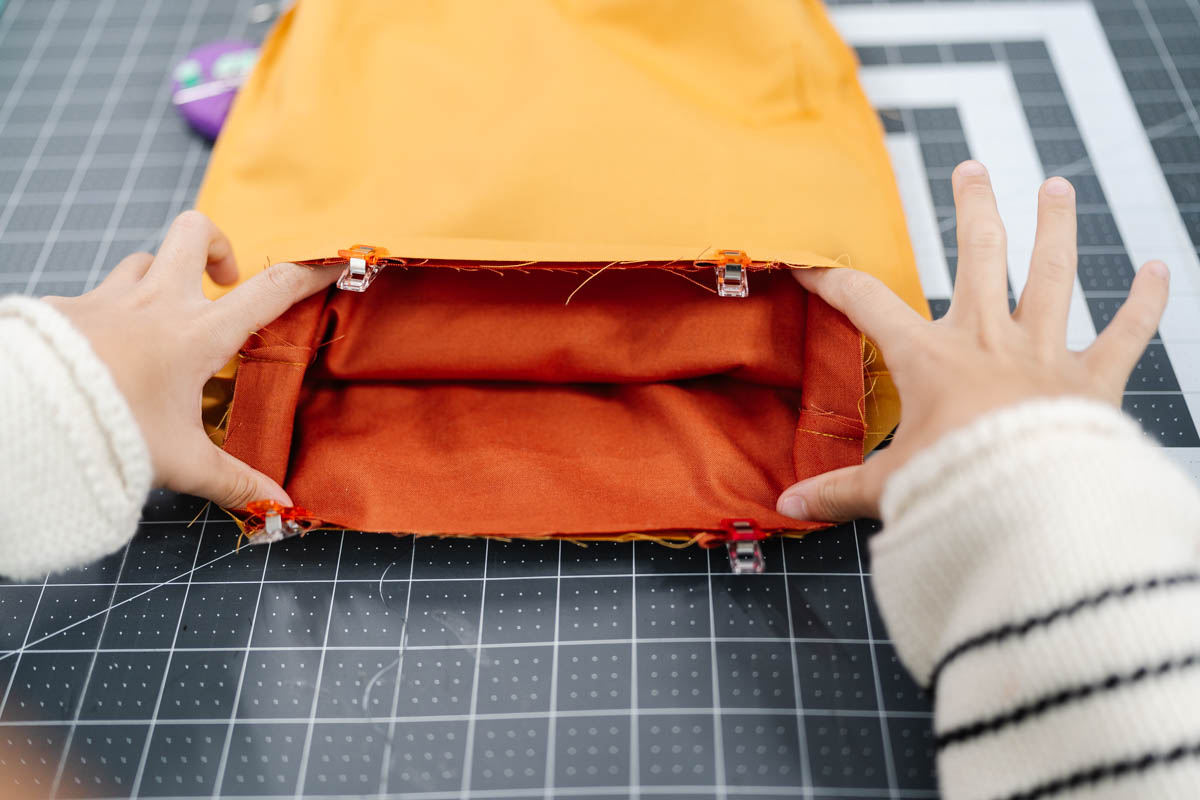
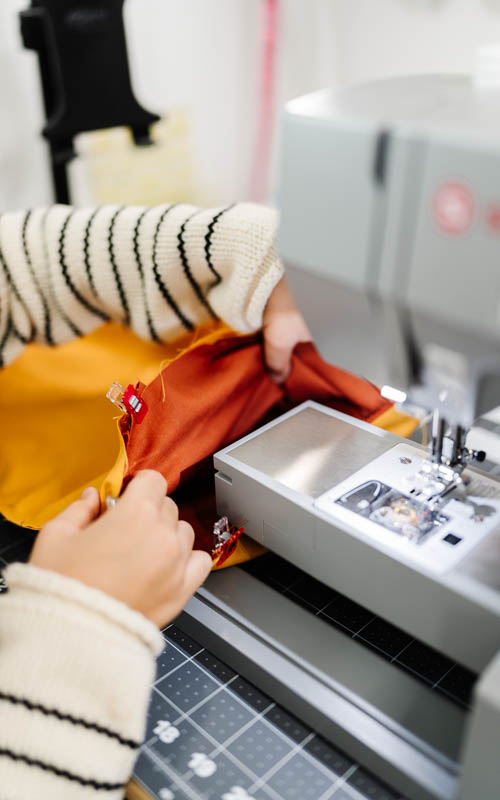
Before sewing, she removed the storage piece (free arm) from her sewing machine to make it easier to sew around the narrow top opening. Then she sewed around the entire top edge with a 1/8″ seam allowance, stitching carefully through all layers to attach the straps and connect the bag pieces together.
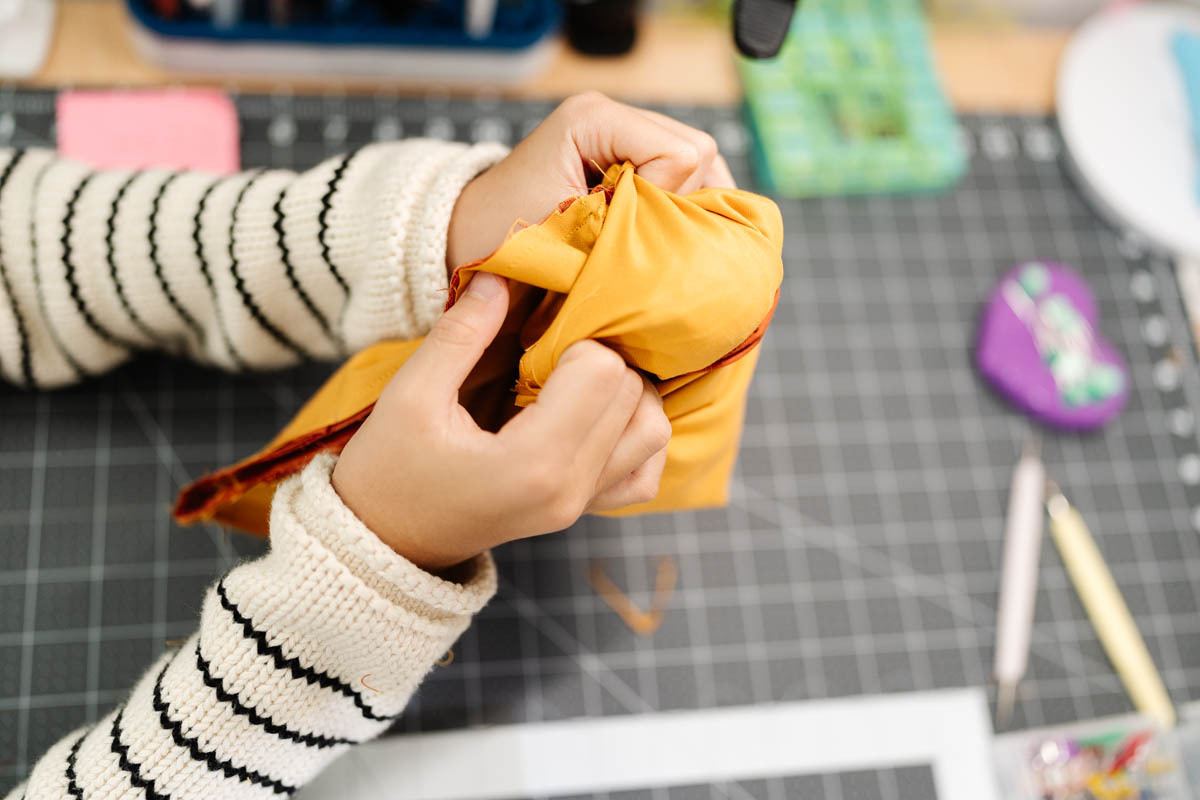
For the final step, Cataleya pulled the bag right-side out through the 4″ opening she had left in the bottom of the inner lining. To help push out the corners neatly, she used her Clover Point Turner, making sure the edges looked crisp and clean. Once everything was turned and smoothed out, she sewed the opening closed with a straight stitch near the edge, neatly securing the gap. Then she tucked the lining inside the outer bag, gave the top edge a quick press with the Hot Roller, and admired her finished reversible tote bag — ready for trick-or-treating and everyday use!
With two fun sides, a cute pumpkin face, and straps she made herself, Cataleya’s reversible tote is ready for every adventure — from collecting candy to carrying crafts and books all fall long. This project was the perfect mix of creativity, patience, and practice using her favorite Clover tools.


“It’s my favorite bag ever — because I made it myself!” — And that’s the best kind of magic there is.
If you want to keep up with her, Cataleya, on social media, follow her on social media: Instagram
If you want to keep up with all things Clover, follow us on: Facebook | Twitter | Instagram | Pinterest | YouTube | Ravelry


Leave a Reply