

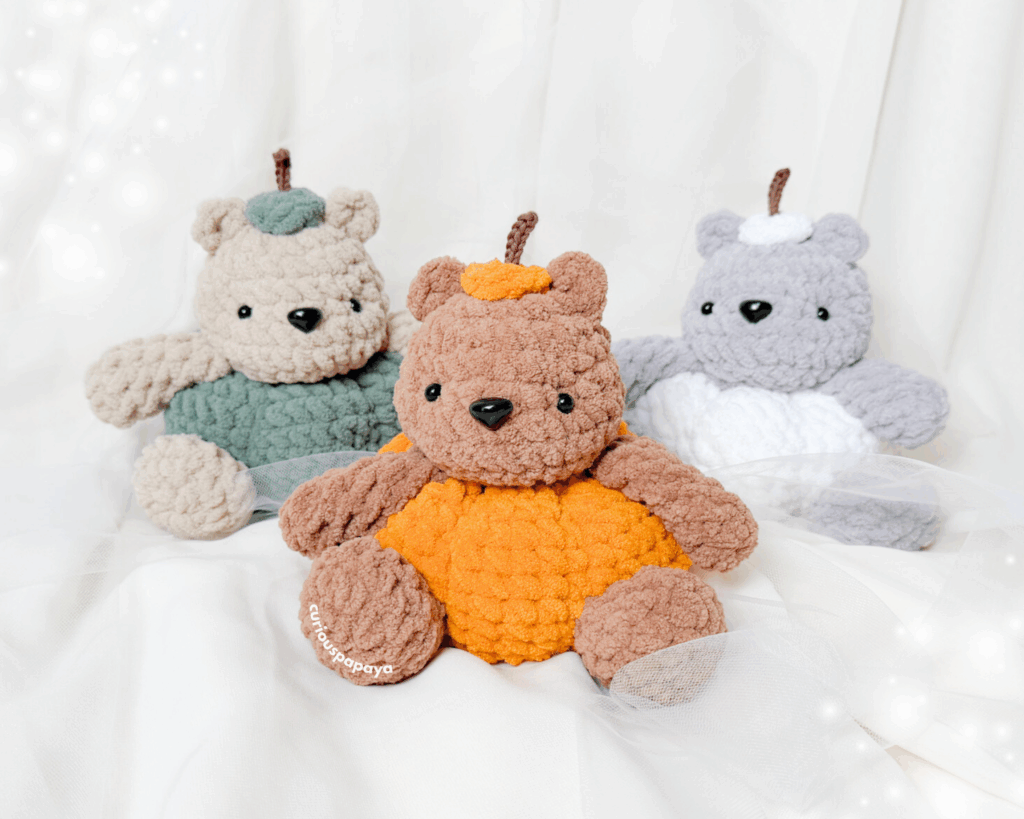
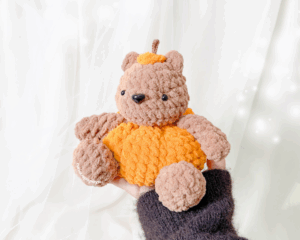
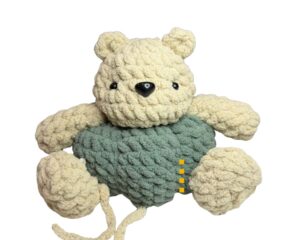
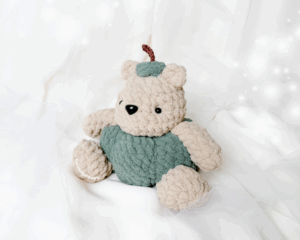
Meet the Pumpkin Bear — the sweetest little bundle of fall magic! With a cozy pumpkin body and a soft, huggable bear face, this crochet cutie brings together the best of autumn and cuddles. Perfect for decorating your home, gifting to a friend, or adding a touch of handmade charm to your fall display.
– Amy (@curiouspapaya)

MATERIALS:
- Clover Amour Hook (7 mm)
- Clover Amour Hook (2.75 mm)
- Clover Patchwork Scissors
- Clover Yarn Needle
- Clover Stitch Markers
- Clover Sewing Pins
- fiber fill stuffing
- two 8 mm safety eyes and one 11 mm safety nose
- hot glue
- #6 super bulky yarn
- bear: 59g
- pumpkin: 66g
- color combo of your choice:
- light brown bear and mustard yellow pumpkin
- gray bear and white pumpkin
- tan bear and sage green pumpkin
- #3 medium worsted acrylic yarn
- dark brown: 1g
NOTES:
- Please do not copy/redistribute any part of this pattern as your own. This includes reposting/translating without permission. Feel free to sell your finished products in small quantities as long as you give credit to help support my work. Tag your creations with @curiouspapaya so I can feature you!
- This pattern is written in US terminology.
- This pattern will be worked in continuous rounds (a spiral).
- In this pattern, I am using the “yarn under, yarn over” method of crocheting. This creates a slanted “x-shaped” stitch definition and it is my preferred method when using chenille yarn. You may crochet however you prefer!
- Difficulty: intermediate-beginner+
- Measurements: 7 in. x 7.5 in. [~18 cm x ~19 cm] (if using the prescribed materials)
- Important: I prefer to glue in my safety facial features because my amigurumi makes are intended for decor only. If you prefer to place the backings in, be sure to follow the modified instructions in the pattern. Forming the eye indentations may look differently for you.
ABBREVIATIONS:
- blo: back loops only
- ch: chain
- flo: front loops only
- dec: decrease
- inc: increase
- sc: single crochet
- slst: slip stitch
- st(s): stitch(es)
- rnd(s): round(s)
- [#]: stitch count
- (…) x #: repeat instructions the number of times
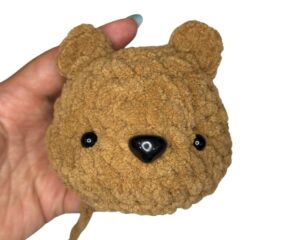
BEAR HEAD PATTERN:
Using the color of your choice yarn and a 7 mm Clover Amour hook:
- Round 1: ch 2, work into the second ch from the hook and (sc) x8 [8]
- Round 2: (inc) x8 [16]
- Round 3: (sc, inc) x8 [24]
- Rounds 4-5 (2 rnds total): sc all around [24]
- Round 6: (2 sc, inc) x8 [32]
- Round 7: sc all around [32]
- Round 8: (sc, dec, sc) x8 [24]
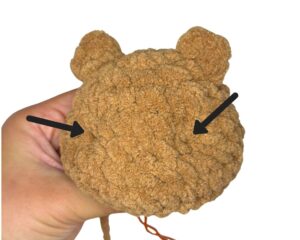
- Tip: Staggering the decreases creates a smoother texture for the bear’s face. The reason why we don’t need to do this in round 6 is because the round right before and after it do not contain any increases.
- Round 9: (sc, dec) x8 [16]
- Note: I prefer to glue in my eyes and nose after the eye indentations have been completed so that the placement can be exact and symmetrical, so skip to the next step if you want to follow this tutorial as written. If you prefer to insert the safety backings in, insert the nose between rnds 5-6. Then, insert the safety eyes 2 sts from the nose. It is important for the eyes and nose to be aligned between the same rounds! Please note that if this is to be given to a small child, embroidering these details would be safest.
Stuff well.
- Round 10: (dec) x8 [8]
Fasten off and leave a long tail for sewing onto the pumpkin. Do not close up the piece yet.
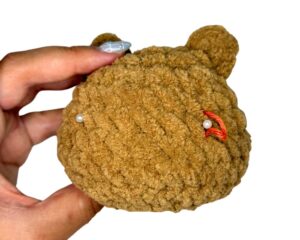
Next, we will create the eye indentations.
- Step 1: Use sewing pins and mark where the eyes will be between rnds 5-6, 7 sts apart.
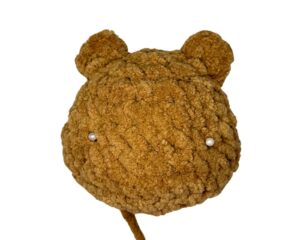
*The ears have been sewn on in the process images to provide a better reference point. However, follow the instructions to make and sew them on later during assembly.
-
- Step 2: Cut 10 in. [~25 cm] of any color acrylic yarn.
- Step 3: Thread your Clover Darning Needle and enter from the opening at the bottom of the head. Leave a 3 in. tail.
- Step 4: Weave out where the right eye will be and weave back into the head 1 stitch above. Come back out the opening of the head.
- Step 5: Weave out where the left eye will be and again, weave back into the head 1 stitch above. Come back out the opening of the head.
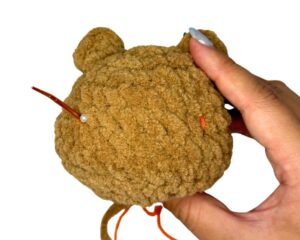
- Step 6: Holding the two yarn tails, tug gently to create the eye indentations.
- Step 7: Tie the yarn tails into a double knot to secure the indentations in place.
- Step 8: Weave in the remaining yarn tails.
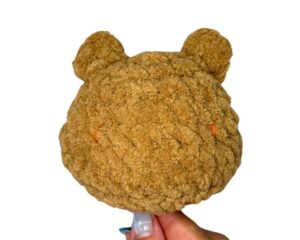
Using the Clover Darning Needle, thread the bear head’s yarn tail. Weave through the flo and pull the hole closed.
Lastly, use hot glue to secure the safety nose between rnds 5-6. Then, insert the safety eyes 2 sts away from each side of the nose.
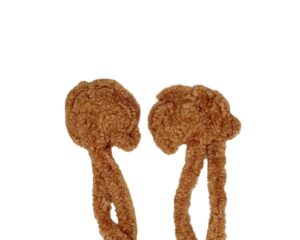
EARS PATTERN (make two):
Using the color of your choice yarn and a 7 mm Clover Amour hook:
- Round 1: make a magic circle and (sc) x4, slst into the center of the circle [4]
- Tip: Why are we using the magic circle starting method here but not in the other parts of the pattern? The reason is because with this type of yarn, the greater the stitch count, the more difficult it is to pull the hole closed. With our ears only being 4 sts, yarn snagging won’t be an issue and the magic circle allows us to create the rounded shape we want.
Fasten off and leave a tail for sewing. Then, pull the ring closed.
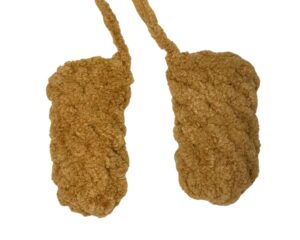
ARMS PATTERN (make two):
Using the color of your choice yarn and a 7 mm Clover Amour hook:
- Round 1: make a magic circle and (sc) x8 [8]
- Rounds 2-6 (5 rounds total): sc all around [8]
Do not stuff or fasten off.
To crochet the piece closed, watch HERE for a more in depth video tutorial on this method.
- Step 1: Flatten the opening.
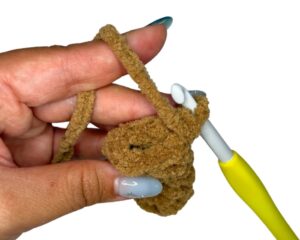
- Step 2: Insert your hook through both layers and make 4 sc across.
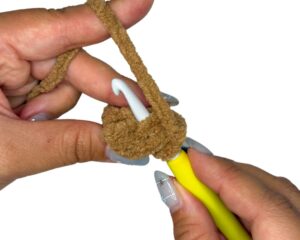
- Step 3: Fasten off and leave a tail for sewing.
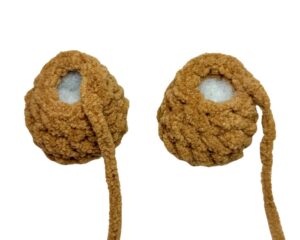
FEET PATTERN (make two):
Using the color of your choice yarn and a 7 mm Clover Amour hook:
- Round 1: make a magic circle and (sc) x8, slst into the center of the circle [8]
- Round 2: (inc) x8 [16]
- Round 3: sc all around [16]
- Round 4: (2 sc, dec) x4 [12]
- Round 5: 3 dec, 6 sc [9]
Fasten off and leave a tail for sewing.
Lightly stuff.
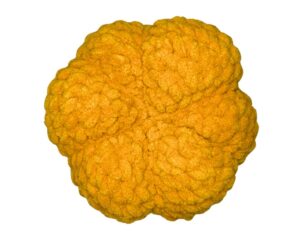
PUMPKIN PATTERN:
Using the color of your choice yarn and a 7 mm Clover Amour hook:
- Round 1: ch 2, work into the second ch from the hook and (sc) x8 [8]
- Round 2: (inc) x8 [16]
- Round 3: (sc, inc) x8 [24]
- Round 4: (sc, inc, sc) x8 [32]
- Round 5: (3 sc, inc) x8 [40]
- Rounds 6-13 (8 rnds total): sc all around [40]
- Round 14: (3 sc, dec) x8 [32]
- Round 15: (sc, dec, sc) x8 [24]
- Round 16: (sc, dec) x8 [16]
Stuff but be careful not to overstuff because we will need some flexibility for shaping!
- Round 17: (dec) x8 [8]
Fasten off and leave a 4 ft [~122 cm] yarn tail for the pumpkin shaping. Using the Clover Darning Needle, go through the flo and pull the hole closed.
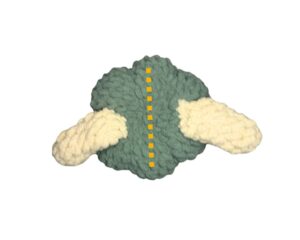
PUMPKIN SHAPING:
*Note: At this point, your pumpkin may look like a ball! Before you begin the next few steps, it’s important to understand the construction of the pumpkin segments. We will be using the yarn tail left at the end of the pumpkin to create symmetrical lines on the pumpkin. Cinching each segment evenly will help create the beautiful segments. There will be 6 in total.
- Step 1: Use the Clover Darning Needle and thread the yarn tail.
- Step 2: Weave into the bottom center and out the top center of the pumpkin.
- Step 3: Weave around the pumpkin and into the same entry point at the bottom of the pumpkin again.
- Step 4: Weave back out the top center and weave around the opposite side of the pumpkin. You should now have a line of symmetry.
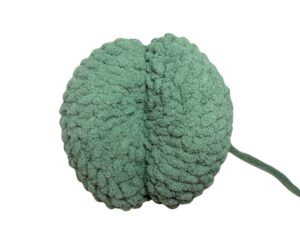
- Step 5: Cinch tightly!
- Step 6: Repeat the same method to create a diagonal line and cinch tightly.
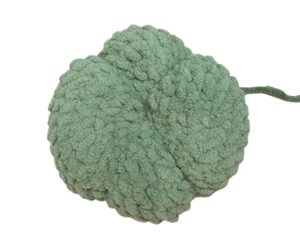
- Step 7: Repeat the same method to create the opposite diagonal line and cinch tightly for a total of 6 segments.
- Step 8: Secure a double knot and weave in the remaining yarn tail.
*Ignore the different color yarn here 🙂
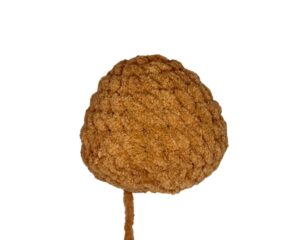
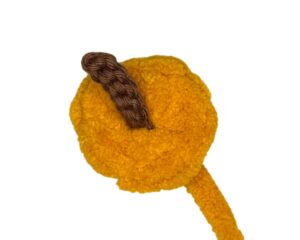
PUMPKIN HAT PATTERN:
Using the color of your choice yarn and a 7 mm Clover Amour hook:
- Round 1: ch 2, work into the second ch from the hook and (sc) x8 [8]
Use the invisible finish (video) and leave a tail for sewing.
STEM:
Using dark brown yarn and a 2.75 mm Clover Amour hook:
ch 7, work into the second chain from the hook, slst into the next 6 ch
Fasten off and leave a tail for sewing.
ASSEMBLY:
Using the Clover Darning Needle:
Ears: Sew the ears onto the head spanning rnds 2-3, 12 sts apart (when counting on rnd 3).
Arms: Use Clover sewing pins to position the arms onto the pumpkin so that they are symmetrical onto one of the segments. Then, sew the arms down against the pumpkin.
Pumpkin Hat: Sew the stem onto the center of the hat and secure a double knot on the opposite side. Cut the yarn tails short. Then, sew the hat onto the center of the head, weaving through the “third loop” of each st.
-
- Tip: You may also sew through using the blo but it will not be as neat. Another option is to carefully use hot glue to secure it since sewing with bulky yarn may be an intermediate skill.
Head: Sew the head onto the top of the pumpkin, centering the face with the arms.
Feet: Set the pumpkin onto a flat surface. Then, use Clover sewing pins to position the feet onto the bottom of the pumpkin, aligning the inner sides of the feet with the eyes. Be sure to check that they sit flat on the table before sewing them on.
-
- Tip: Do not skip this step or you’ll have floating limbs!
You’re finished! We’d love to see your creations over on social media. Tag your creations with #cloversquad and #curiouspapaya to share your makes 🙂
If you want to keep up with me, Amy, on social media for other fun projects, follow me on: Instagram
If you want to keep up with all things Clover, follow us on: Facebook | Twitter | Instagram | Pinterest | YouTube | Ravelry