Holiday Kitchen Apron *free reversible pattern*
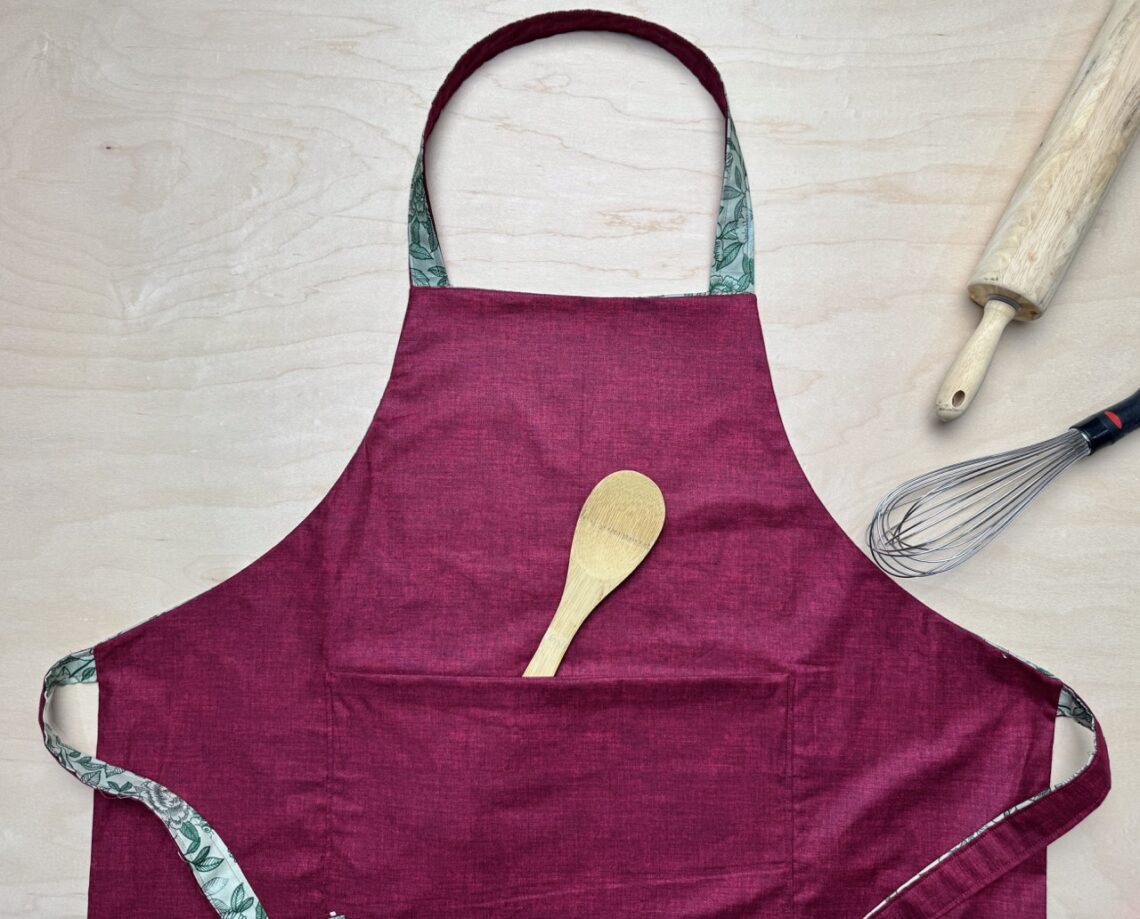
Hello everybody! The holidays are here, and one of my absolute favorite things to do this time of year is bake. This reversible holiday apron has quickly become one of my favorite makes of the season because it comes together in just 30 minutes. I love that you get two looks in one simple, beginner-friendly project, making it the perfect quick craft when you want something practical and pretty without spending all day at your machine. Whether you’re gearing up for holiday baking, hosting friends and family, or just enjoy the charm of a handmade apron hanging in your kitchen, this project is such an easy and enjoyable addition to your crafting list. Let’s jump in!
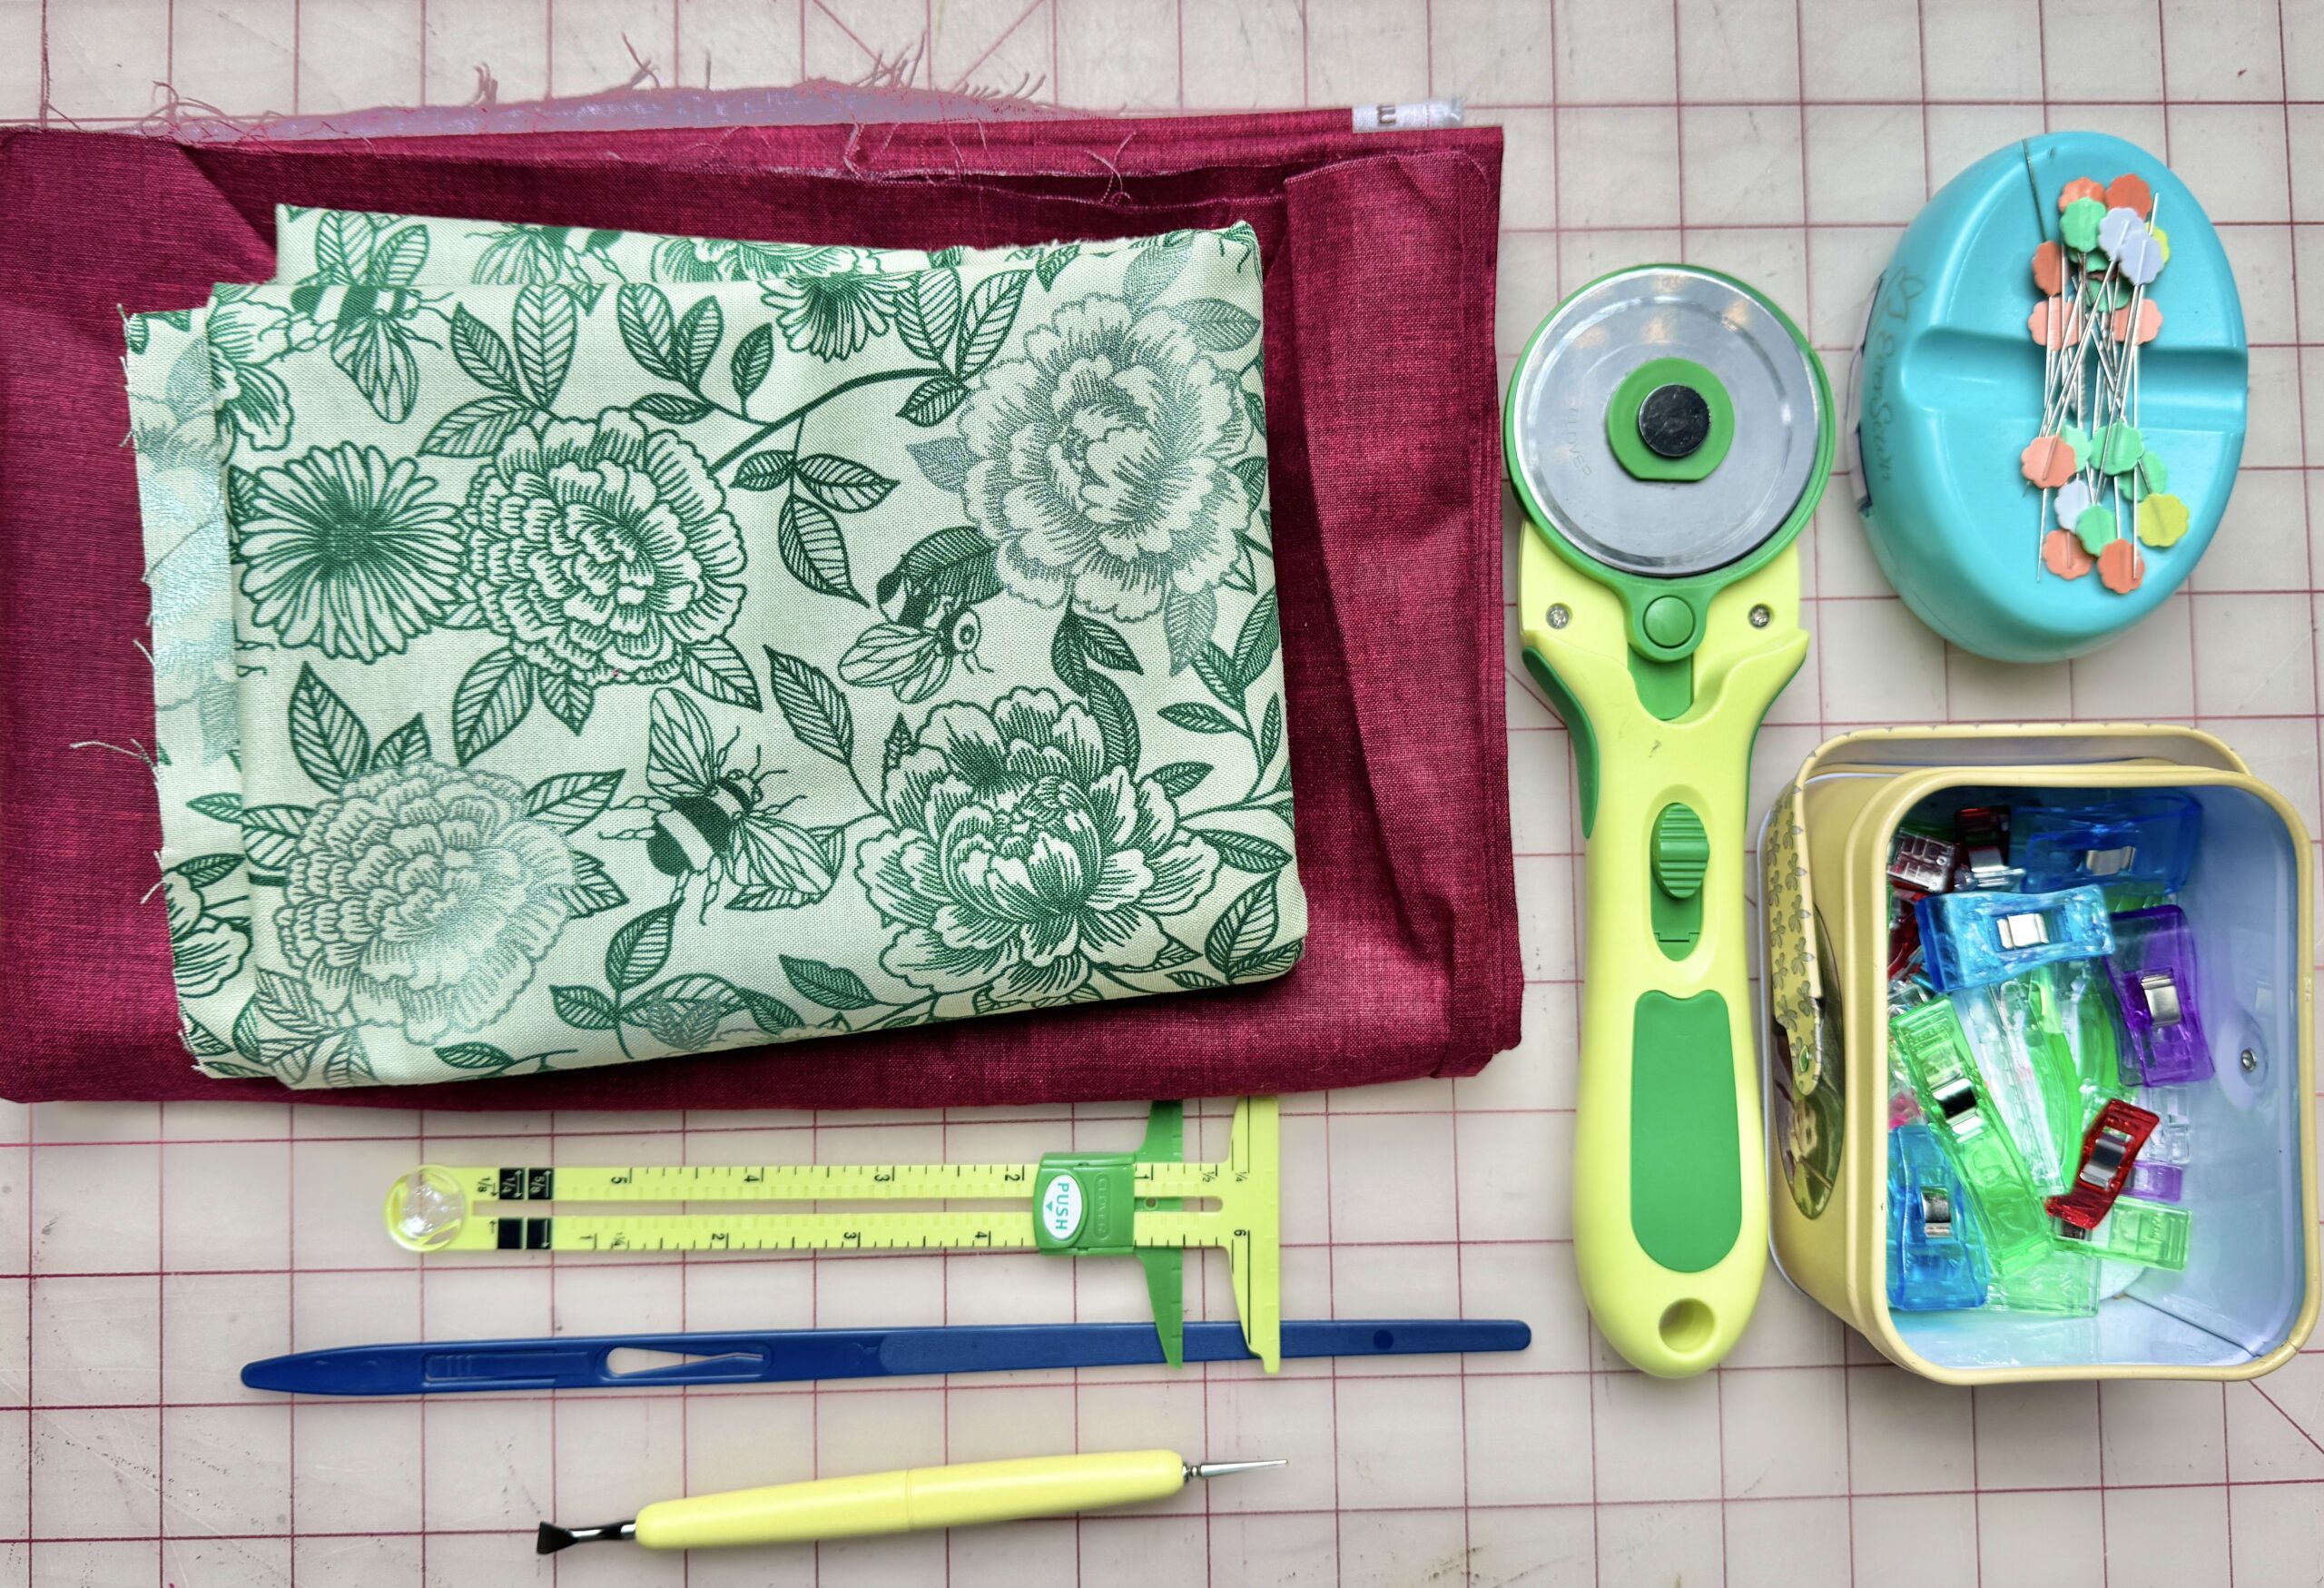
MATERIALS:
- Clover Metal Hera with Stylus
- Clover Rotary Cutter (60 mm)
- Clover Flower Pins
- Clover Wonder Clips
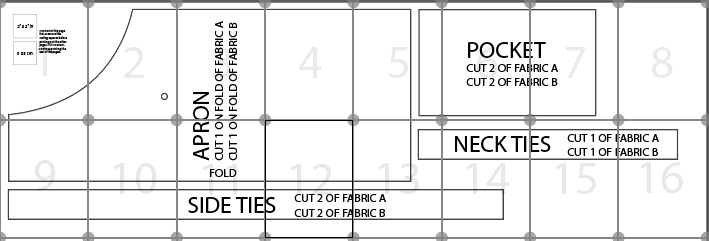
- Apron Pattern
- 1.5 yards of fabric A
- 1.5 yards of fabric B
APRON TUTORIAL:
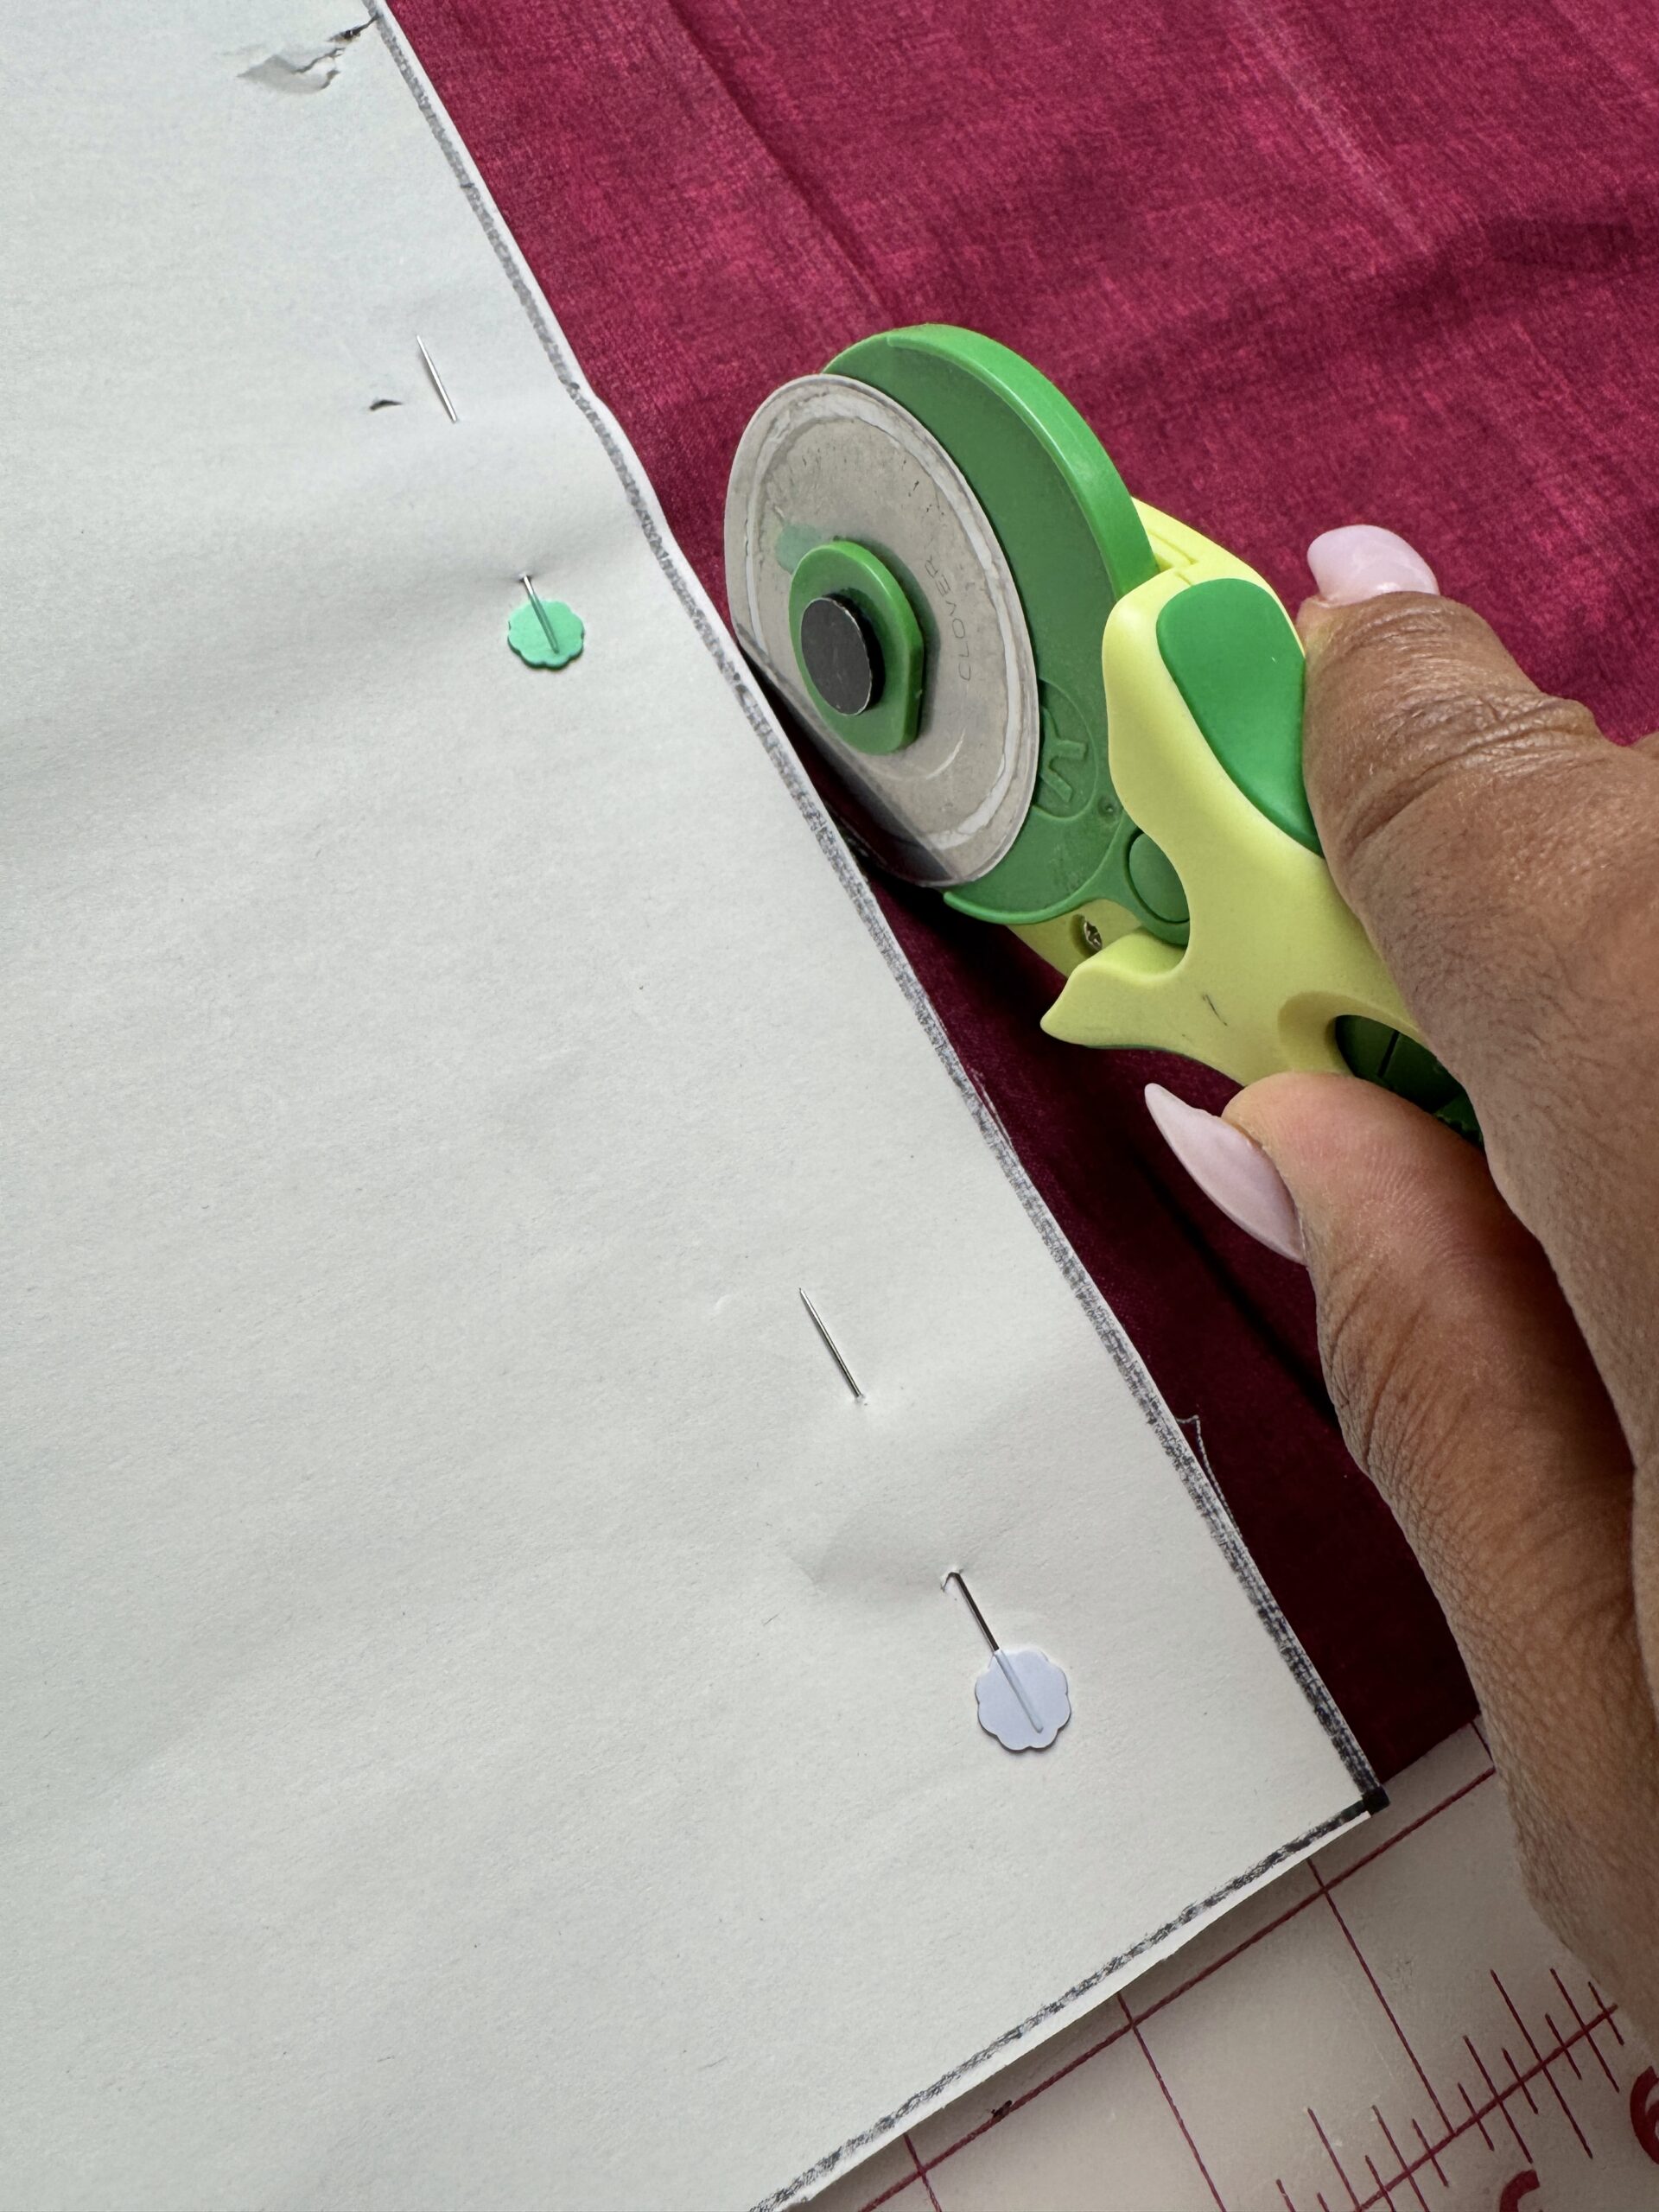
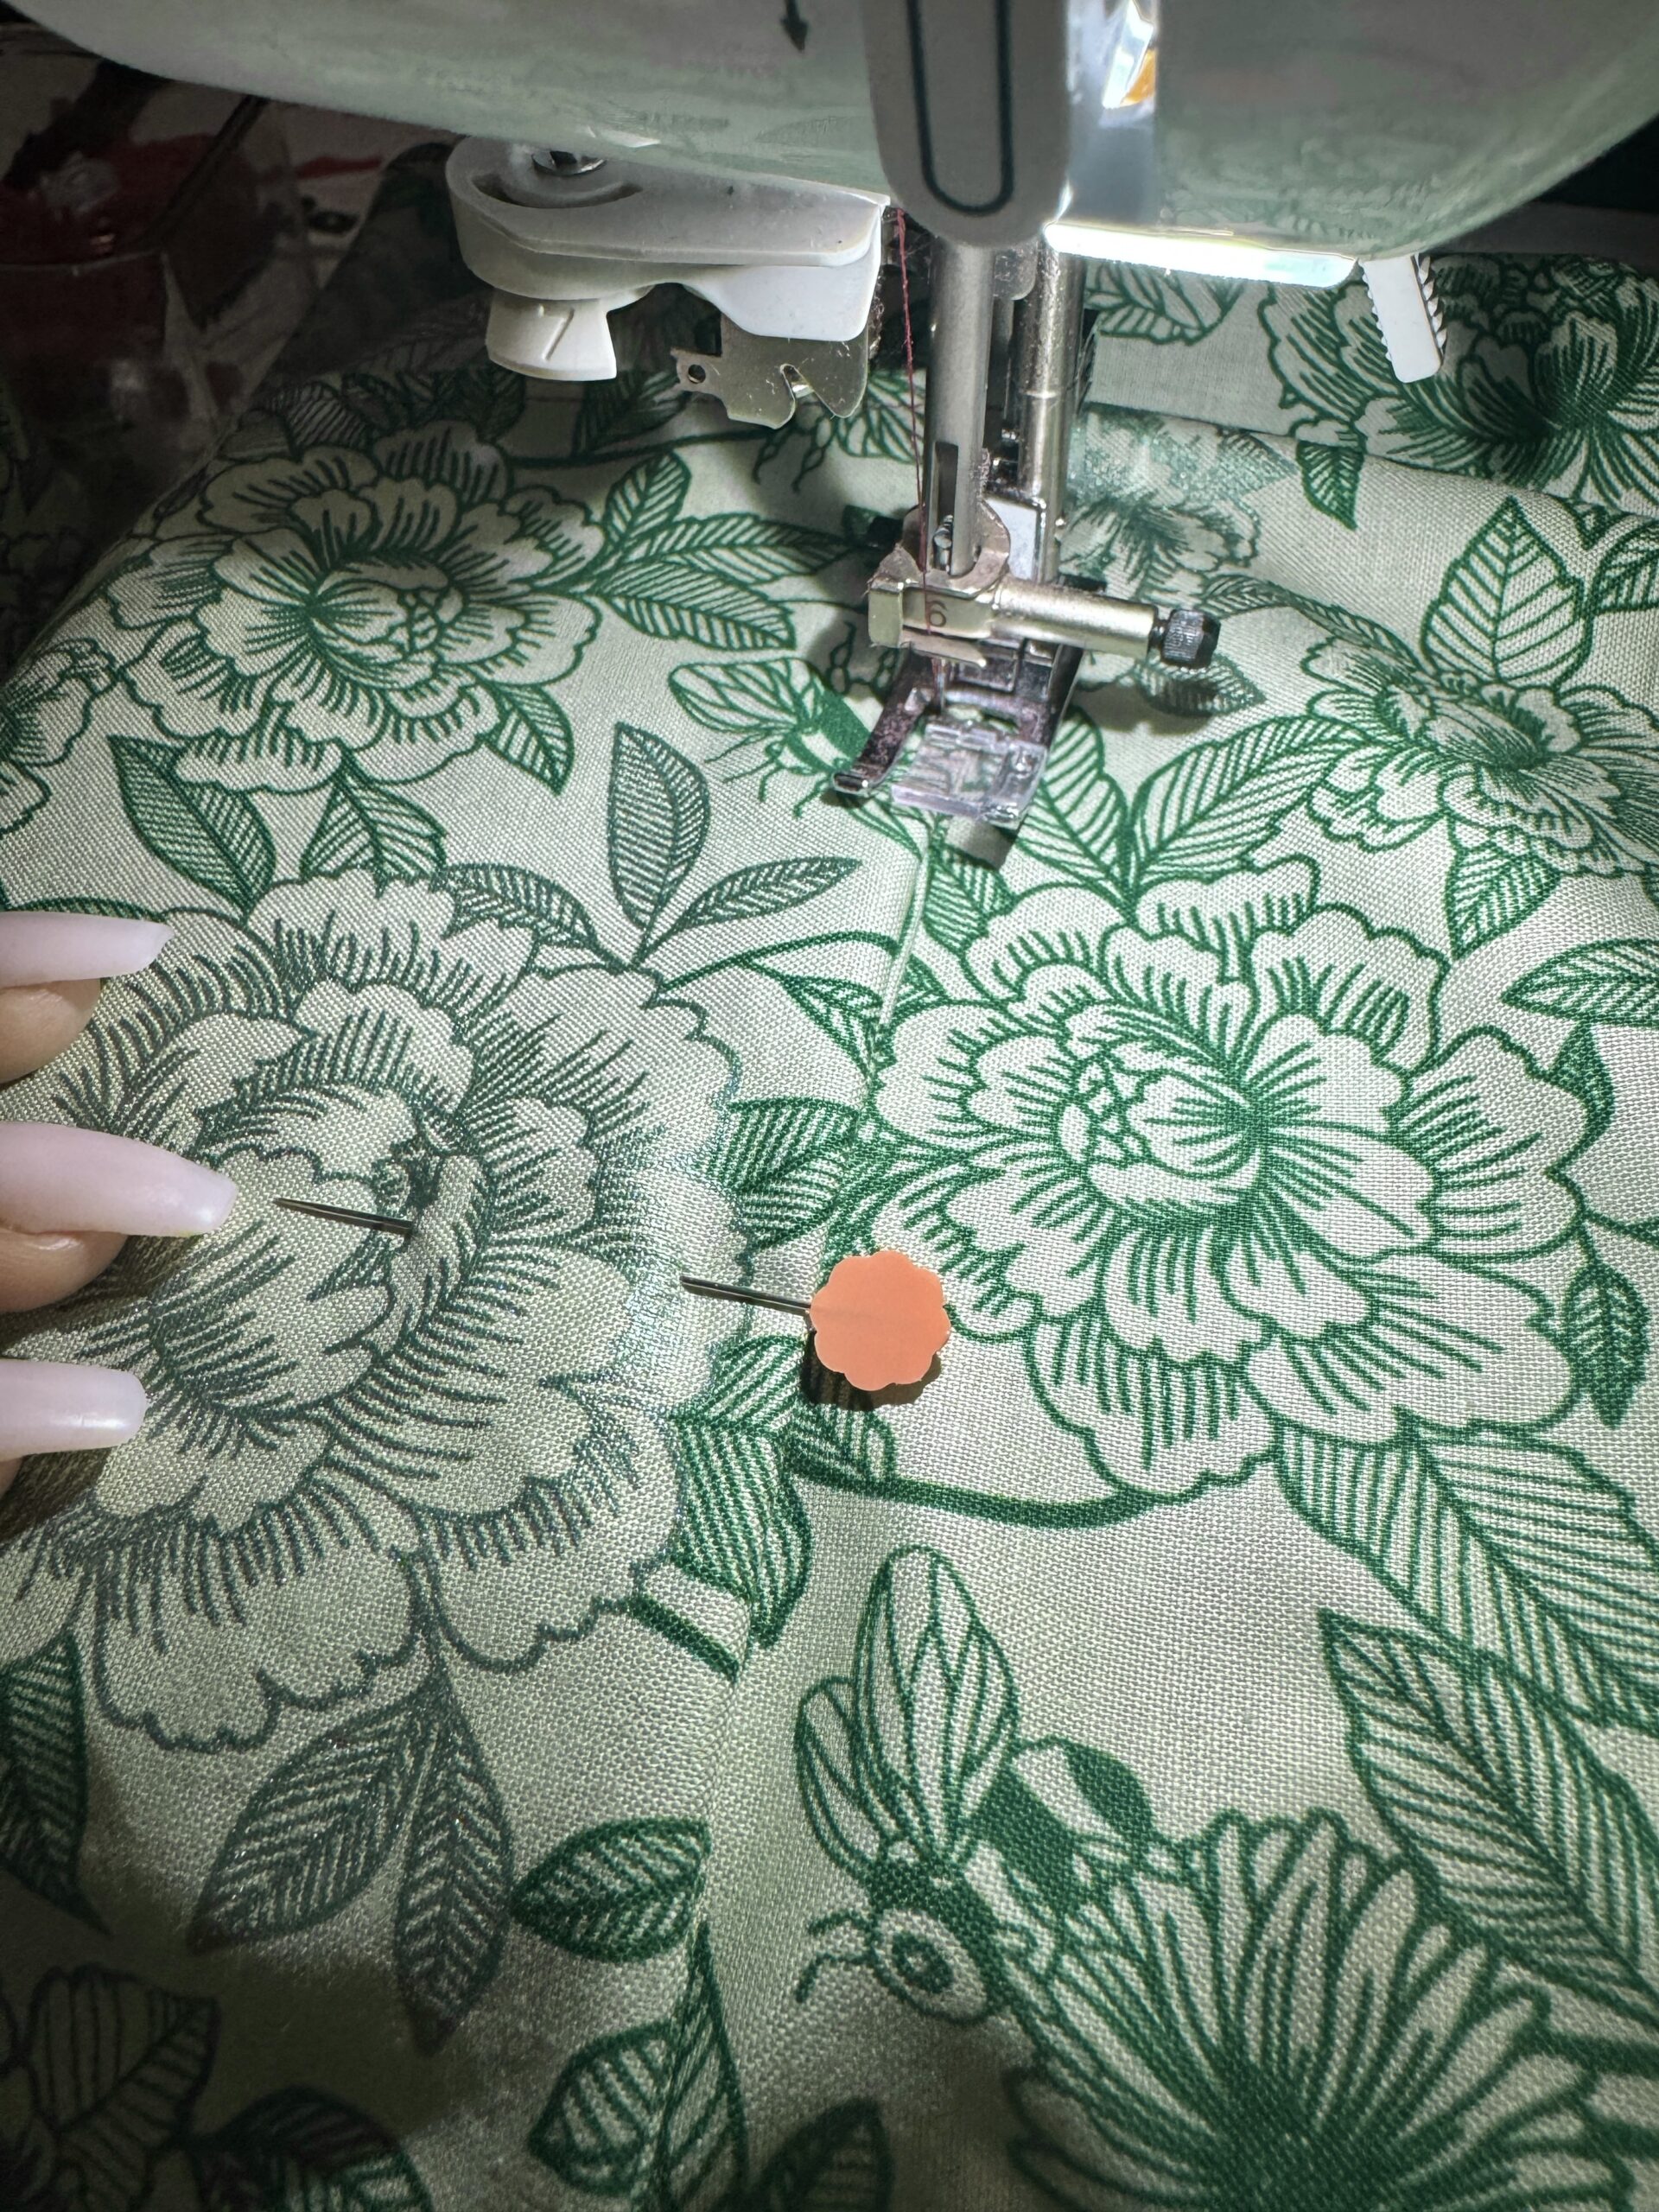
1. Place the pattern pieces on the fabric and hold it in place using the Clover Flower Pins. Cut out the apron pattern pieces using the Clover Rotary Cutter (60 mm). I love using this rotary cutter for the clean cuts and it makes cutting out fabric much easier.
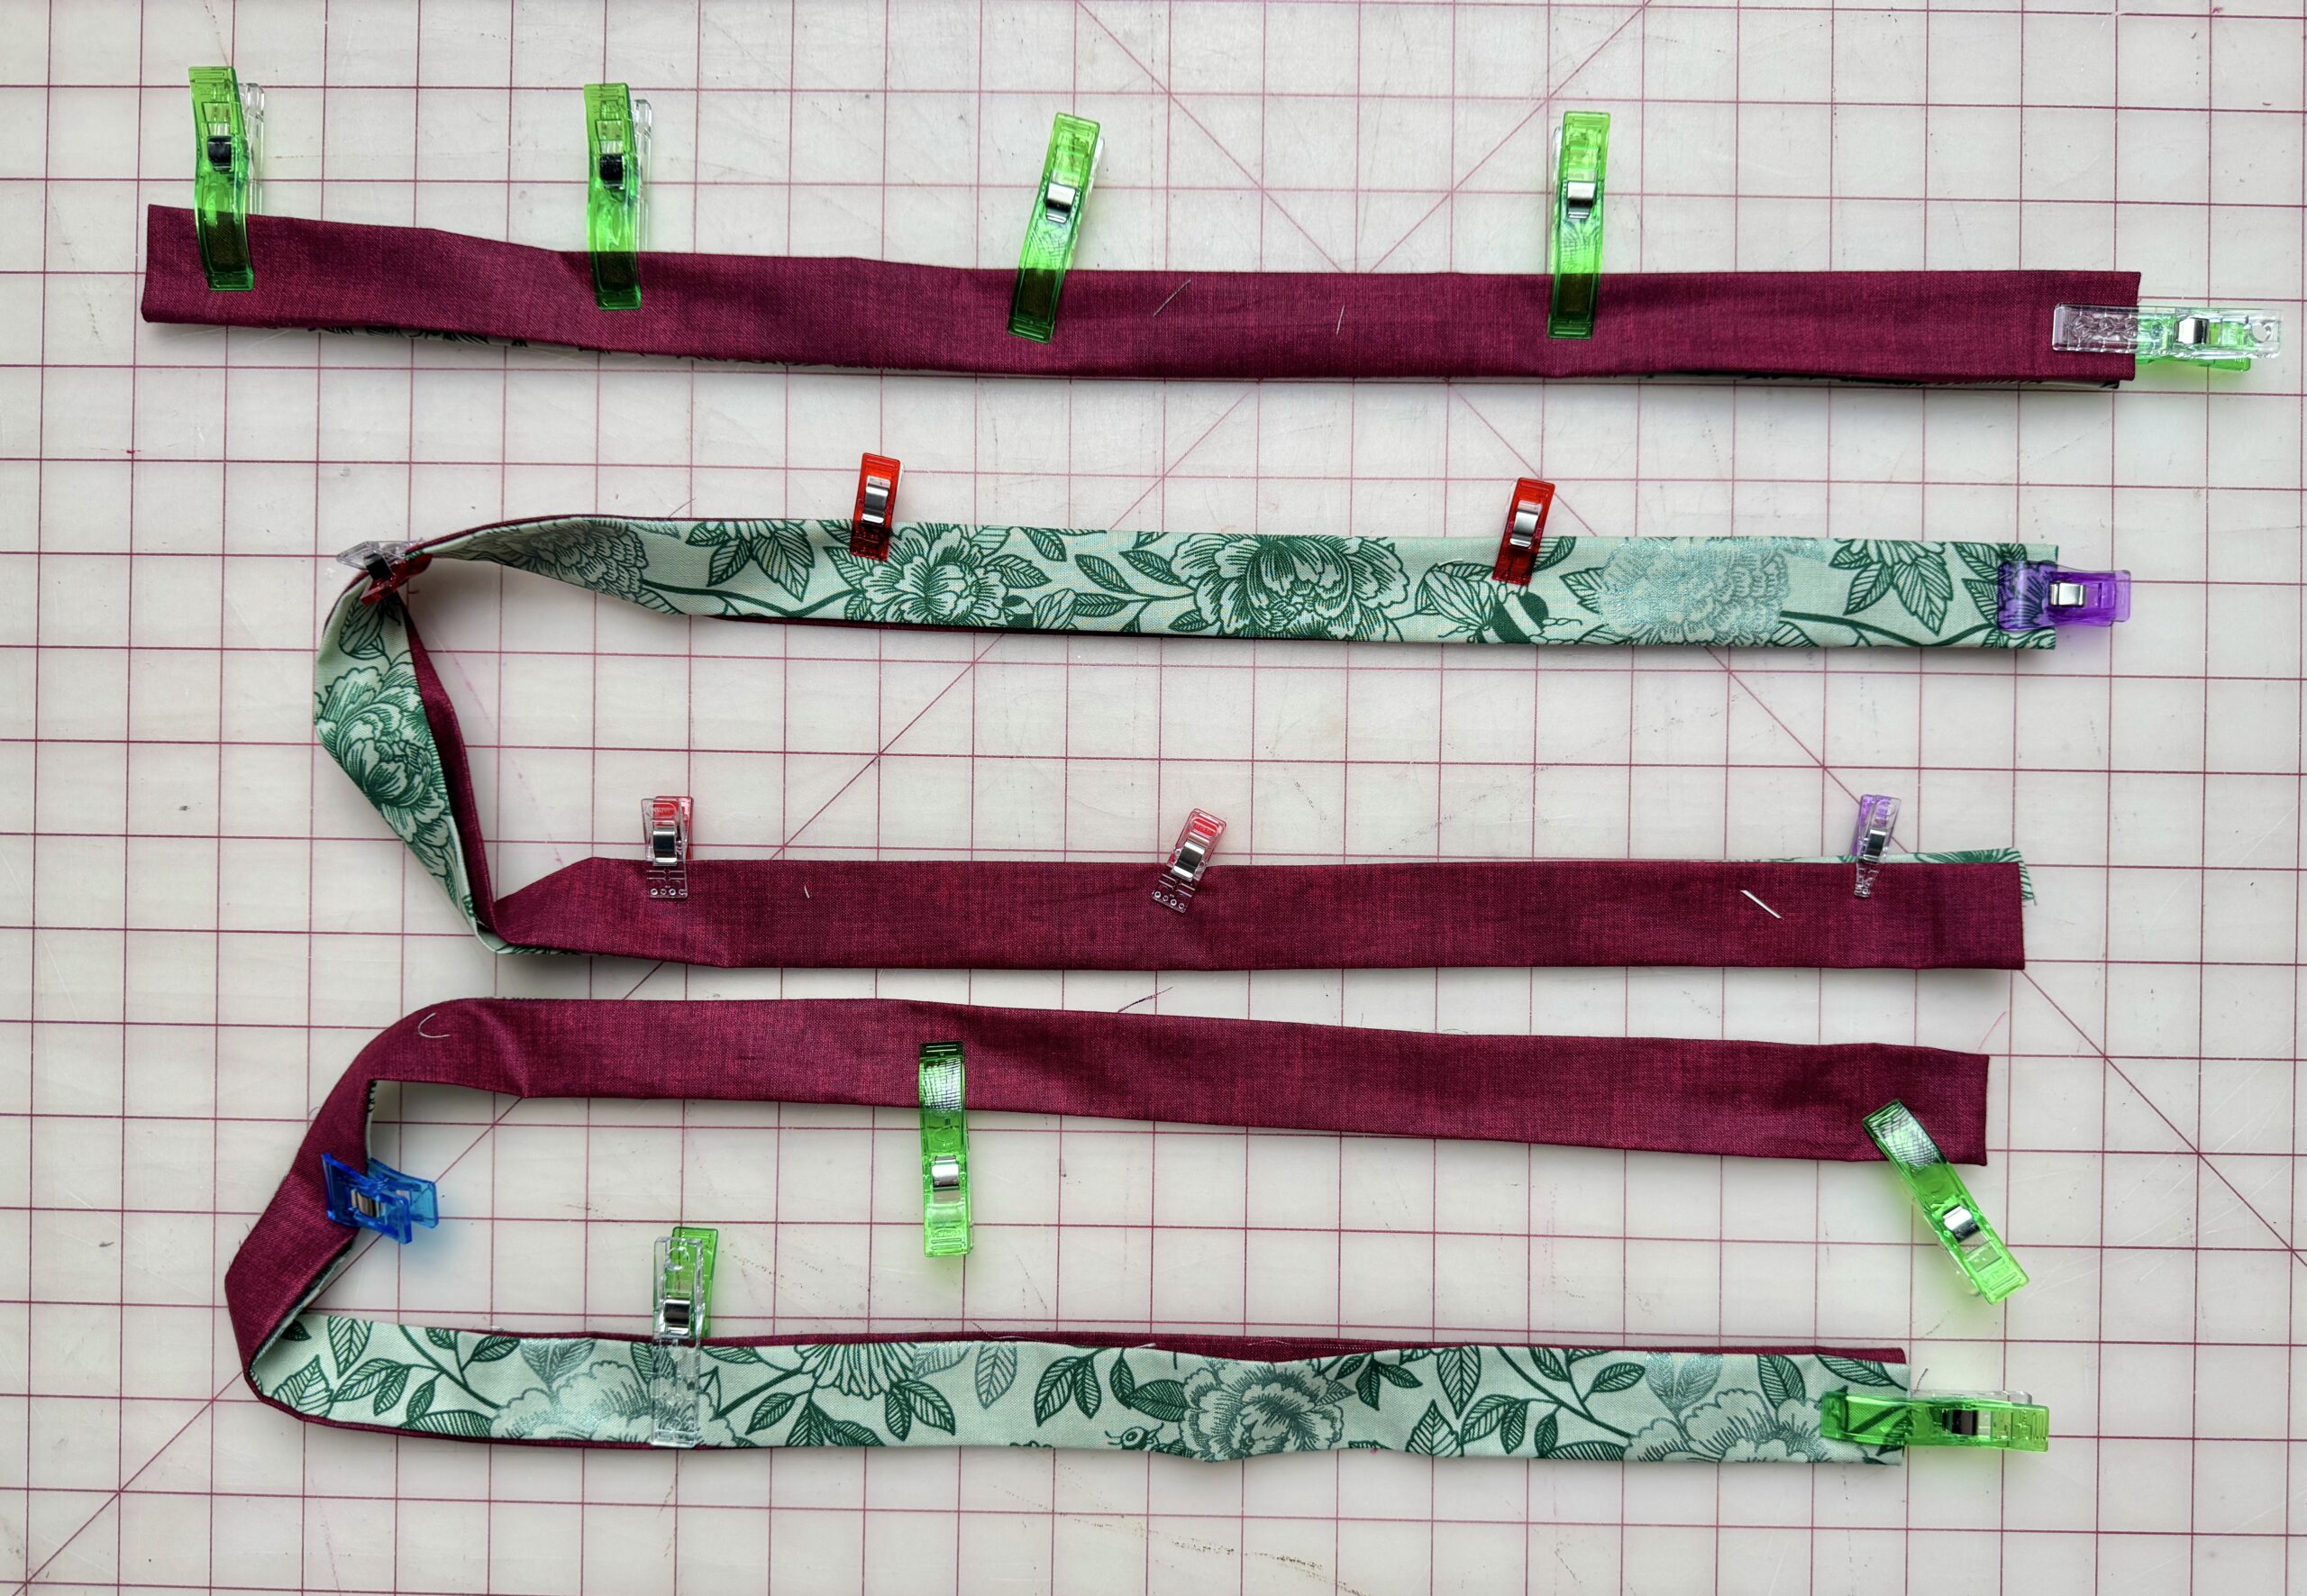
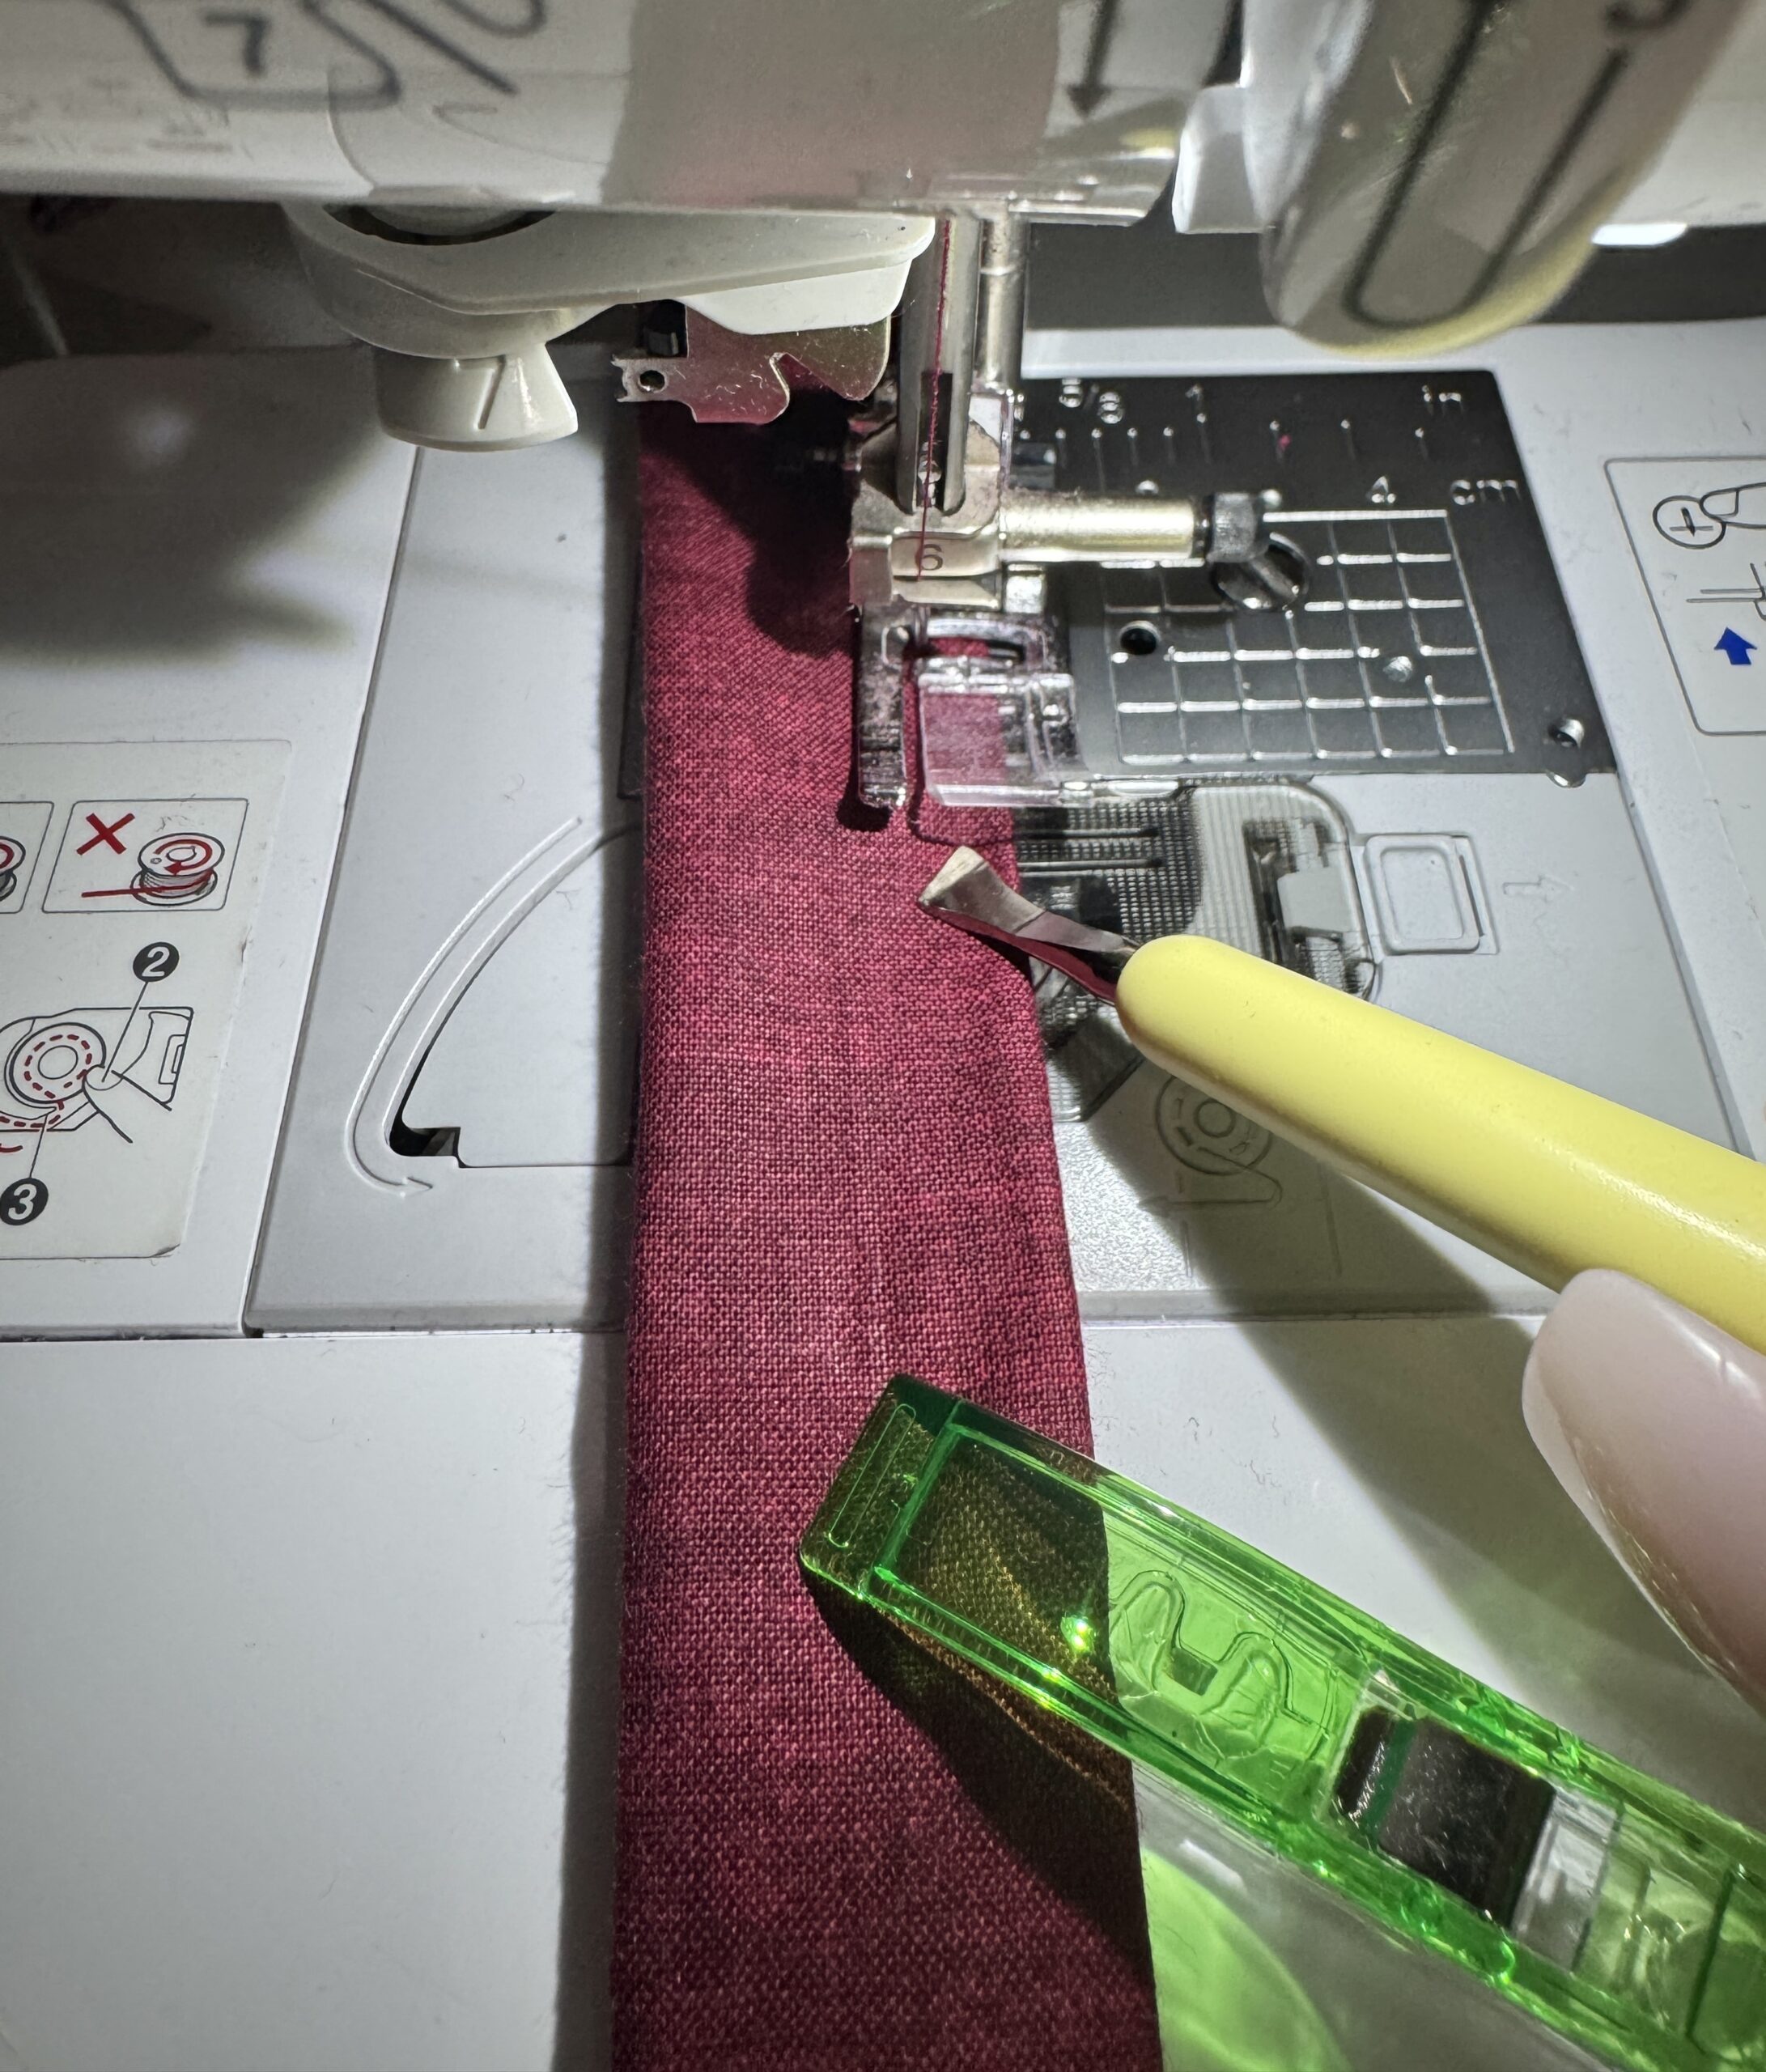
2. Create the ties by folding in the fabric A & B in by 1″ on each side. Press using an iron. Lay the fabric on top of each other wrong sides together. Hold in place using the Clover Wonder Clips and edgestitch around the ties to create a two-sided tie. The Clover Metal Hera with Stylus is becoming one of my favorite tools when sewing to help keep the fabric from moving as it gets close to the needle.
- Note: Seal one end of the long ties and you can leave raw edges on the shorter tie.
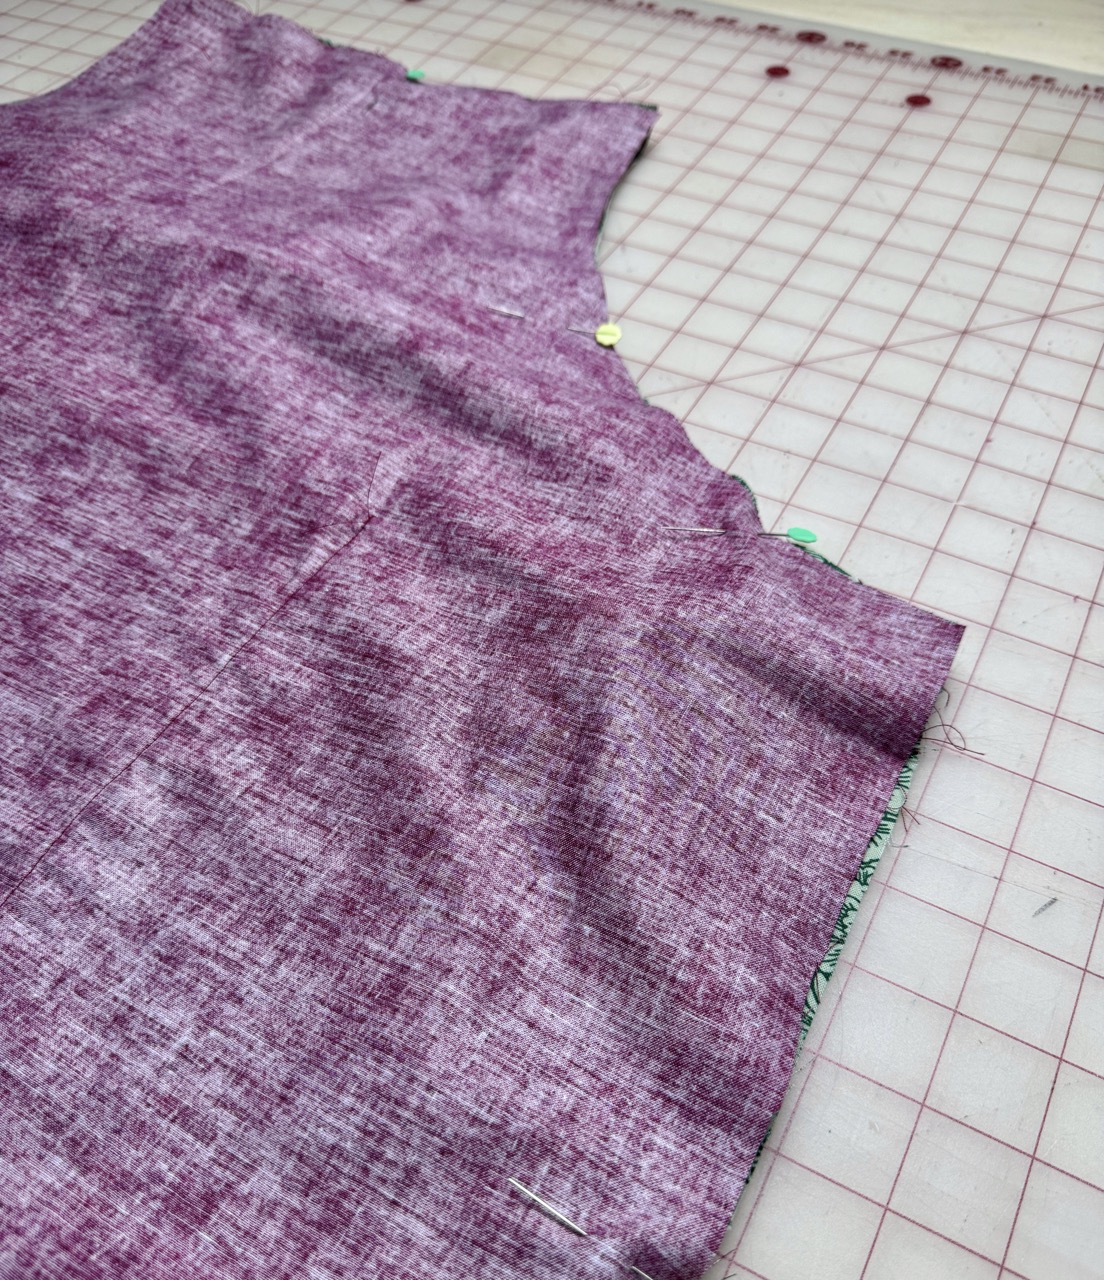
3. Create the pockets by placing Fabric A right sides together. Stitch around and leave a 4″ gap. Turn right sides out and press. Place the pocket on the marking on the apron with the gap being on the bottom. Topstitch around the pocket, leaving the top open. Repeat with Fabric B.
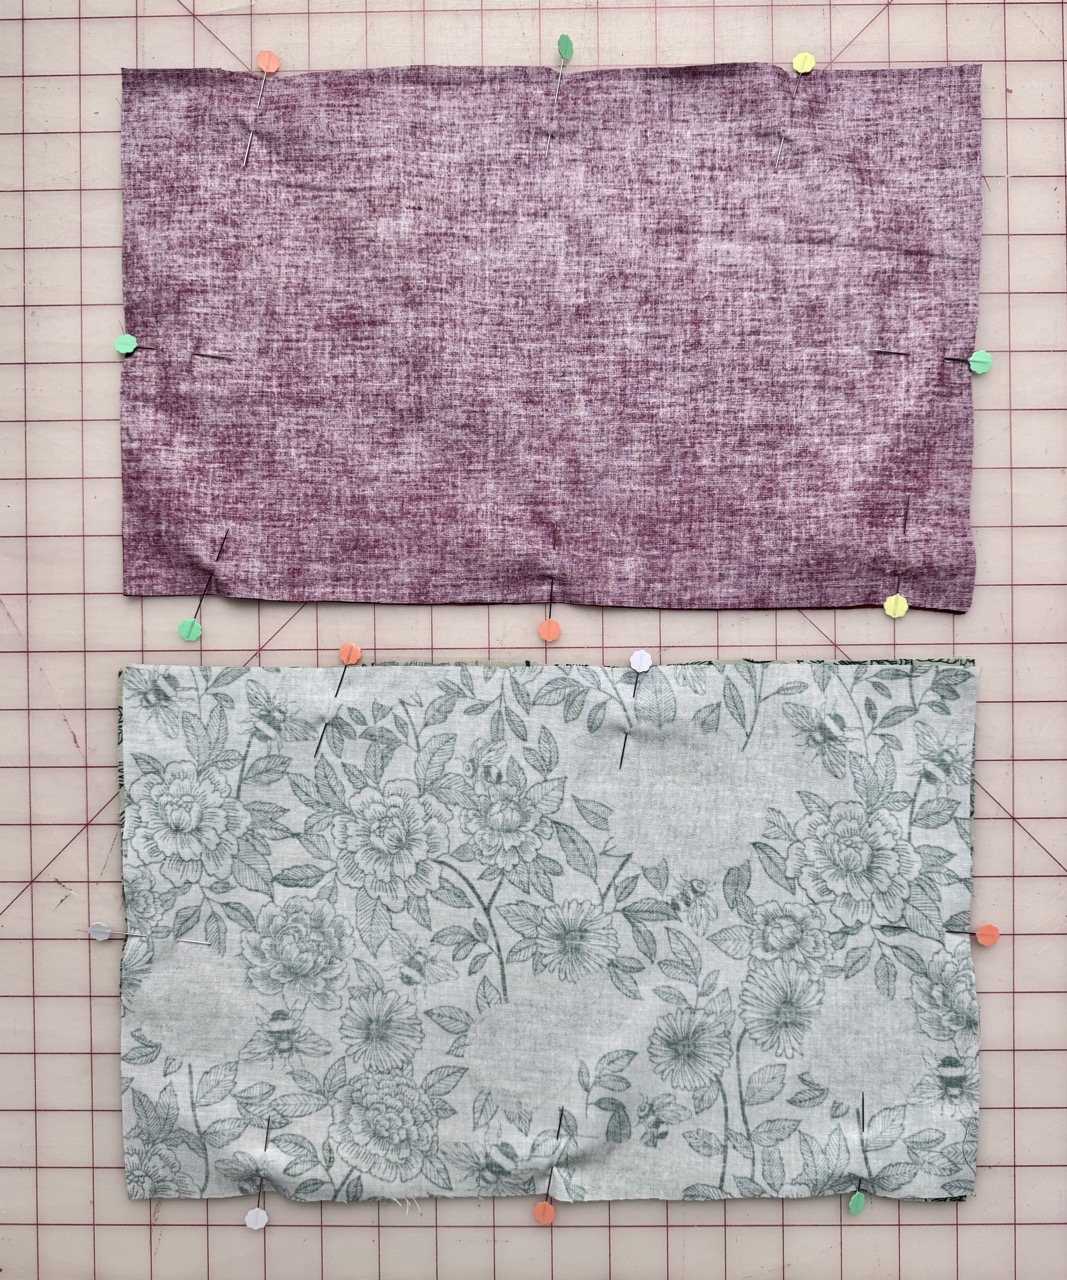
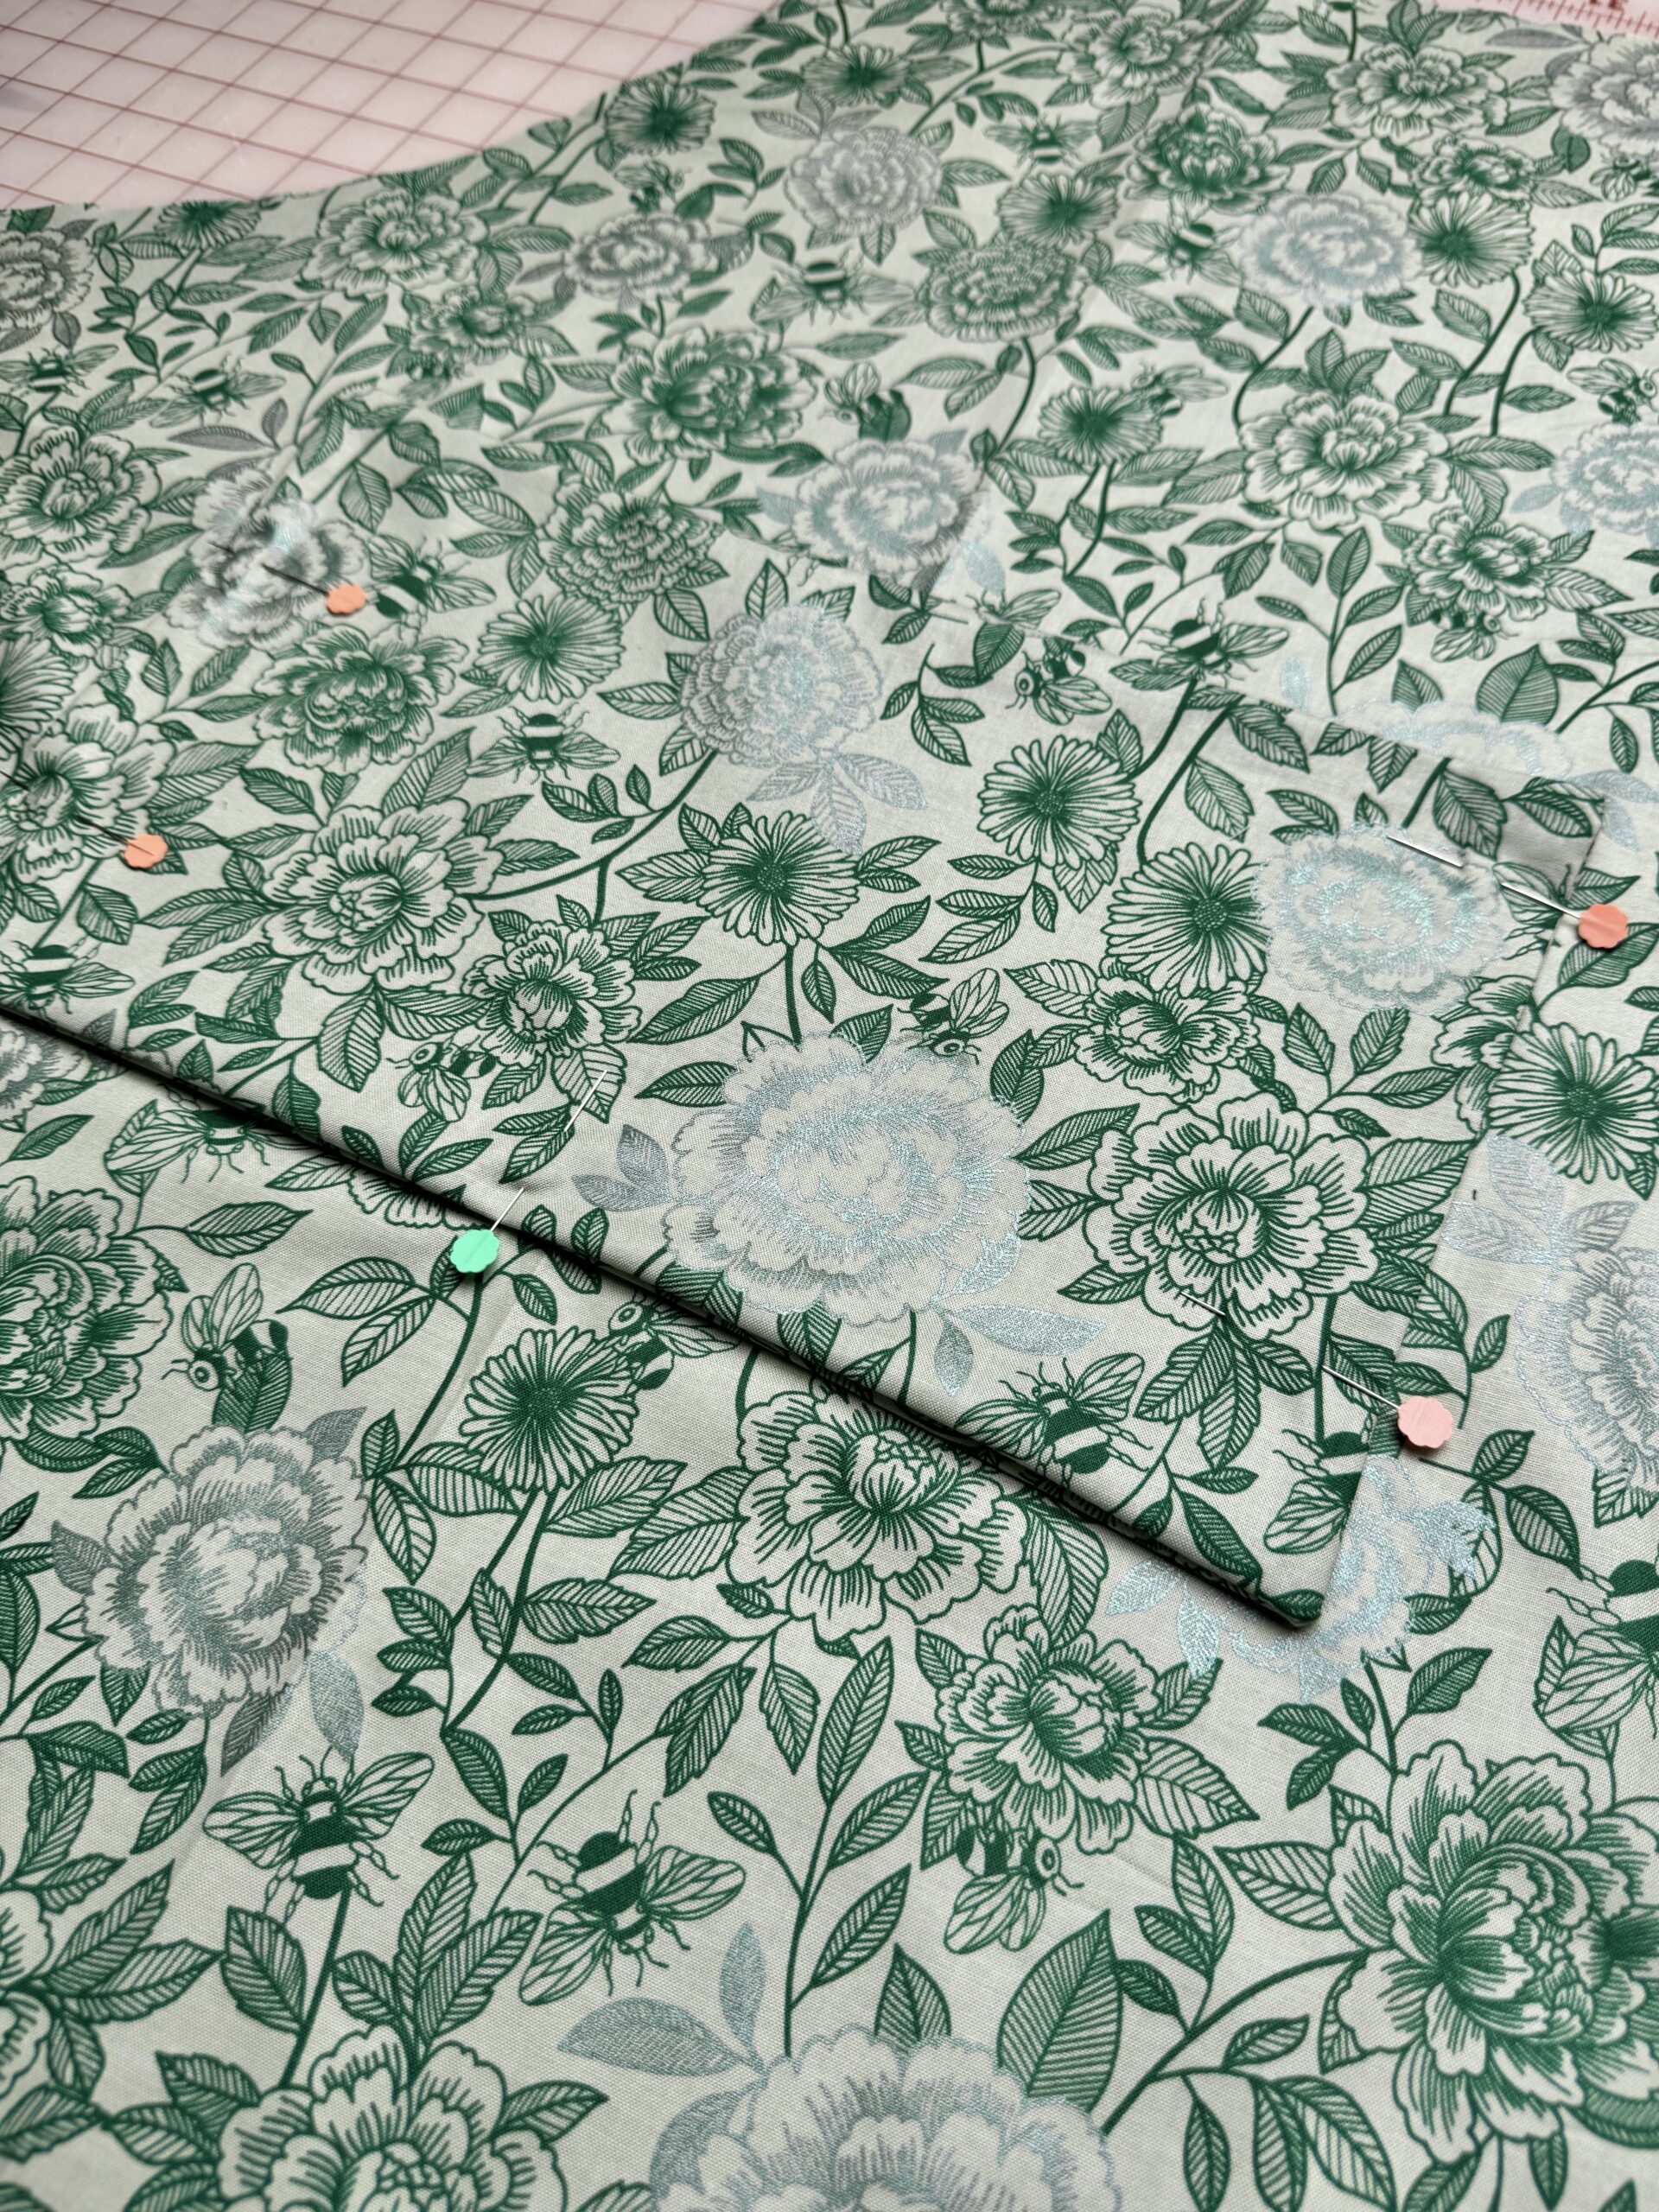
4. Place the long ties on the sides and the short tie on the top for the neckline. Baste in place. Place Apron pattern with Fabric B on top of the Apron pattern with Fabric A. Stitch around the entire apron, making sure not to sew over the loose ends of the ties. Leave a 5-6″ gap at the bottom of the apron. Use that gap to turn the apron right sides out. Press entire apron. Stitch 1/2″ seam across the bottom. to close the gap.
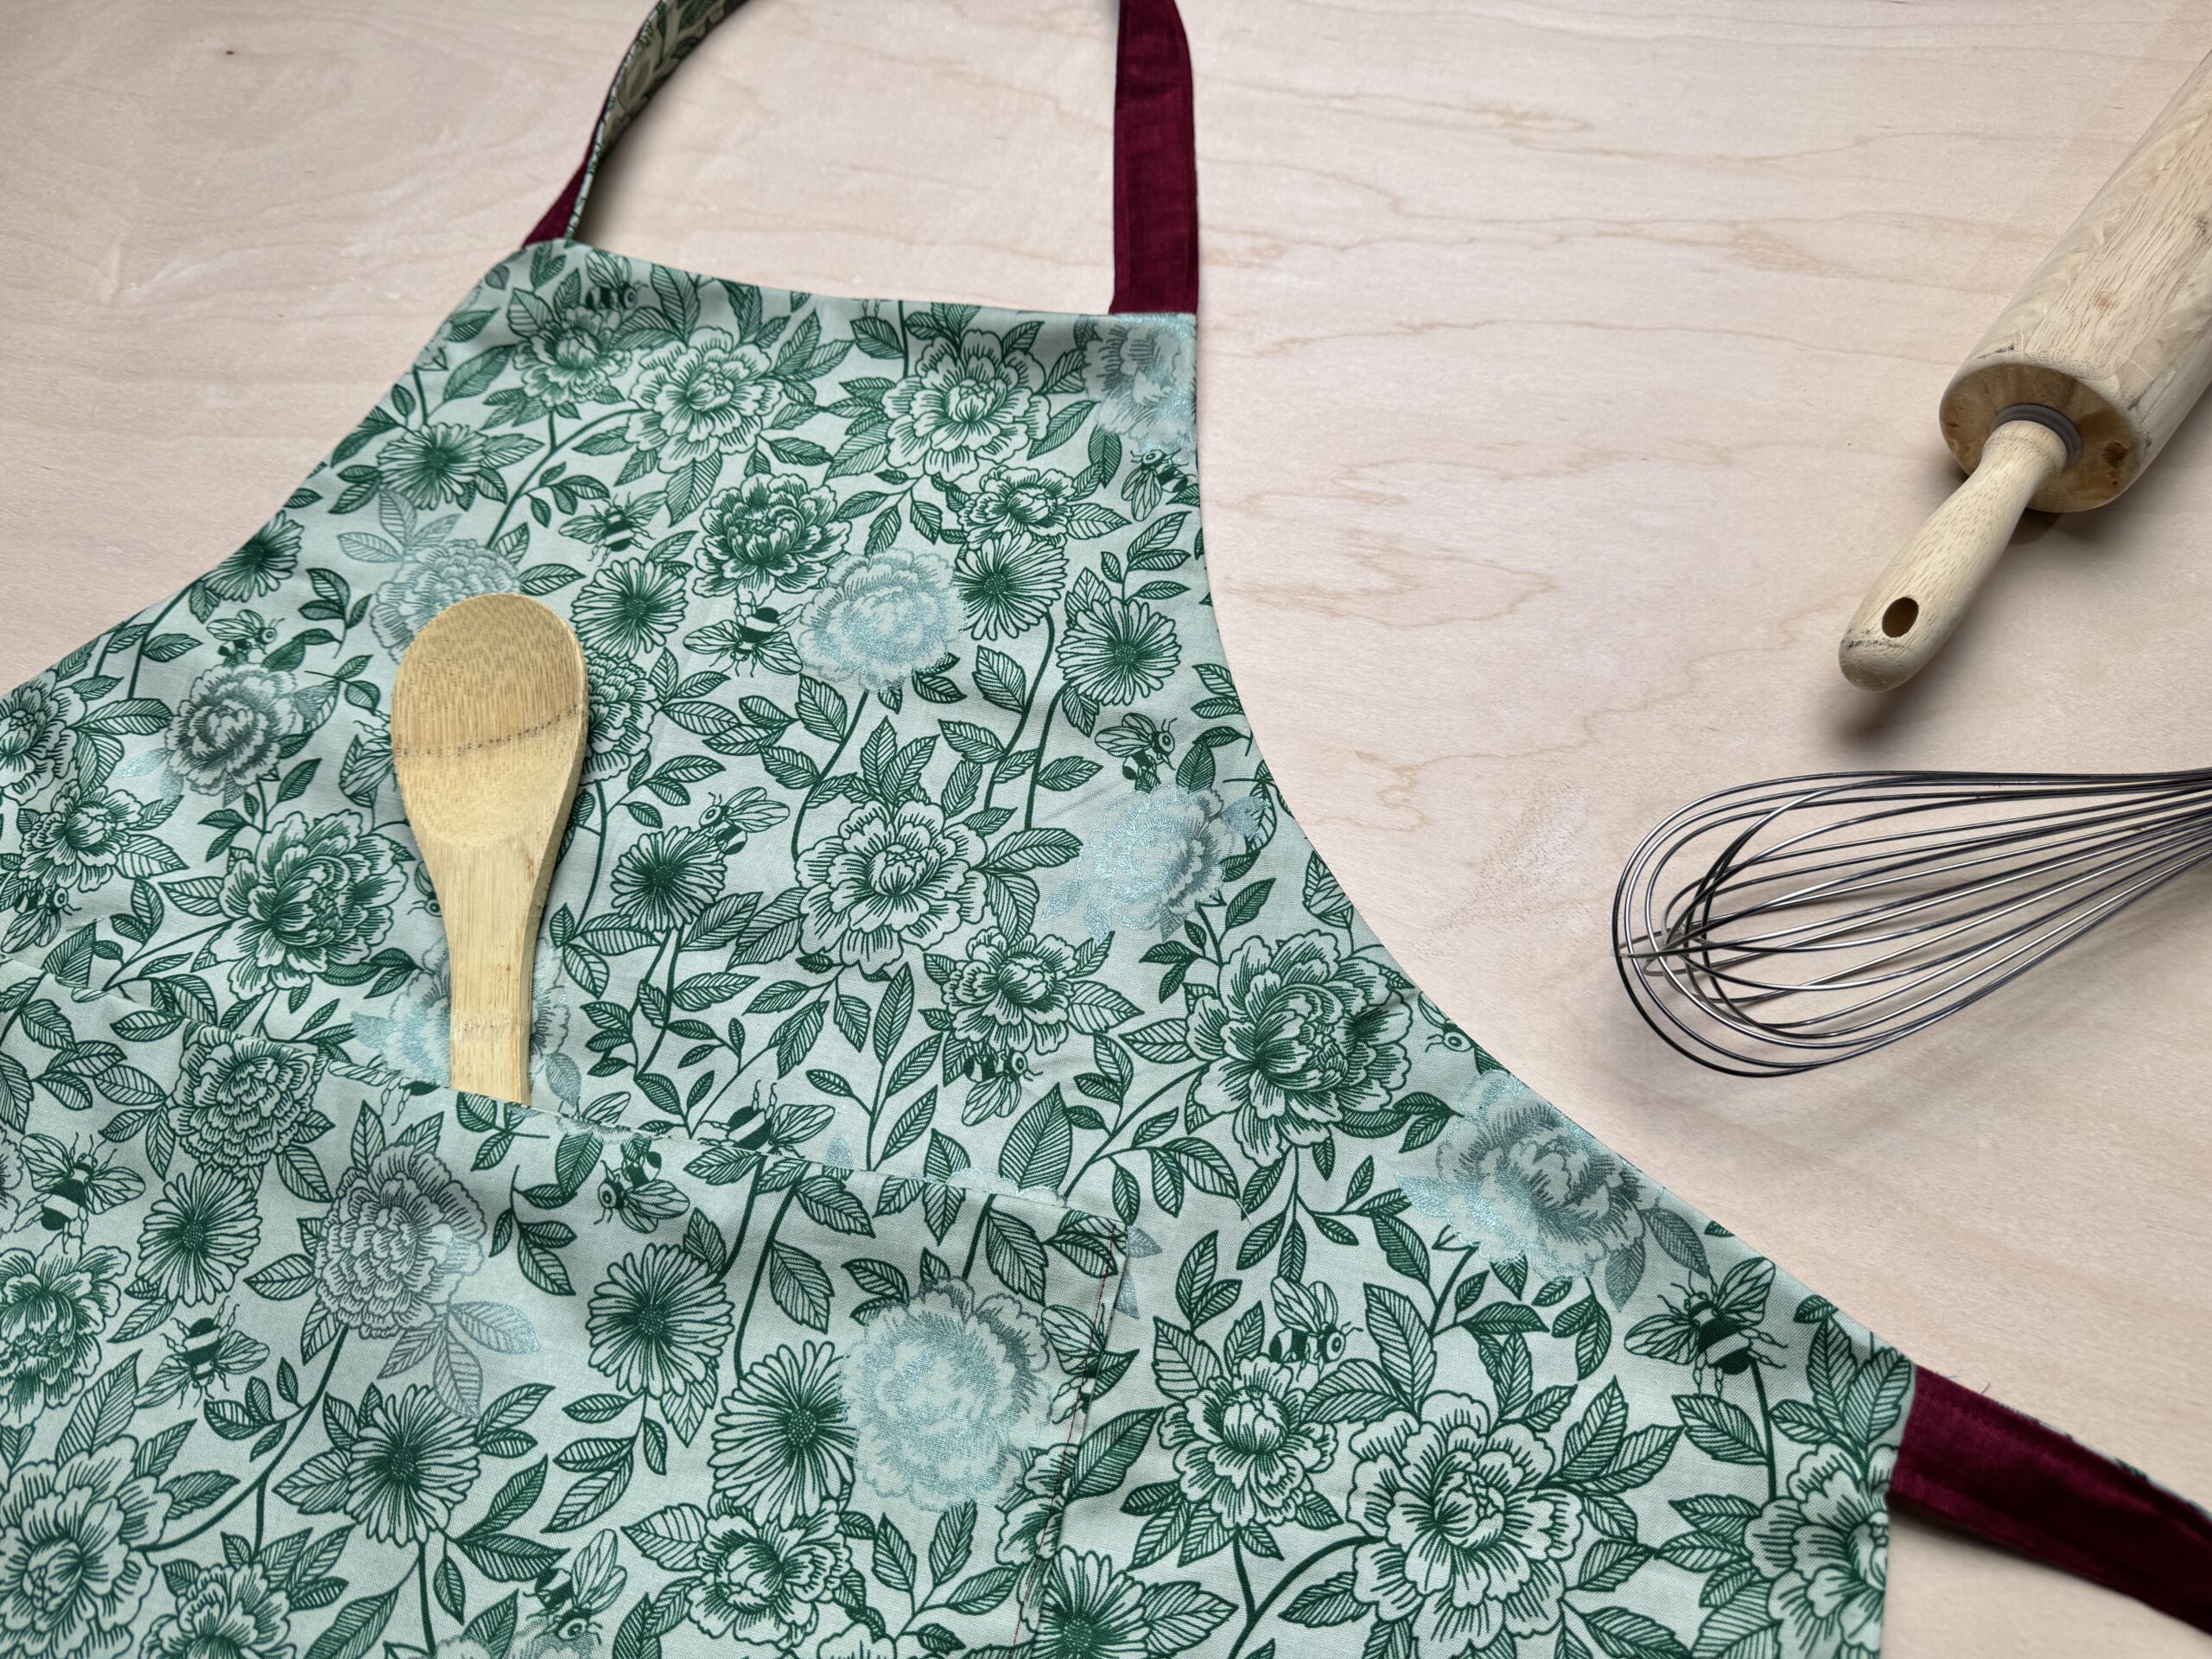
I hope you enjoyed making this quick reversible apron as much as I did. Whether you stitched it up for yourself, gifted it to a friend, or added it to your handmade essentials, I know it’ll become one of those pieces you reach for again and again. Happy sewing, and happy holidays!
If you want to keep up with me, Duana, on social media for other fun projects, follow me on social media: Instagram
If you want to keep up with all things Clover, follow us on: Facebook | Twitter | Instagram | Pinterest | YouTube | Ravelry