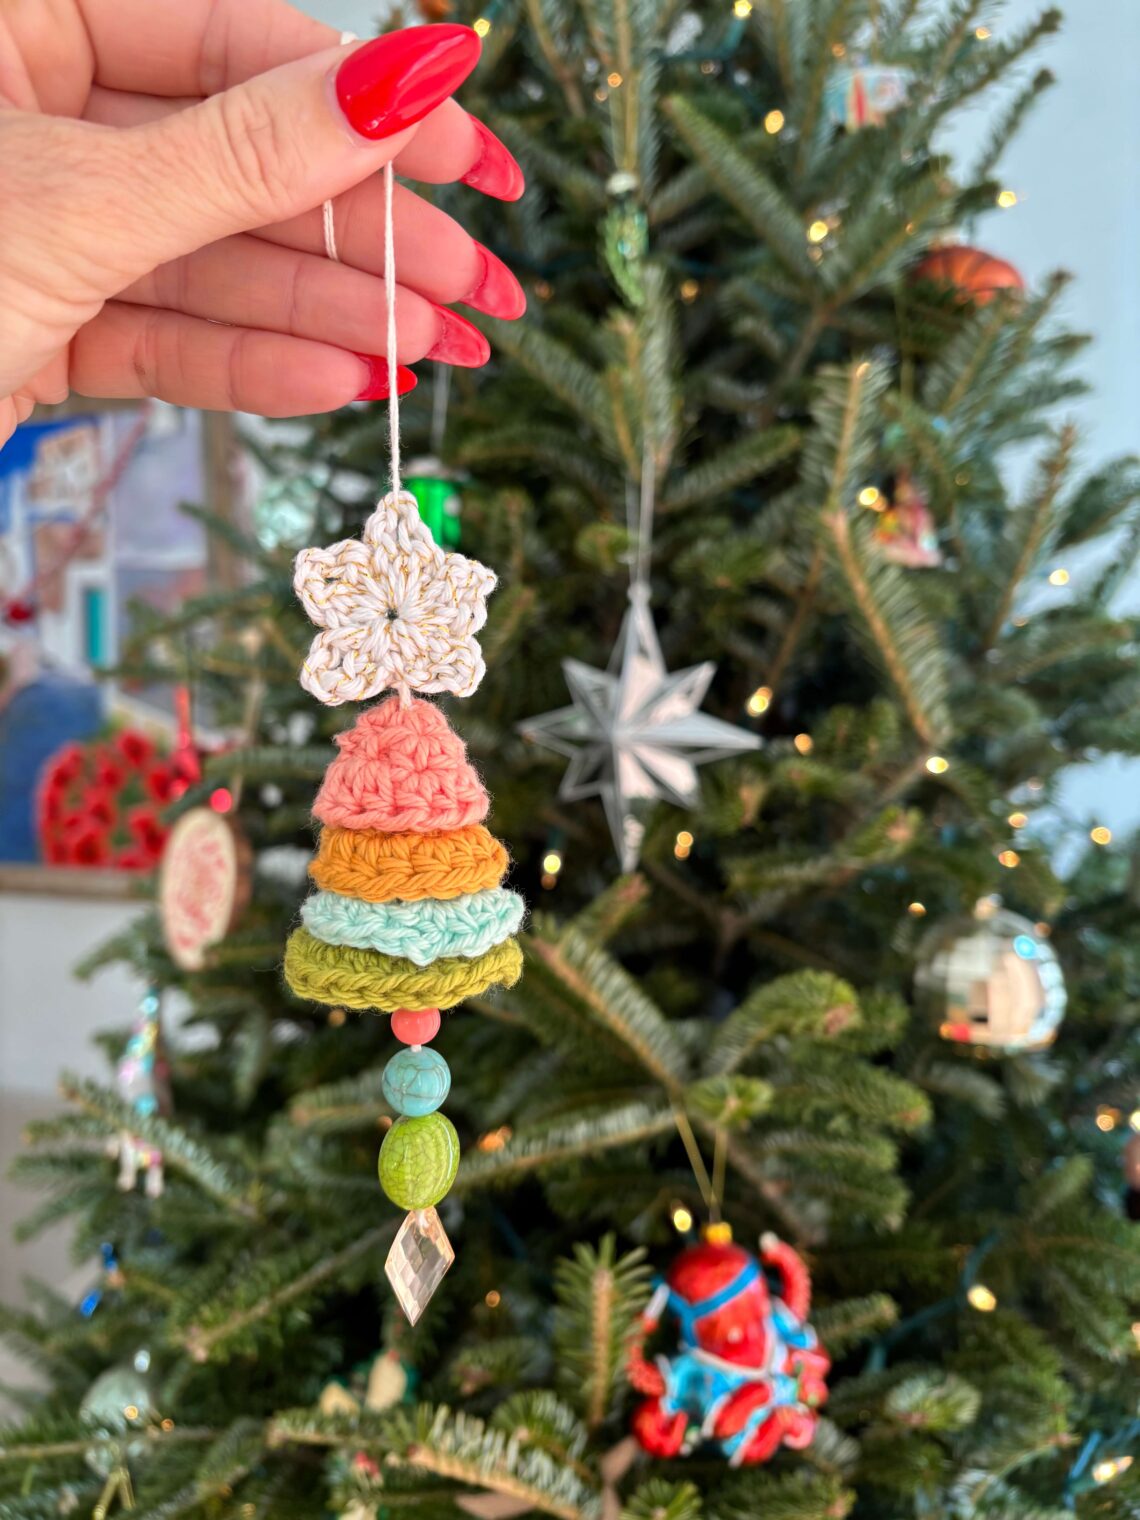
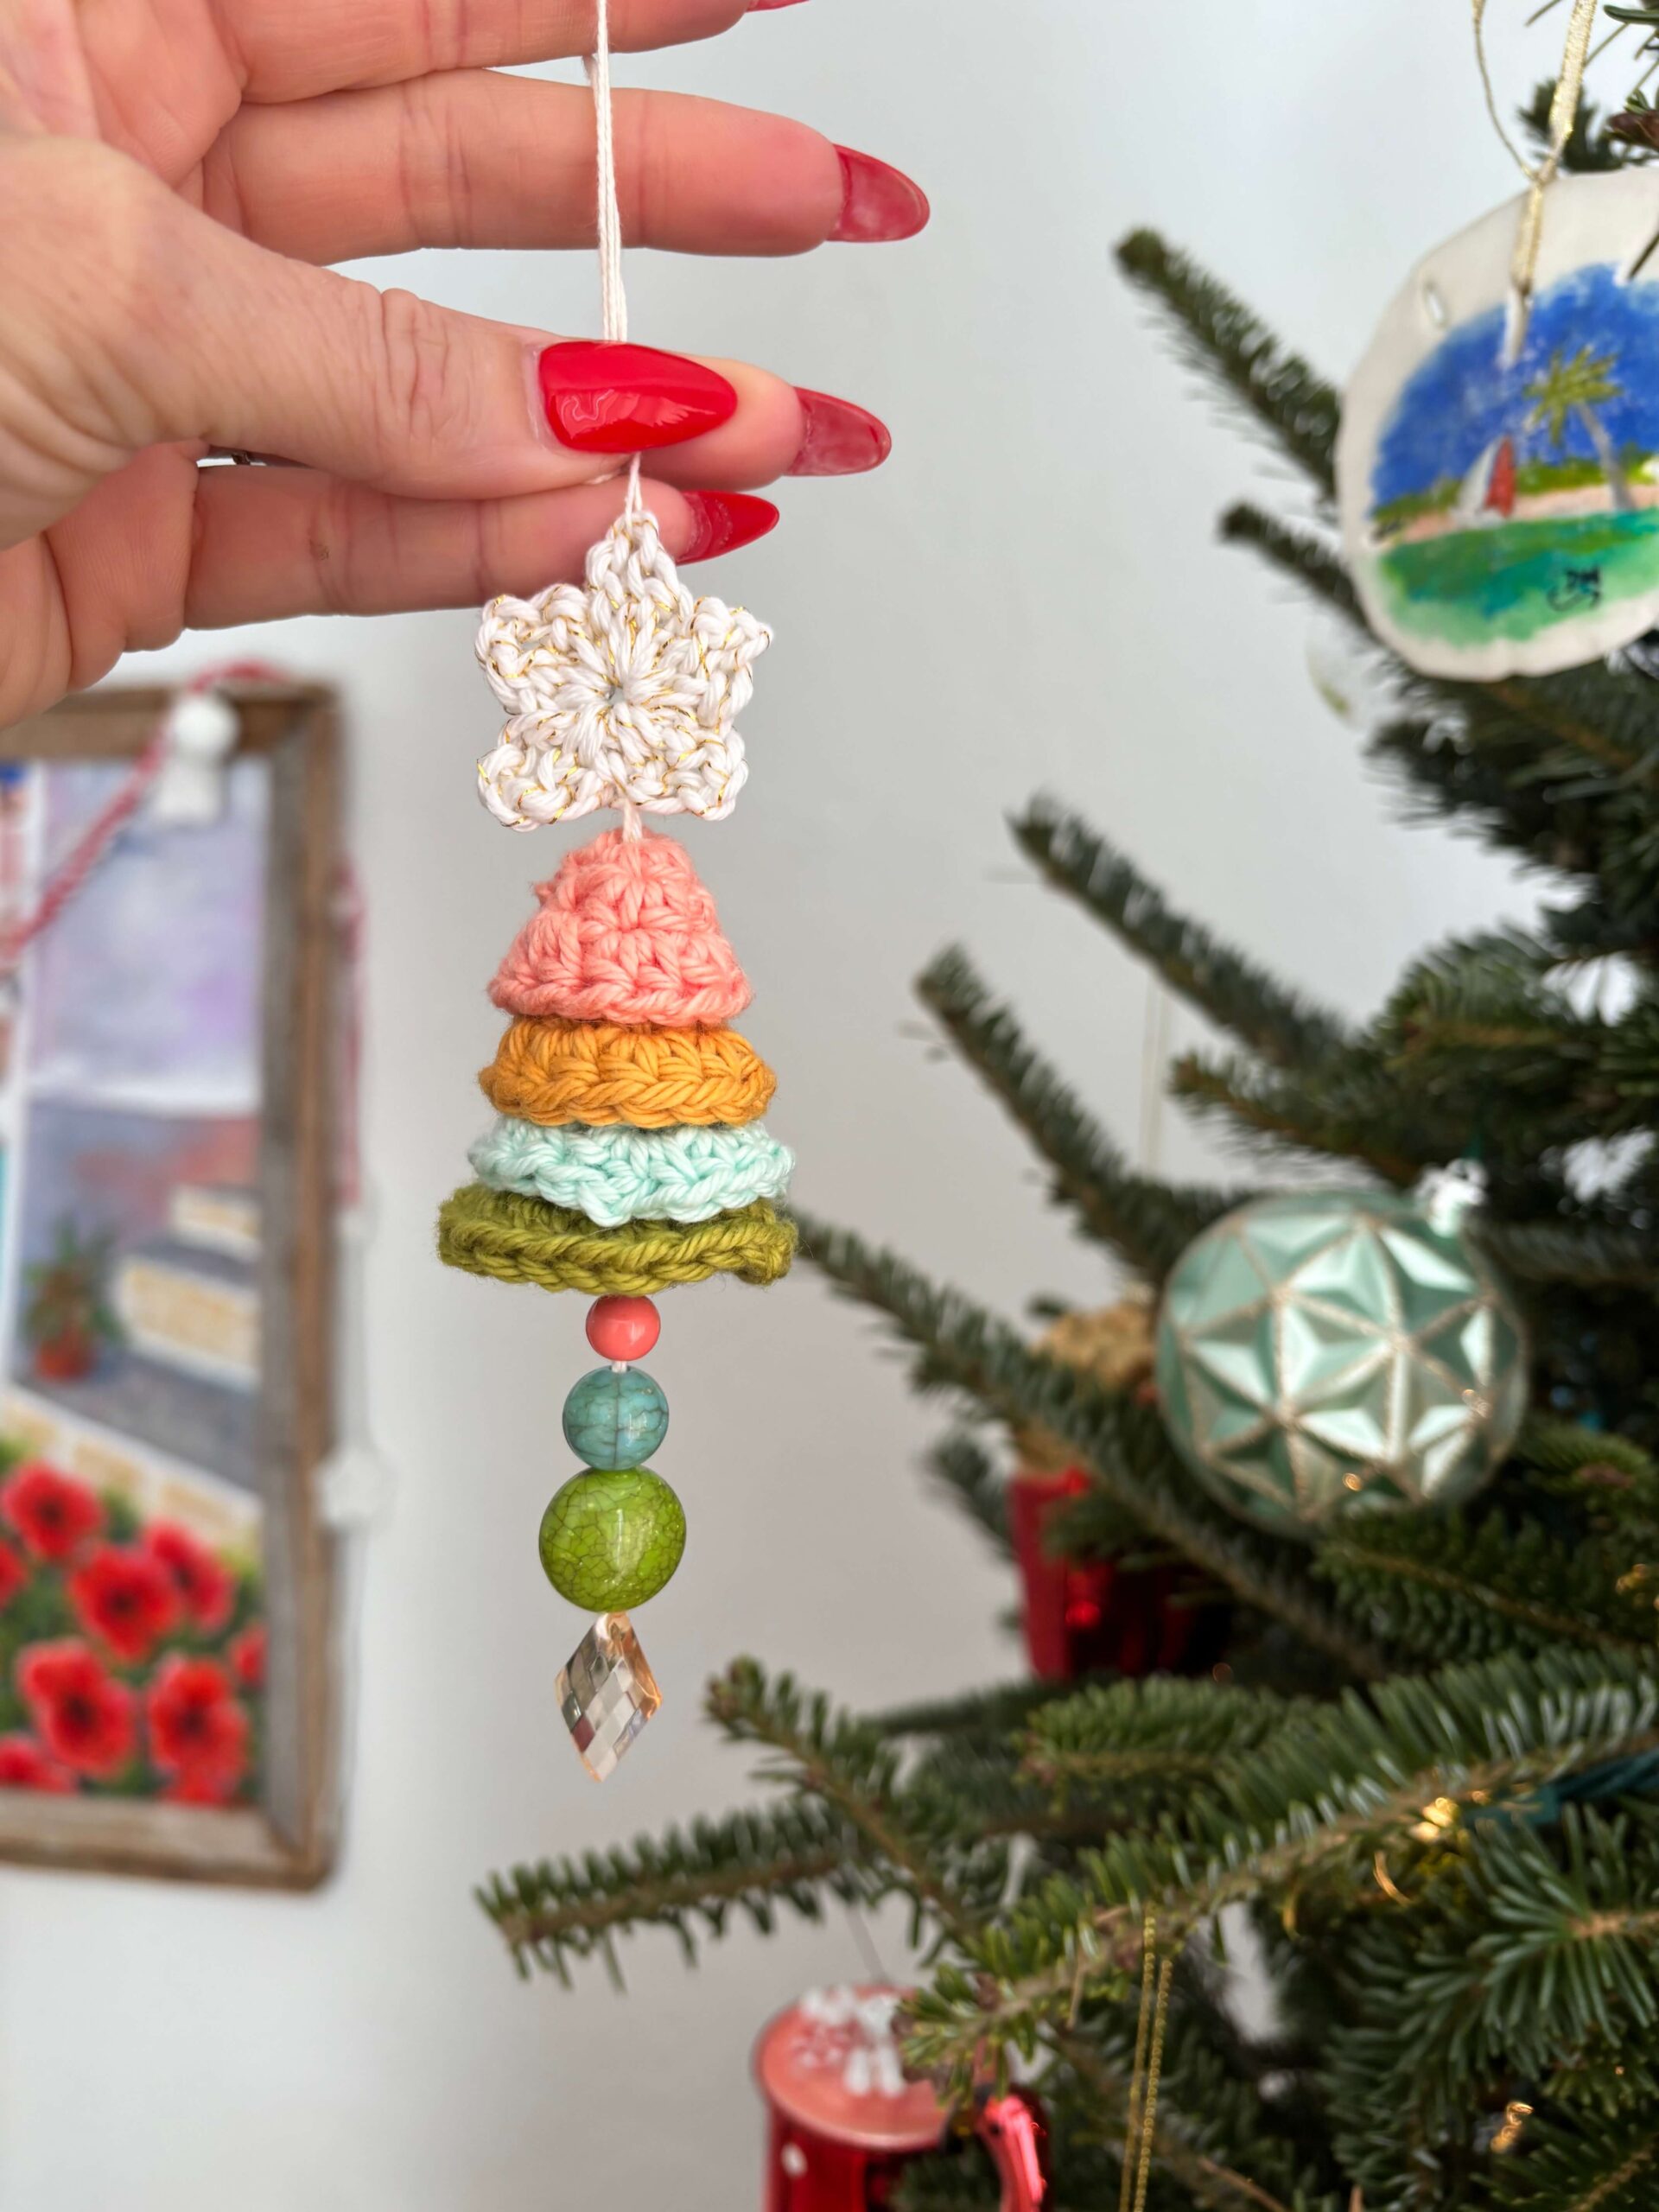
Rainbow Christmas Tree (ornament or car charm!)
Handmade doesn’t have to be complicated to be meaningful! 🙂 This Rainbow Christmas Tree is a simple, joyful project that celebrates the beauty of small makes during the busiest time of year. You can use it as a new ornament or even a charm to hang in your car! This is the perfect little holiday project. Cute, compact, and full of Christmas spirit, it’s ideal for stocking stuffers, teacher gifts, or adding a handmade touch to your own car this season.
If you prefer to follow along VISUALLY for this pattern, find the tutorial on our YouTube channel by clicking HERE!!!!!
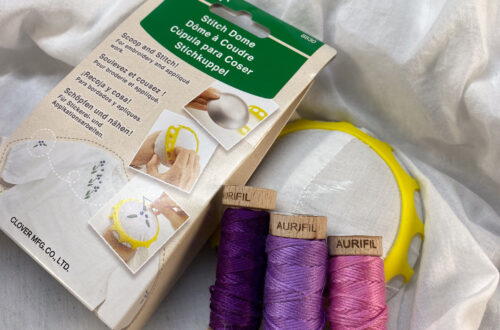
MATERIALS:
- Clover Amour Hook G (4.0mm)
- Patchwork Scissors (mini)
- beads, thread, and beading needle
- yarn needle
- small amount of worsted weight yarn in multiple colors
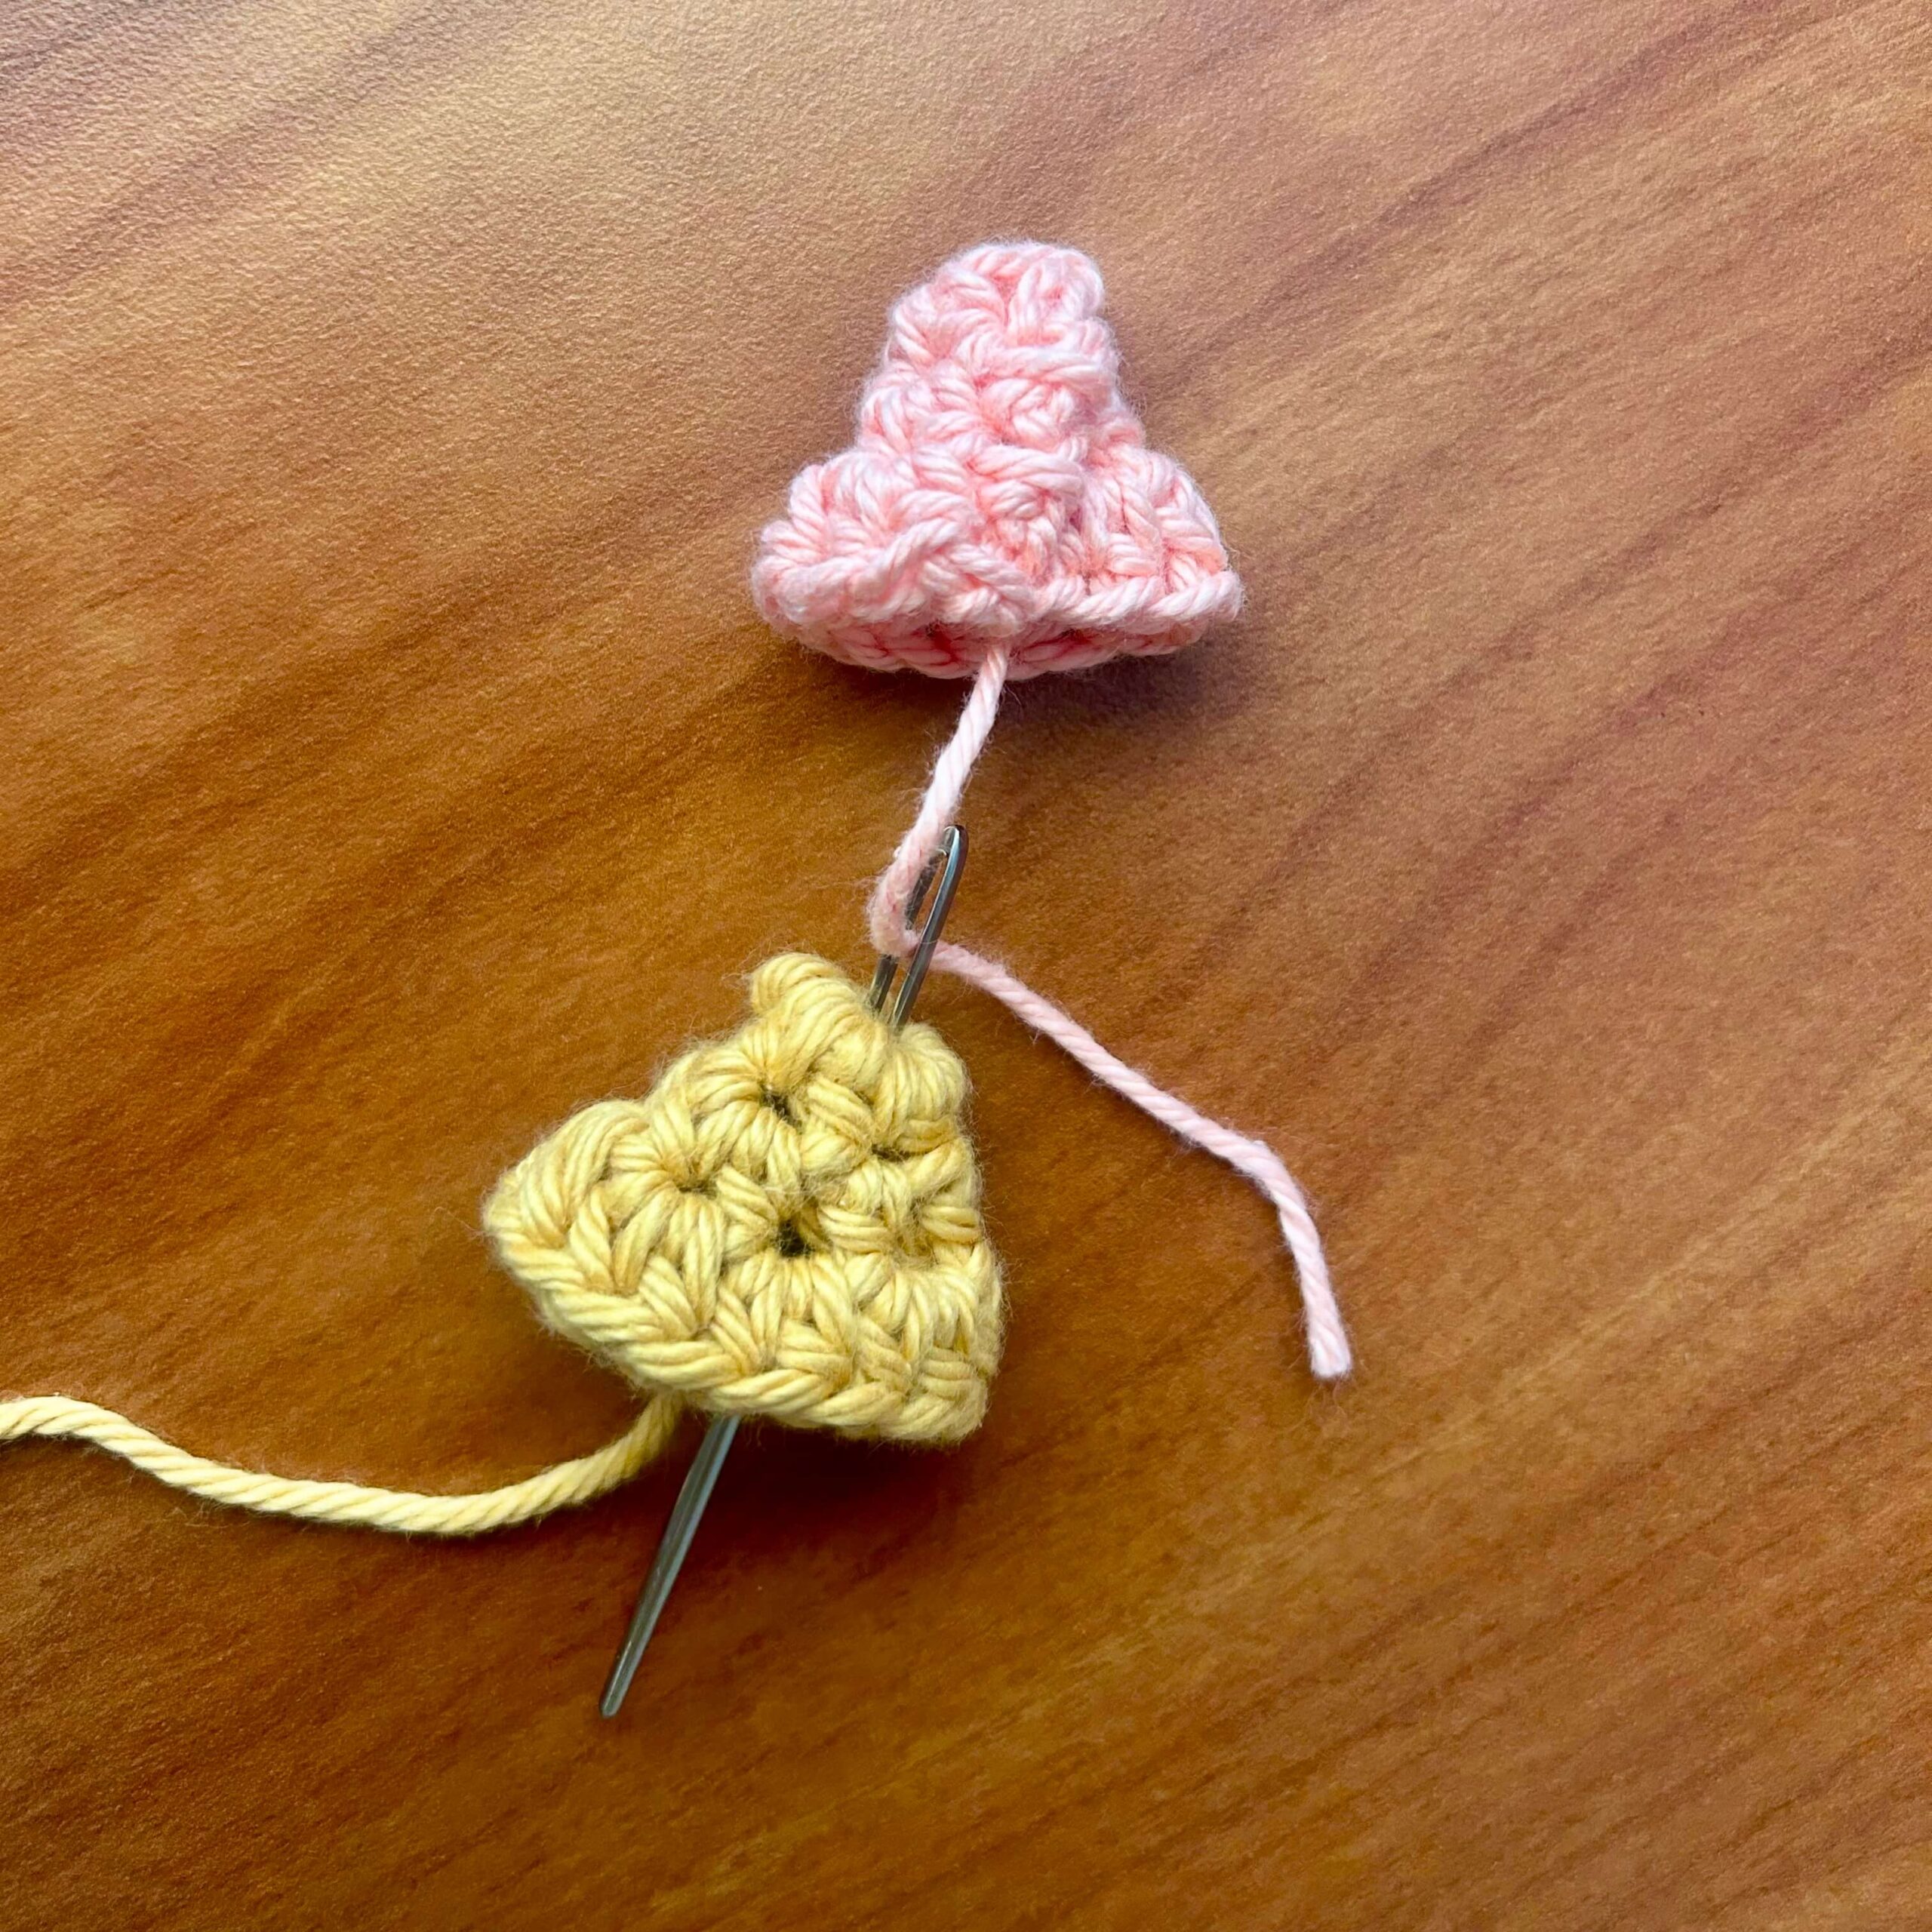
Note: when you finish each cone, do not weave in your center tail as you will use this to connect the cones together.
TREE PATTERN:
With pink:
- Ch 4, sl st in the first ch to form a ring.
- Round 1: Ch 2, 4 hdc in the ring, join with a sl st to the first hdc. Push out the center to form your cone top. (4 hdc)
- Round 2: Ch 2, *1 hdc in the first st, 2 hdc in the next st, * repeat once more, join with a sl st to the first hdc. (6 hdc)
- Round 3: Ch 2, 2 hdc in each st around, join with a sl st to the first hdc. Finish off. (12 hdc)
With yellow:
- Ch 4, sl st in the first ch to form a ring.
- Round 1: Ch 2, 5 hdc in the ring, join with a sl st to the first hdc. Push out the center to form your cone. (5 hdc)
- Round 2: Ch 2, *1 hdc in the first st, 2 hdc in the next st, * repeat once more, 1 hdc in the last st, join with a sl st to the first hdc. (7 hdc)
- Round 3: Ch 2, 2 hdc in each st around, join with a sl st to the first hdc. Finish off. (14 hdc)
With blue:
- Ch 4, sl st in the first ch to form a ring.
- Round 1: Ch 2, 6 hdc in the ring, join with a sl st to the first hdc. Push out the center to form your cone. (6 hdc)
- Round 2: Ch 2, *1 hdc in the first st, 2 hdc in the next st, * repeat twice more, join with a sl st to the first hdc. (9 hdc)
- Round 3: Ch 2, 2 hdc in each st around, join with a sl st to the first hdc. Finish off. (18 hdc)
With green:
- Ch 4, sl st in first ch to form a ring.
- Round 1: Ch 2, 6 hdc in the ring, join with a sl st to the first hdc. Push out the center to form your cone. (6 hdc)
- Round 2: Ch 2, *1 hdc in the first st, 2 hdc in the next st, * repeat twice more, join with a sl st to the first hdc. (9 hdc)
- Round 3: Ch 2, *2 hdc in the first st, 3 hdc in the next st* repeat from * around, ending with 2 hdc in the last st, join with a sl st to the first hdc. (22 hdc)
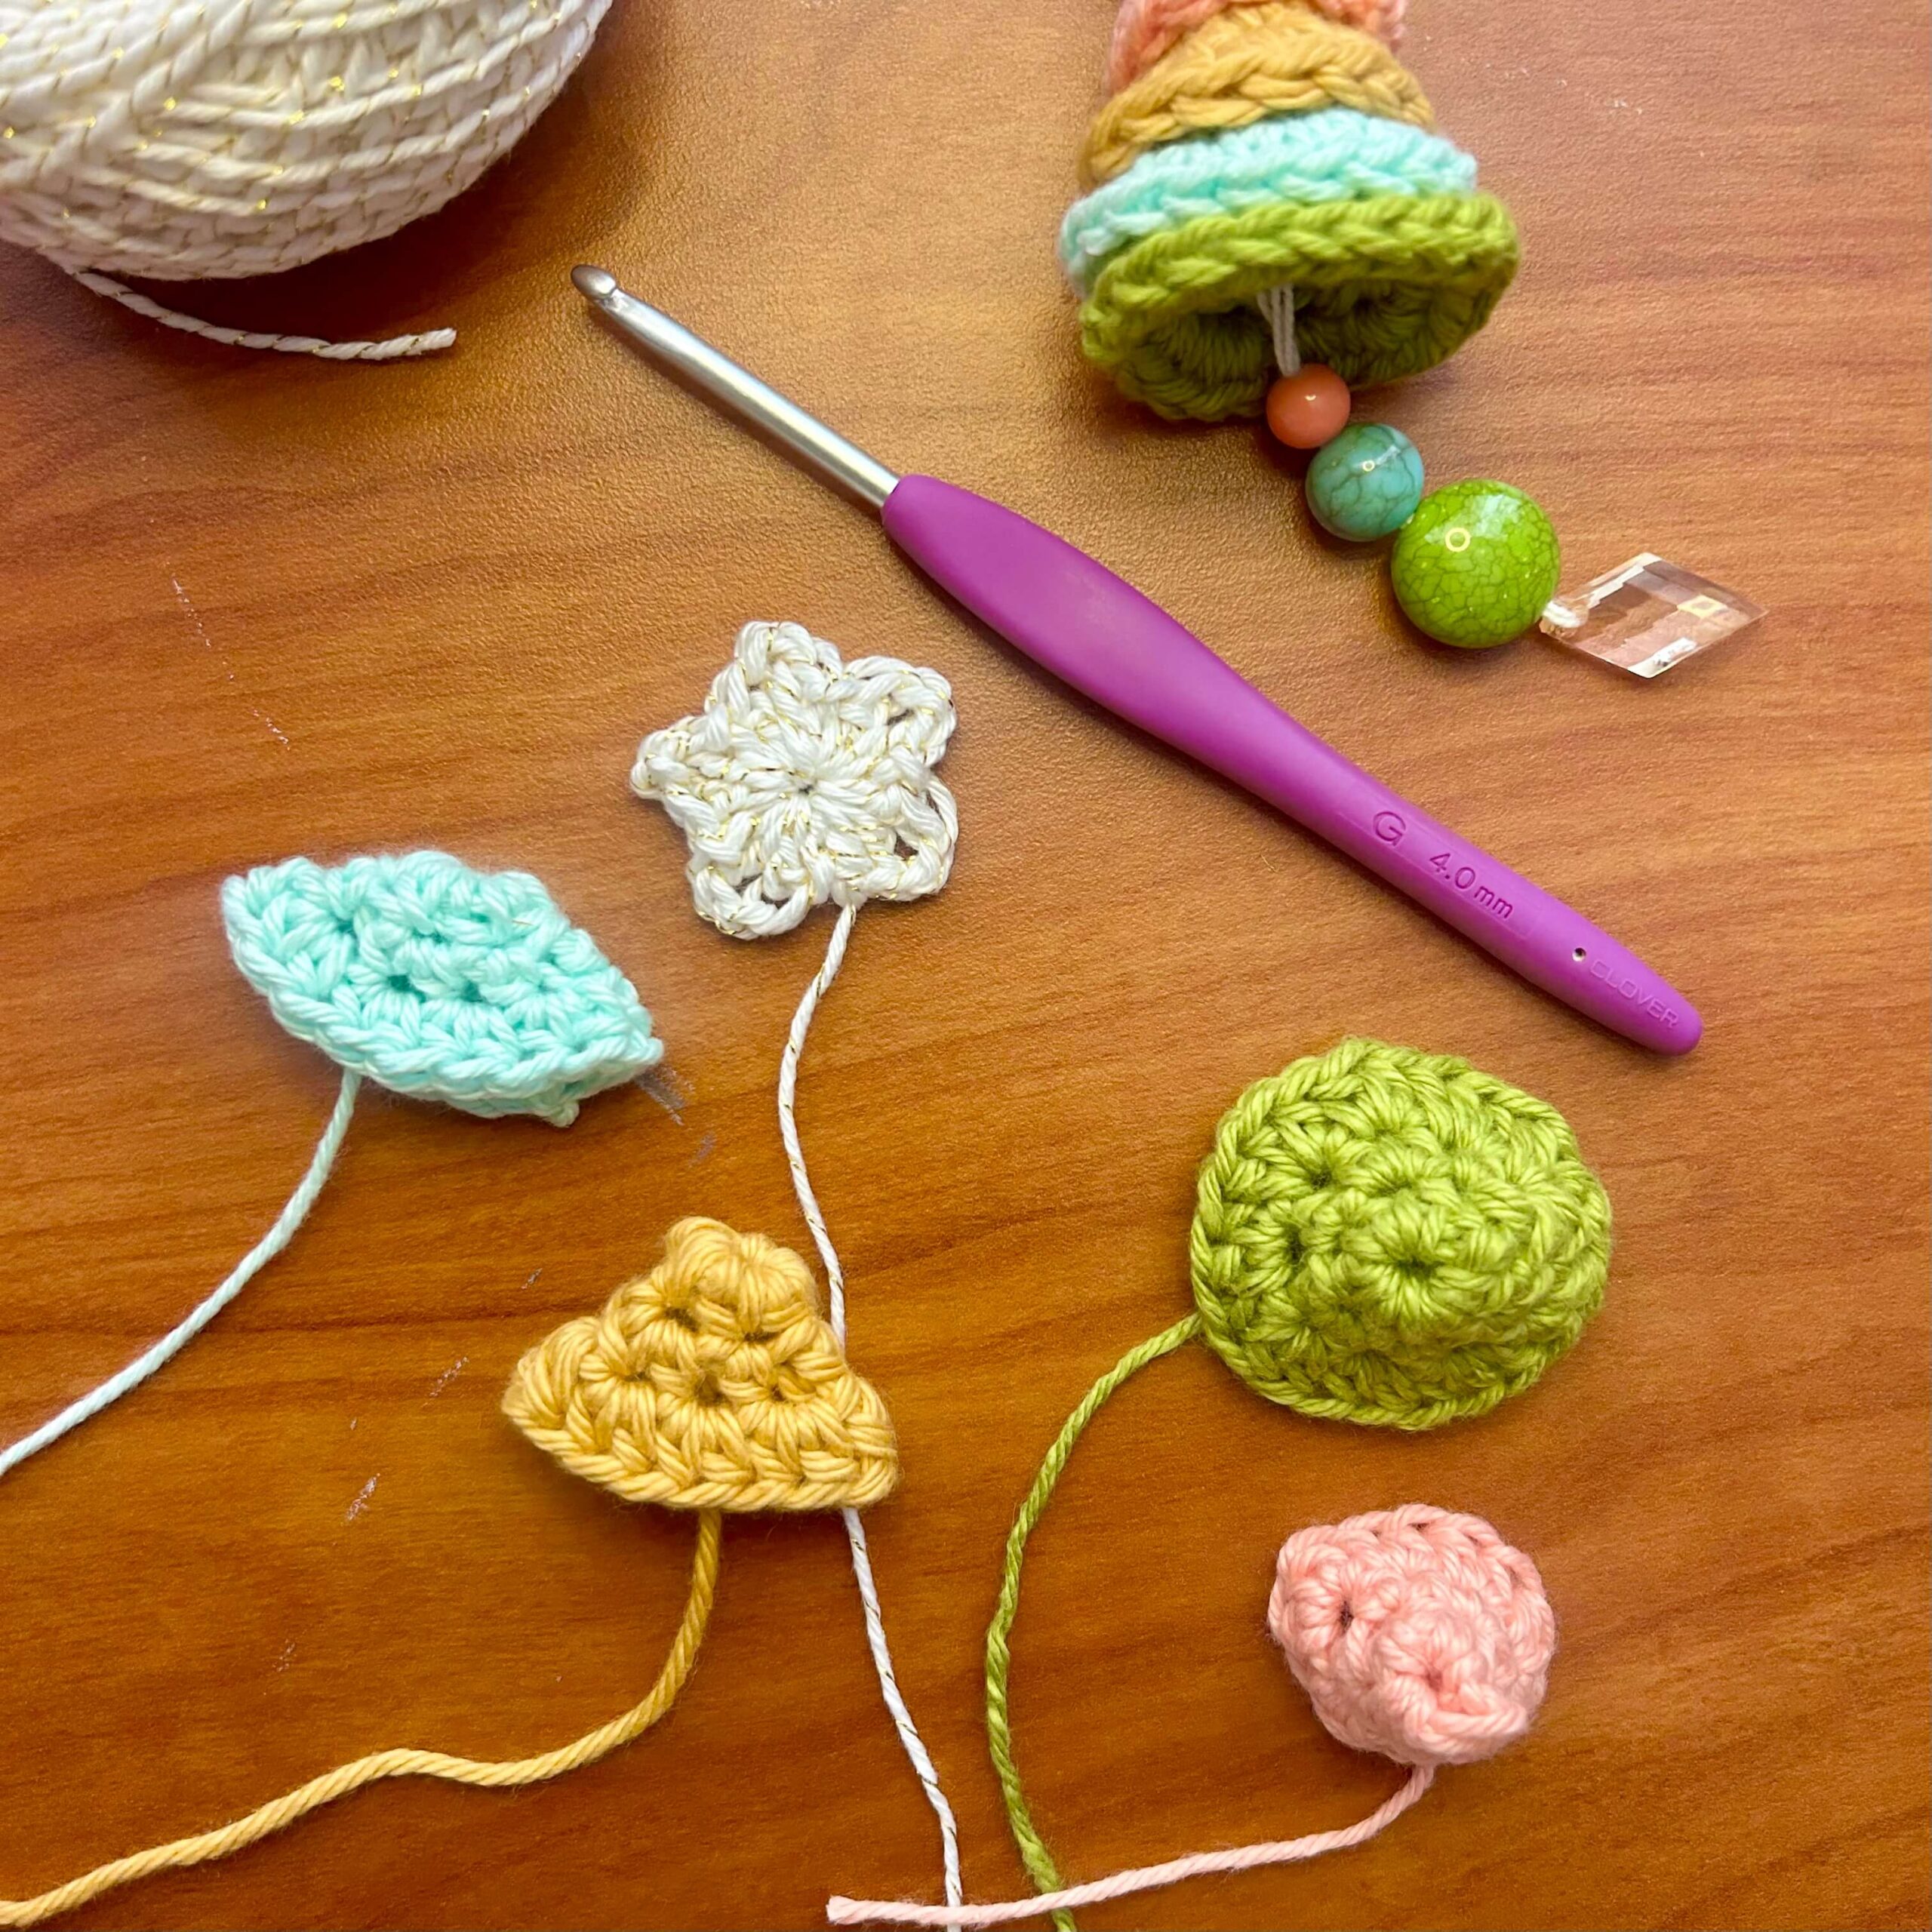
STAR PATTERN:
With white:
- Make a magic circle.
- Round 1: *1 sc, 1 dc, ch 2, 1 dc* in magic circle, repeat 4 more times, ending with one sc, pull tightly closed, join with a sl st in the beginning sc. Finish off.
ASSEMBLY:
Using the center yarn of each cone, use your yarn needle to sew each cone to the one underneath it by passing the yarn through the top of each cone and tying a knot. Repeat the process until all cones are nestled together. Then sew your star onto the top.
BEAD TUTORIAL:
Make your thread and your yarn needle, insert your thread through the top of your tree and down through the center, leaving a long tail out of the top. Then remove your yarn needle and place the long tail of thread at the top onto your needle. Weave once through the bottom of your star, then down through the tree center. Remove your yarn needle and place your two strands of thread on your beading tool and insert your beads onto your thread. Secure in place.
![]()
If you’ve made it this far, that means you’ve officially completed your newest Halloween project! It’s such a good way to mix in the spooky + cute aesthetics 
If you want to keep up with me, Julie, on social media for other fun projects, follow me on: Instagram
If you want to keep up with all things Clover, follow us on: Facebook | Twitter | Instagram | Pinterest | YouTube | Ravelry